Participant
October 11, 2017
Question

Why wont my offset tool work correctly?

  • October 11, 2017
  • 2 replies
  • 6002 views

Hello!

I am a print designer who has used the offset tool hundreds of times to create repeating prints. However i am struggling and getting frustrated with my offset tool as it isn't matching the design up correctly?

I have looked at the forums to find answers and have tried cropping my motif with the 'delete cropped pixels' selected but it still doesn't work..

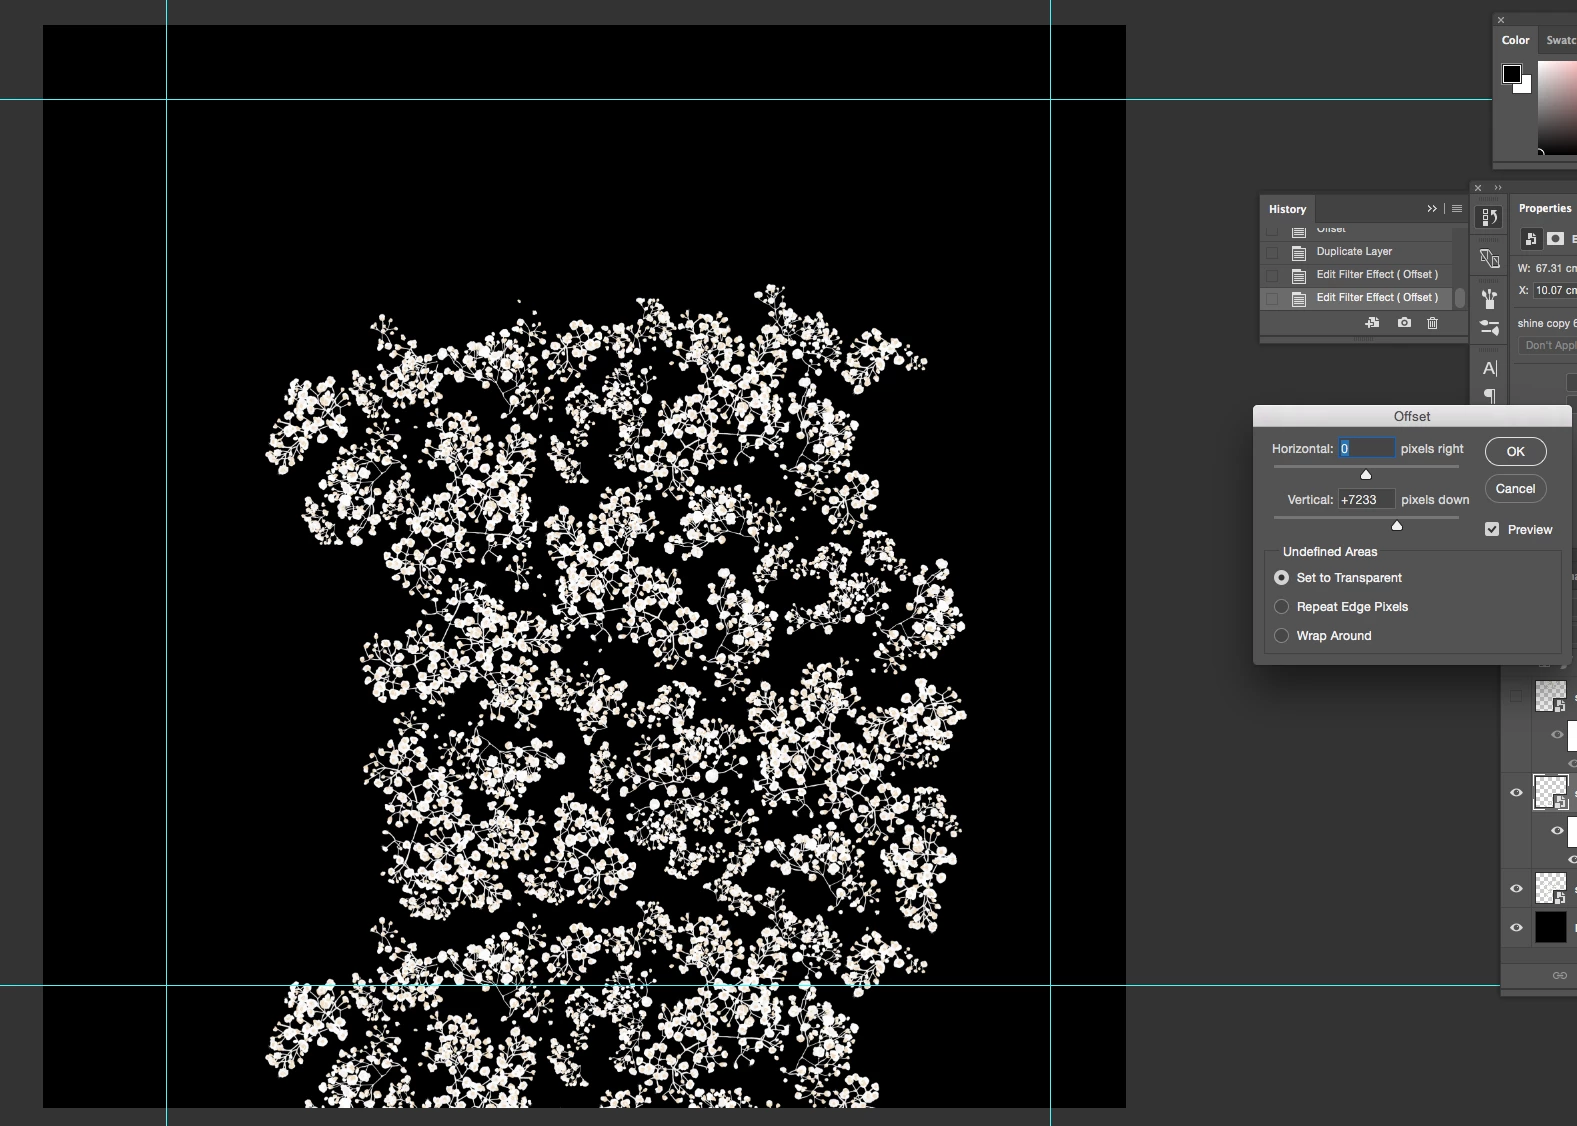
1.The motif itself is a smart object as i need to move some of the pieces after wrapping the design.

2.then i copy this smart object and move it vertically +7233

3. I then copy this object and move it vertically the same amount but minus -7233

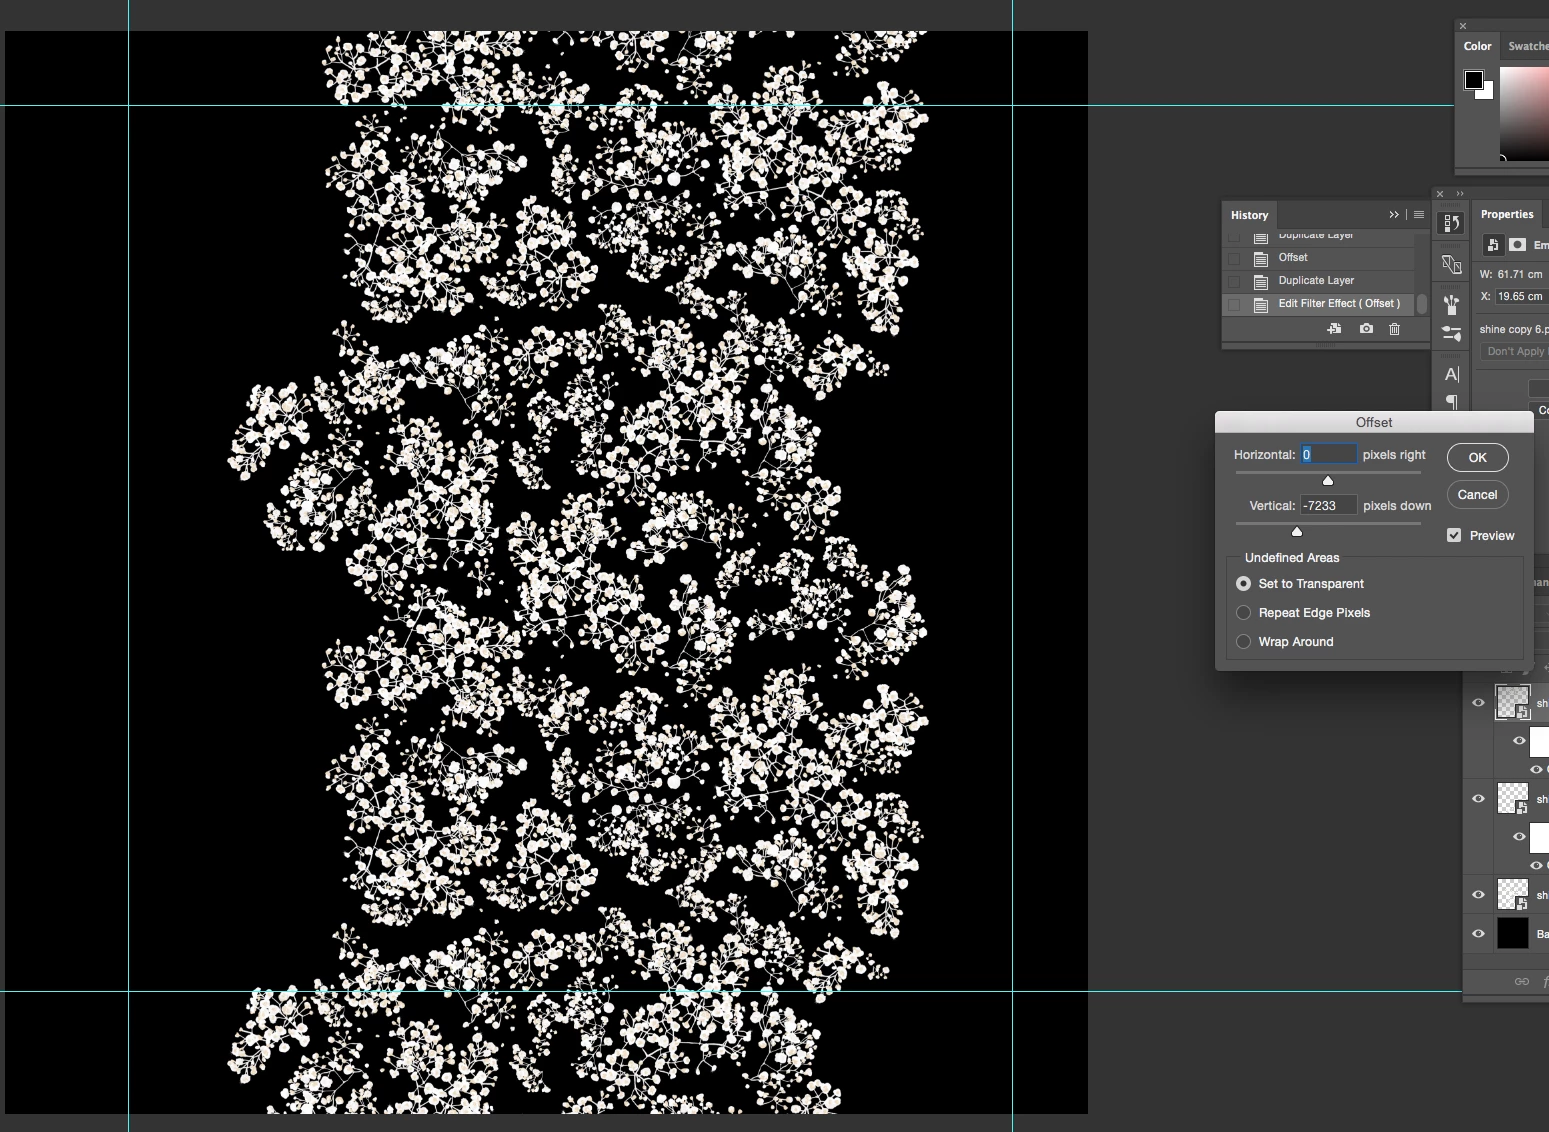
4. As an example I have made this vertical repeat into a 'define pattern' to show the discrepancy - see below.

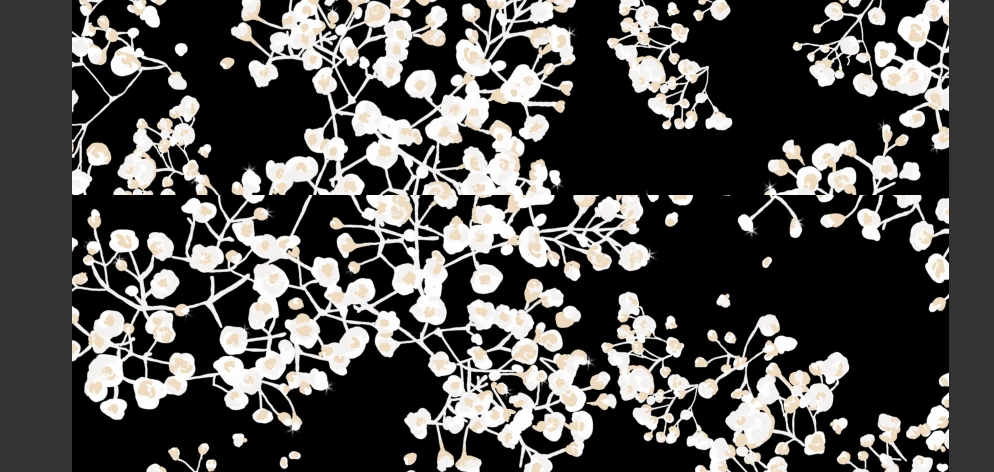
PLEASE HELP! I have also tried creating a new file & Select All / Reveal all and then deleting any pixels that may be hidden but this hasn't worked....

I am so stuck ...

This topic has been closed for replies.

2 replies

mglush
Community Expert
Community Expert
October 12, 2017

Hi! I am not understanding what is not working in the first images. Sorry to ask this, but please tell us what you are expecting to happen that isn't happening? Because in the first three images, it looks like it's working.

Can you show a sample of your beginning image? It might be a little easier to help you figure out what's going on if we had the original to work with.

Thanks!

Michelle

Participant
October 12, 2017

Hello Michelle,

Thanks for taking a look ..

it does wrap around but not correctly.. the lines don't meet back up..

Here is my motif

And here is where the lines don't meet up once it has been wrapped using 'offset' and then made into a 'define pattern':

mglush
Community Expert
Community Expert
October 12, 2017

Thanks for posting these!

In working with patterns, I've learned that whatever you do on the left has to mimic what's on the right side--and the same with the top and bottom.

Here I put your image together just as you did, but I added left and right. I also used guidelines to match up edges so they are all on the same horizontal line.

Thank I cropped it so that there is no large areas of black on either sides or top and bottom

In the top image, you can see that I placed a red dot on the center horizontal line on the left and right side--just to see where the image would come together in the center.

Then I used the offset tool. And in the image below, you can see the dot has come together and with the offset values--moved the edges (and the red dot) to the center.

The key is creating an image that has the same shape and space on the left as on the right so that it tucks in perfectly. If you are going for a pattern that is not so small, then you need to follow the same guidelines when you put the little clusters together. Another way of putting it, is that when adding a second copy of the image--the left side of the image has to fit perfectly sitting next to the right side of the original to give you the seamless look you are going for. Same with top and bottom. Then the key is cropping out the outside of the image to get rid of any negative space.

I hope that helps! Let me know if that makes sense or not!

Michelle

John T Smith
Community Expert
Community Expert
October 11, 2017

In what program?

You posted in the generic Creative Suites forum (which is for CS6 and earlier) not a specific program forum

Post the name of the program you are using and a Moderator will be able to move your message

Participant
October 11, 2017

Thank John! will do

Participant
October 11, 2017

It is in Photoshop CC 2017