Window Reflection Removal

Copy link to clipboard
Copied
Hello Everyone,
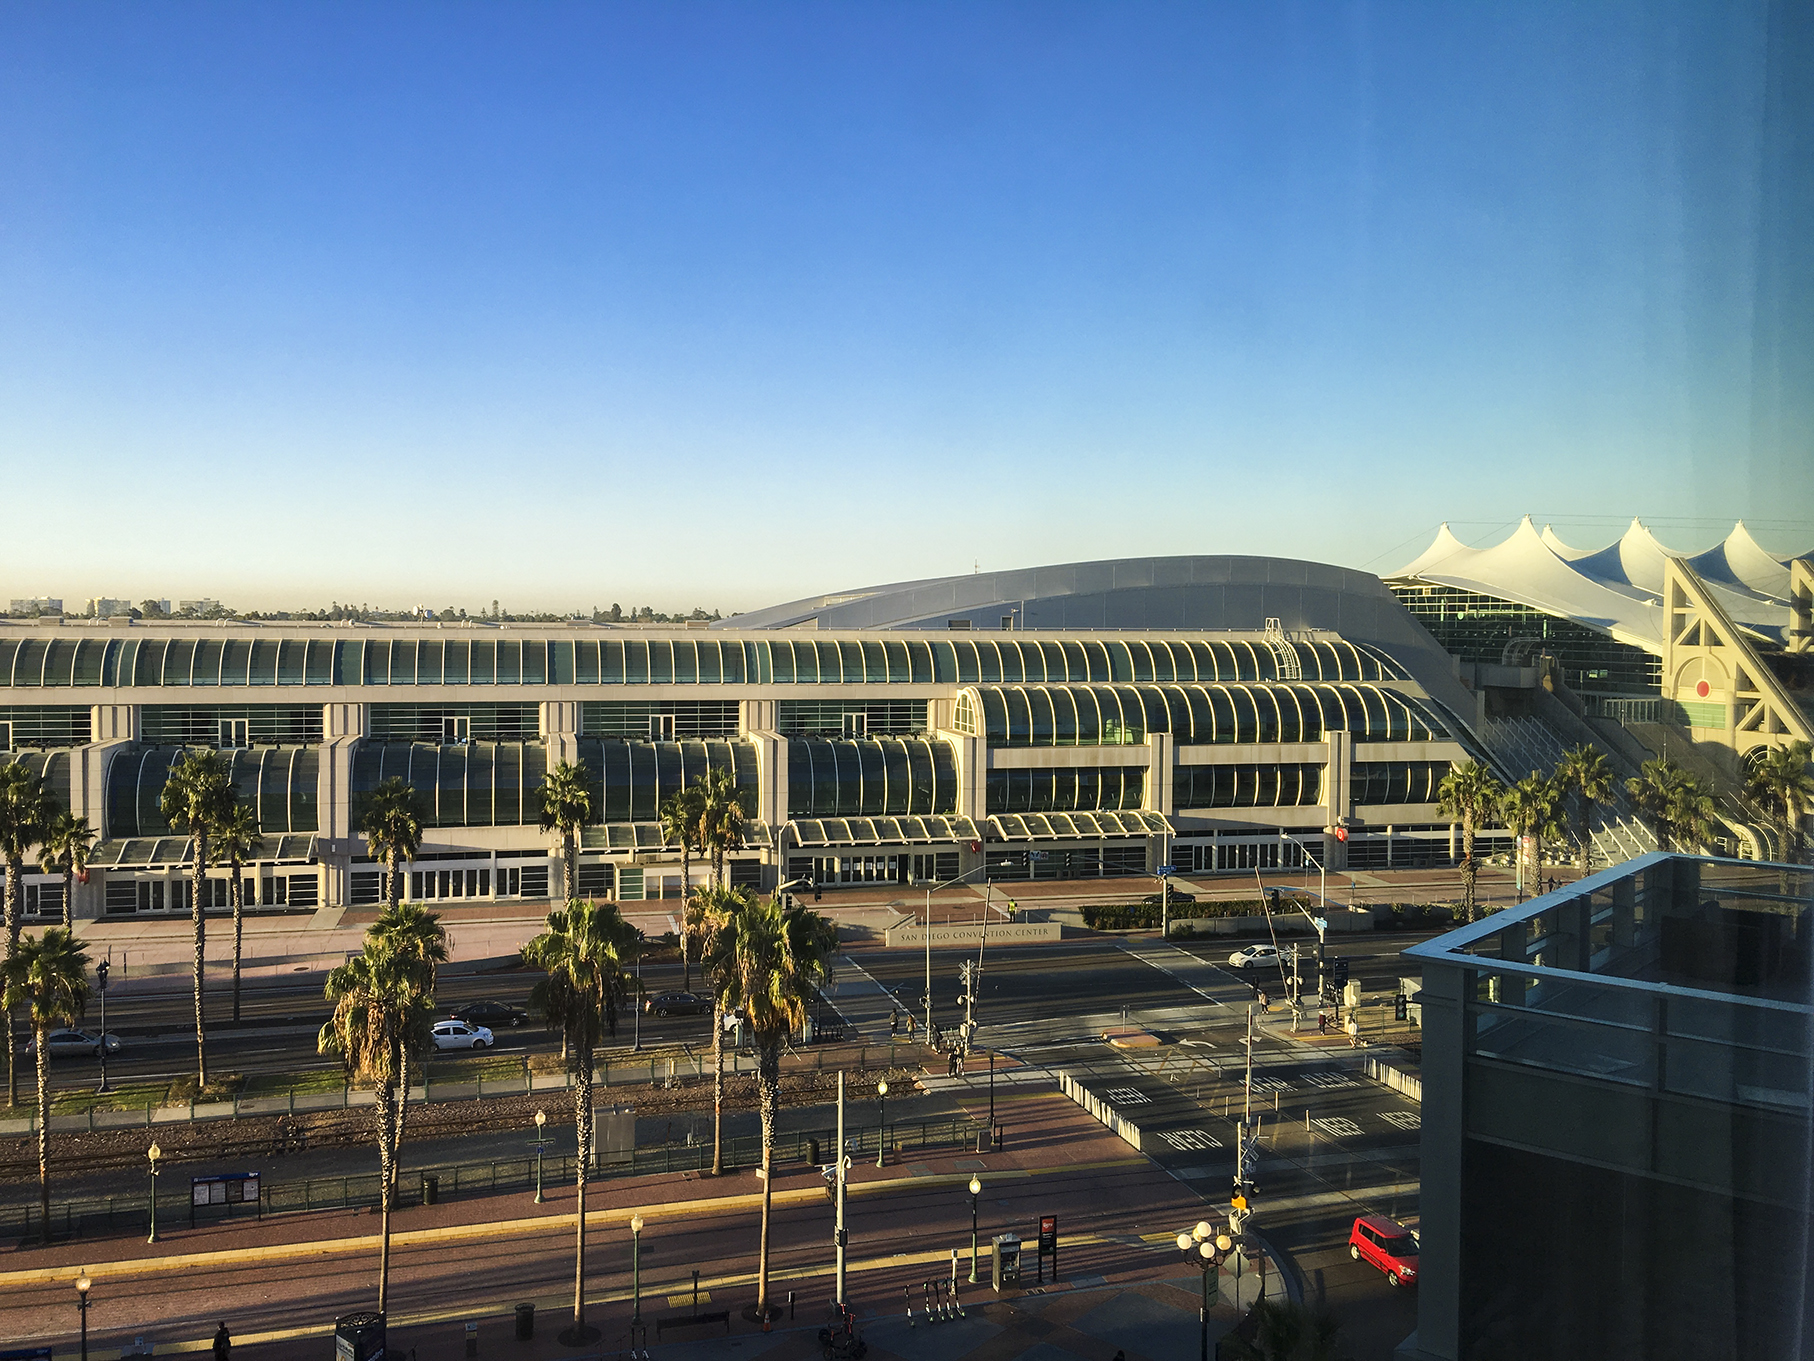
I took this picture through a windows and as you can see I've got a lot of reflection on the right hand side of the image. What is the best way to remove this reflection using Photoshop CC?

Thank you.
Explore related tutorials & articles
Copy link to clipboard
Copied
Could be as simple as duplicating the layer, darkening it and experimenting with blending modes and of course feathering only the right side of this darkened layer in via a layer mask. Otherwise you might want to look up techniques on how to split up the channels and even out the luma using blurs and then reassembling the channels, which it mostly comes down to.
Mylenium

Copy link to clipboard
Copied
I am not familiar with that process. By any chance do you have a link to a tutorial that goes over that technique?
Copy link to clipboard
Copied
I think rather than try and fix the sky, I'd replace it.
Select the foreground, and copy to a new layer.
Make a new layer between the background, and copied foreground ready for the new sky

You need to make a gradient that roughly matches the existing sky, so select the top and bottom of the sky to foreground and background colours

Select the gradient tool, and double click the gradient in the Options bar to open the gradient editor
The default will be a gradual transition from foreground to background colours

Click on the adjuster (green square) which will create a central handle (cyan circle) and drag that to the right to duplicate the current sky. You can save that if you like, by clicking on New

Run the gradient down the sky layer

If you want to get the details right, draw the cables with a 1 pixel fully hard black brush, and reduce layer opacity untill it looks about right.


Copy link to clipboard
Copied
Thank you for the tip on the sky. Much appreciated! But my biggest issue with that photograph is the balcony reflections.
Copy link to clipboard
Copied
There's precious little information there to work with. Being so under-exposed, it has a strong blue shift, and pushing the exposure is going to result in a lot of noise. It is what it is though. Camera RAW is the best tool to do the bulk of it. Do this to copy of the background layer, or tom the RAW file if available. Then it's a case of rebuilding

Then you have to decide how far to go with rebuilding it. Textures can be as simple as Filter > Noise > Add noise, or Camera RAW > fx > grain works well. I've done a couple of panels below, and the glass window to which I have added a fake reflection.

Get ready! An upgraded Adobe Community experience is coming in January.
Learn more
