- Home
- InDesign
- Discussions
- Coil Book Binding – How to Retain Margins when Exp...
- Coil Book Binding – How to Retain Margins when Exp...
Coil Book Binding – How to Retain Margins when Exporting Pages with 4 sided Bleed
Copy link to clipboard
Copied
Problem: I'm working on a coil bound book, which has wider interior margins to accommodate the coil. I have full bleed images on many pages so I need to retain bleeds around all four sides of the pages. However, when I export to pages, bleeds overlap onto facing pages. This might not be a problem if perfect binding or saddle-stitching because the overlap of interior bleeds will be resolved during the imposition process. However, it's a problem in coil binding. I can't deselect the "Facing Pages" option in the Page Setup because that will make the margins the same for all pages. How can I give my printer full bleed pages that don't overlap and retain my wide interior margins?
Solution: First I copied my A-Master, B-Master, and C-Master. I labelled the copies A2-Master, B2-Master, C2-Master and inverted their inside and outside margins (remember to select "Enable Layout Adjustment"). Then, my book pages still in the "Facing Pages" layout, I scrolled down the left side and applied the corresponding 2nd master to each page. Once I finished applying the inverted margin layout to all of the even pages (A2-Master instead of A-Master, and so on), I deselected "Facing Pages" in the Page Setup dialogue box, inspected and fixed all individual pages for errors introduced by the changes, and then exported the PDF as pages.
Does anyone have a more elegant method?
Copy link to clipboard
Copied
Did you try turning off Allow Pages to Shuffle in the panel menu button of the Pages panel? Then you drag the right hand pages to the right to give full room for interior bleed.
and this script:
Separate Pages Script | in-tools.com
and this:
https://indesignsecrets.com/breaking-pages-apart-to-bleed-off-a-spine.php
Copy link to clipboard
Copied
I think I may have refined the process a bit for you. Please let us know how this may work for you ...
Starting from a new document (though this will work with an existing one too):
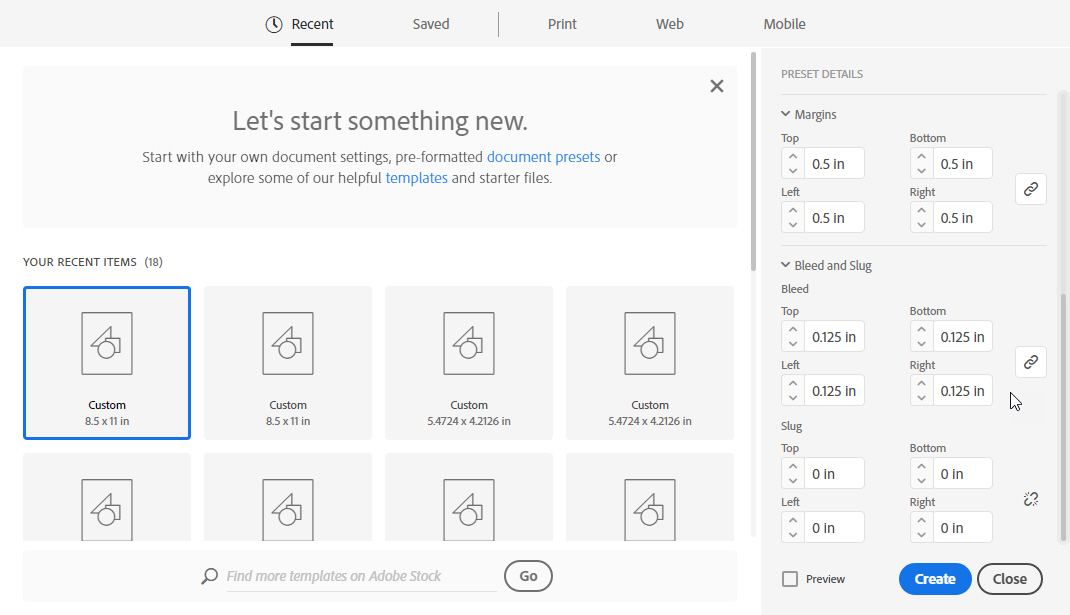
1) Create the new document with equal margins. My example below is letter sized, four pages, with a half-inch margin all around. Turn off the Facing Pages check box.Open the Bleed and Slug section at the right and enter your bleed space. I used an eighth-inch bleed.

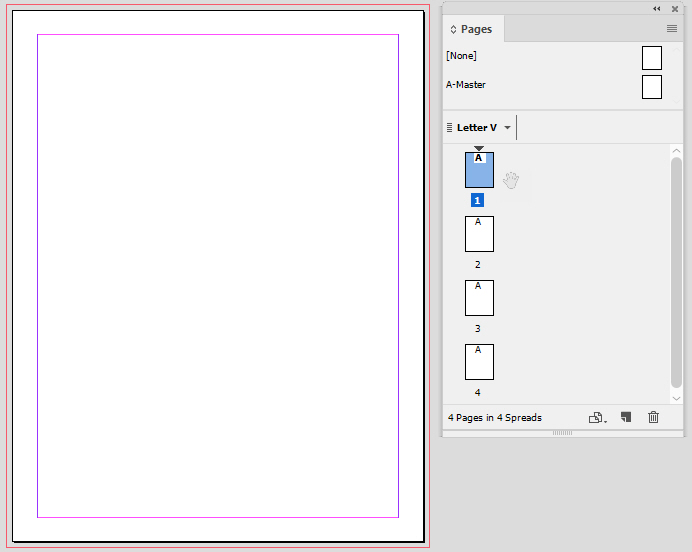
2) This opens our four-page document with it's default A-Master master page layout, as illustrated below:

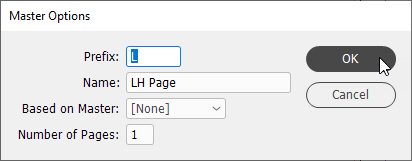
3) Let's start changing the rules here, by first editing our A-Master setup to reflect the layout for our left-hand pages. Click on the flyaway menu, the three lines in the upper-right of the Pages panel, and select the Master Options for "A - Master" ... menu command.

It's a bit redundant, but we can both rename the Prefix: letter and the Name: of the masters in the edit boxes. So why not; let's make the letter L and the name LH Page. Click the OK button. Then we change the "inside margin for the left hand pages, which would be the Right: one, to show 0.75 in. Go to the Layout>Margins and Columns... menu command and change the margin as shown below:

4) Go back to the Pages panel flyaway menu and Select the New Master... menu command.

We'll fill in this new master page with an R Prefix: and RH Page Name: edit boxes. If we had an elaborate layout we could base it on our existing LH Page master, but since this is a simple example we'll choose the Based on Master: option of [None]. Now we'll change the "inside margin for the right hand pages, which would be the Right: one, back to 0.5 in and the Left: one to 0.75 in. Go to the Layout>Margins and Columns... menu command and apply the appropriate margins. Massage the master page content if/as necessary.
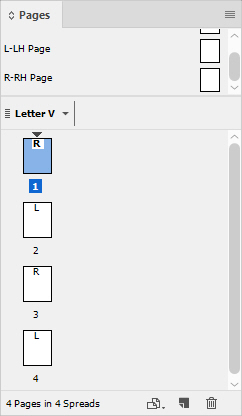
5) Apply the appropriate master pages to your document, then fill in the document pages, as shown below, and you'll be in business.

Never print as spreads, or InDesign will artificially re-introduce your crossover bleed problems. Hopefully this will work pretty slick for you.
And I hope this helps,
Randy
Find more inspiration, events, and resources on the new Adobe Community
Explore Now