Exit
  • Global community
    • Language:
      • Deutsch
      • English
      • Español
      • Français
      • Português
  • 日本語コミュニティ
  • 한국 커뮤니티
21

How Can I Set Zoom/Layout to "Actual Size"?

Explorer ,
May 05, 2024 May 05, 2024

Unfortunately, I have encountered quite a few issues with Acrobat Pro. While their phone support was way more knowledgeable with other questions I had, they don't work on the weekend, and their chat support has never been able to help much with other issues.


Anyway, I have about 70 slides. About half of them are about 4288x2446 because I grabbed them off my parents mac. Everything was actually going fine, it was recognizing the text and I could edit what I needed. Then, any other image I started pasting and if I would go to "Edit", it would just highlight the whole image, even though even the blue banner at the top with headings was exactly the same as other issues. I thought it was because I was taking screenshots on my monitor, but that wasn't the case because I went to my parents MAC, took more screenshots, and it would do the same thing. That being said, half of my slide I have the width of every image at 1920 and the height is either 1080 or slightly higher if the image neeeded to be.


Phone support told me to export the page with the issue, separately scan, and bring it back. While that wasted time, and I thought it helped, in the end it didn't. I didn't notice at the time, but it added weird letters and removed letters from my images, and reduced the quality, despite it being set to the highest.


Due to this and other issues, I hired someone on UpWork who helped so much in giving me a bunch of tips, and I think I might share them, and some I figured out along the way. This guy knows his way around the program so much.


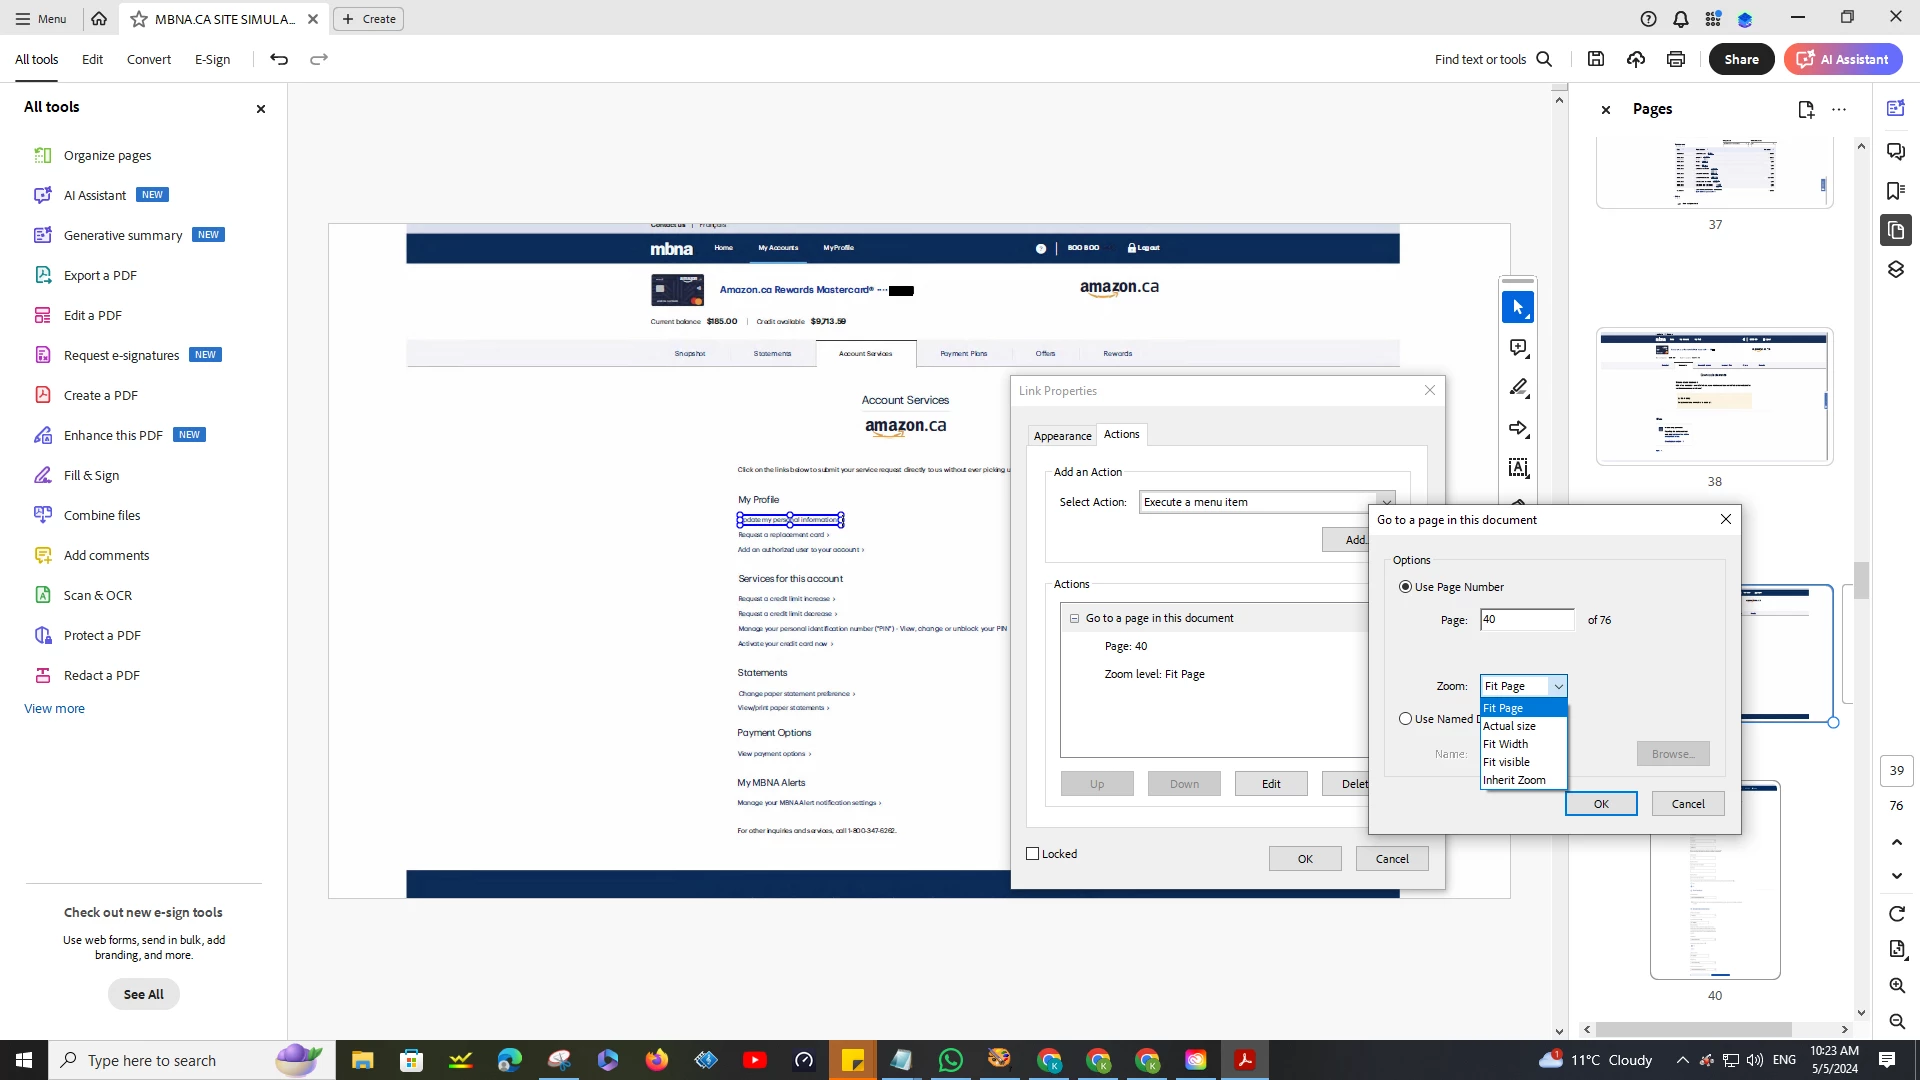
The issue I would be scrolling from page to page, and it would keep changing the zoom layout, no matter what I did. I could set it to view the actual size, and as soon as I'd click on any image to do anything with it, and I'd go back to one where I had to scroll quite a bit before it would go to the next slide, it would go back to doing the same thing. I noticed when creating a link you can change the layout to "Actual Size", but that doesn't do anything - any other link you create on the same page goes back to "Zoom: Custom", and I don't see what clicking a link on a page has anything to do with a particular zoom level. He looked at it, and agreed it seems like a glitch. Yes, I went to "Preferences -> Page Layout", and I changed it there, but it did diddly doo daaa.


It's another big time waster, but now I'm trying to figure out how to make sure the audience viewing this file that it shows as "Actual Size", but the only option I see it "Fit Page". I just want to avoid squishing ... since the actual images don't look squished, I'd think I'd be fine, no?


What is the point of when you highlighting a link choosing the "Zoom" and changing it to "Actual"?


Kevin37048549bxmb_0-1714919156818.png


TOPICS
Crash or freeze , Create PDFs , Edit and convert PDFs , General troubleshooting , How to , JavaScript , Modern Acrobat , PDF , PDF forms , Scan documents and OCR , Security digital signatures and esignatures , Standards and accessibility
834
Translate
Report
Community guidelines
Be kind and respectful, give credit to the original source of content, and search for duplicates before posting. Learn more
community guidelines
Community Expert ,
May 05, 2024 May 05, 2024

Hi, @Kevin37048549bxmb. As I read through your comments, I'm not fully sure I understand what your final goal is. You mention "slides" from your parents' Mac. Are they from a PowerPoint presentation? Also, I'm not sure I understand what the "Blue Banner" is. What application is displaying this Blue Banner?


Also, I'm not sure I understand what you think "actual size" is. Can you please explain to me what you consider the actual size is? If you are working off screenshots, the "Actual Size" is whatever size the subject was when you zoomed in or out at the time of the screenshot creation. If you want a uniform size for your fonts in a final product, and your screenshots are of different sizes, you need to export the content into a Word or Text format, unify the text both in size and font, and then re-create the final product, from this corrected font. 


Oh, I will give you one hint on size/style/font issues when copying and pasting fonts from one source to another: Rather than pressing Command/Control-v to paste the content, press Command/Control-Shift-v. This will place the content in the receiving document's size/style/font. (However, this will not take the font's style when pasting. So, if you are pasting text into a section that should be bold, it will not be bold, but Roman. You'll have to change that yourself.

Translate
Report
Community guidelines
Be kind and respectful, give credit to the original source of content, and search for duplicates before posting. Learn more
community guidelines
Explorer ,
May 05, 2024 May 05, 2024

Hi, thank you for commenting so quickly, I will provide you with a bit more information. I know I delved into a few things.

My main issue is making sure that those that are viewing the final product (most have a laptop that's 1920x1080 but some may hookup to an external monitor, but I'm not too worried about that. They can easily zoom if they need to.


I consider and was told actual size is best to avoid the chances of anything appearing squished, as long as it wasn't squished when I took the screen shot. When I was done 50% of the project, I opened it in Adobe Reader PDF (2023), and most pages the zoom/layout would be changing automatically from slide to slide. However, it looks like that it no longer does that, and I'm not sure why lol. I opened the first version of the PDF and every page now shows the same zoom level which is what I want, and if someone wants to change it themselves they can. I don't remember changing a setting on my work monitor, the same type of monitors others would be using.


I guess there's 2 things that are very bothersome that I was trying to explain:

1 - I have about 30 slides that I took using my parents MAC computer at that ~4000 resolution number I mentioned. I would add the image, click "edit", and if you look at the attachment with the blue bar at the top, it recognized separately all of those headings, and the body text, etc. It didn't make sense in that the first set of images Adobe detected perfectly, and then the reamining which have the EXACT same blue bar at the top, and just different body of text, and when I would go to "Edit", it would show a box around the ENTIRE image. It wouldn't recognize a single thing. Phone support said go to "Extract Page" with the issue, scan it there separately, go to Scan OCR, and choose "Output: Editable Text and Images" instead of "Searchable Image". Adobe then shows boxes around all of the text in the image like the first set of images, so I thought I was good. However, as soon as I would click in the text box, it would come up and say "Duplicating Fonts" before I could edit anything, and now the page would start removing random letters, adding random letters, and reducing the quality. 


The UpWork guy taught me how in Chrome, I could simply edit the text there first, and then take a screen grab. So, this helped solve the issue. The text edit feature is obviously faster, and it's quicker to create links when it auto recognizes the text. 


2 - When going from page to page, some of the time it will stop on the page and you can see in the preview page pane that there is like a bubble around part of the image as you are scrolling. If you expand that to cover the entire image (see screenshot), then when you get to that page again, when you scroll down once, you get the next page, and you don't have to scroll till you get to the bottom of the page and you don't have to keep pressing CTRL-0 as much to see the page better. Sure, you can select "Zoom to Page Level", and it will be fine for the moment. However, as soon as you select ANY OTHER image to do anything, as soon as you scroll down to the page you had just fixed, the scrolling thing happens again.


See TEST1 and TEST2 attachments... you will see the bubble I am talking about, when it is like that (Test1), the scrolling thing happens - if you manually expand the bubble, you get TEST2, so you get to the page, and one scroll down and you're onto the next page - but as I said, as soon as you go to ANY OTHER slide and do anything there and come back, it resets things.


Sorry for yelling to emphasize!

Translate
Report
Community guidelines
Be kind and respectful, give credit to the original source of content, and search for duplicates before posting. Learn more
community guidelines
Explorer ,
May 05, 2024 May 05, 2024
LATEST

I just wanted to add that it was around the same time (but can't remember exactly) that I started doing the screen shots on my desktop computer instead of my parents, and I thought it was around that time where Adobe seemed to no longer recognize any of the text at all. So, I went back on my parents MAC, and took the same screen shots, and inserted them, and it made no difference.


I also tried doing Print Screen (instead of Snippit) and tried using Adobe Photoshop instead of Paint Shop Pro 7 - I know PSP 7 is old but I like it because of how fast it is lol, but it didn't make a difference anyway.


On Chat, the guy agreed that a lot of the content was the same, and so it didn't really make sense, but sent me some standard copy/paste 'solution' that was unfortunately of 0 help. So, I resorted by going to "Inspect Element", and updating the text there myself. Sometimes though, I forget to do that, and I realize that after adding links and then I've wasted time. 😞

Translate
Report
Community guidelines
Be kind and respectful, give credit to the original source of content, and search for duplicates before posting. Learn more
community guidelines