Password protect the document in Adobe Sign
Options to password protect a document in Adobe Sign
Do you get confused with the options to password protect the document in Adobe Sign? Yes?
Let us help you to differentiate between these options so that you can select the required one next time.
First, start with the Password Protect option that is visible to each sender on the right-hand side of the window on the Send page.
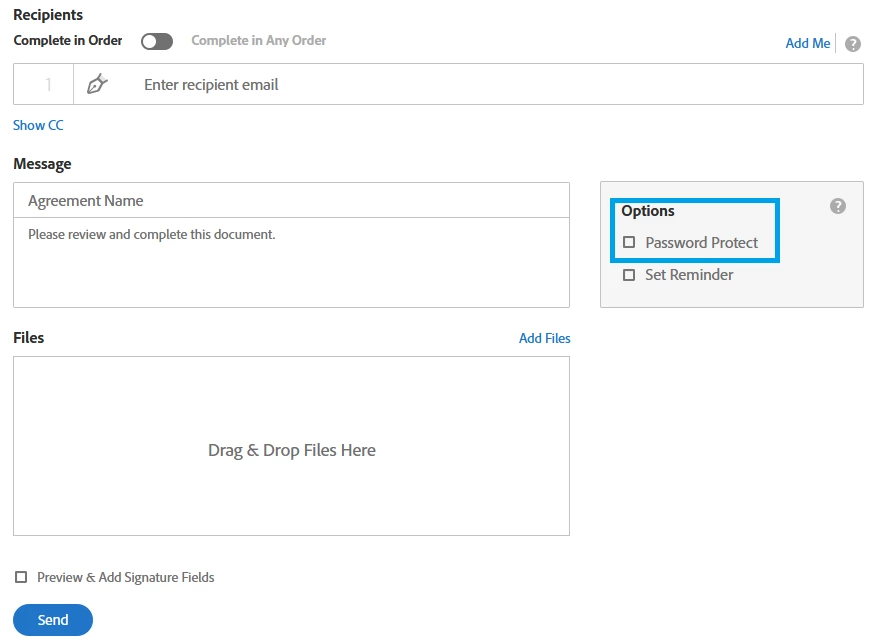
This option helps you to set a specific password that is applied to the signed PDF document. That means the document will be password protected after it is signed and submitted by all the recipients/signers. So, the password setup for the document applies after the transaction is complete. Anyone (including the sender and signers) who will try to open the completed document will need to enter the password.
Steps to setup the password for the signed file:
- On the Send page, check the box for Password
- Type in the password
- Confirm the password (you can also check the box for show password to expose the content of the password field. It will ensure that the two are correct, and what you intend.)
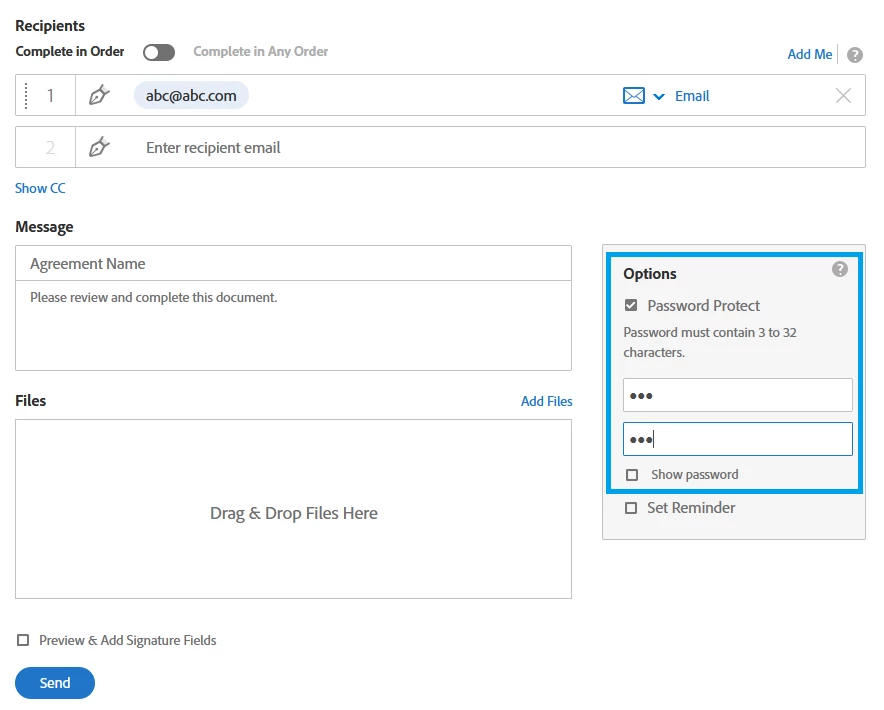
Few things to remember:
- The password must contain 3 to 32 characters.
- Passwords can only contain letters and numbers; no special characters are allowed. For example:
` ~ ! @ # $ % ^ & * ( ) _ + - = [ ] \ ; ' , . / { } | : " < >?
- It is important to remember the Signed PDF password you set is embedded into the PDF and is not possible to recover or reset.
- If the Signed PDF password is lost or forgotten, there is no way to open the PDF.
Another option to set up the password for the document is provided to authenticate the signer. You can find this option on the right-hand side of the recipient email address fields.
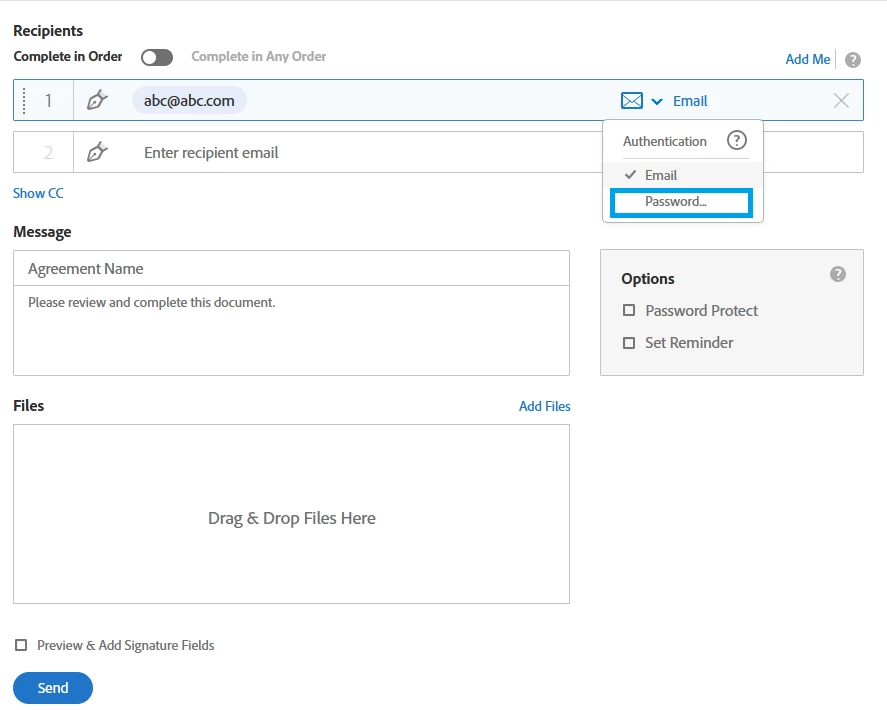
This option is used to authenticate the individual signers. You can set up the password for each signer separately using this option. The signers will get a prompt for a password when they open the document sent to them for signature. They will be able to open the document only if you have shared the password with the signer.
Steps to setup the password to authenticate the signer:
- On the Send page, add email in the recipient field
- Click on the drop-down arrow provided at the right-hand side of the recipient field
- Select Password from the list
- Type in and confirm the password.
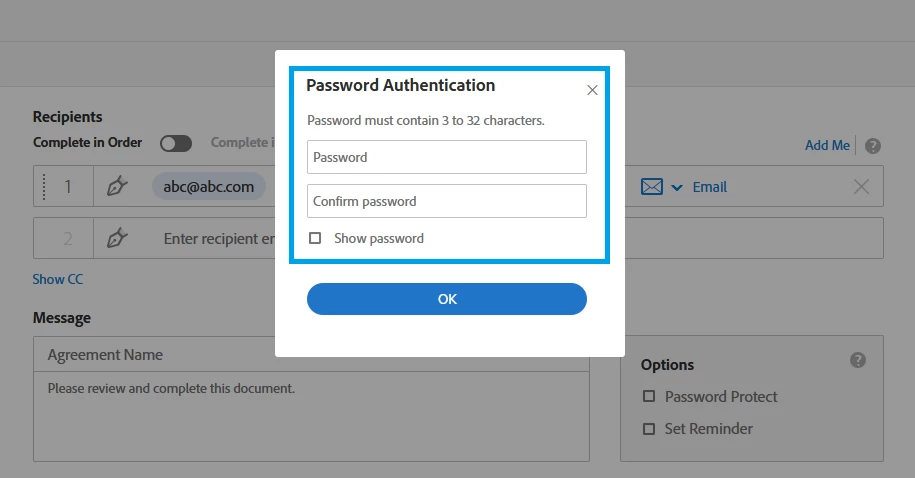
Few things to remember:
- Unique alphanumeric password set per recipient
- The password must contain 3 to 32 characters.
- Passwords are not exposed in the agreement records, nor are they recoverable after the agreement is sent
- Password will not be required to open the signed file
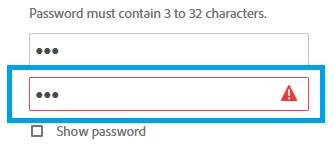
Note: If the two passwords do not match, an error icon appears in the second password field.
To know more about Adobe Sign features, you may visit here.
Hope you find this information helpful. If you have any questions in mind, join the conversation here. We are listening!
To discover a host of other great features – Go straight to: Share Adobe Sign templates with others in your group or organization | Types of Signature fields in Adobe Sign


