

- Home
- Adobe Media Encoder
- Discussions
- Re: Black bars when downconverting HD to SD
- Re: Black bars when downconverting HD to SD

Copy link to clipboard
Copied
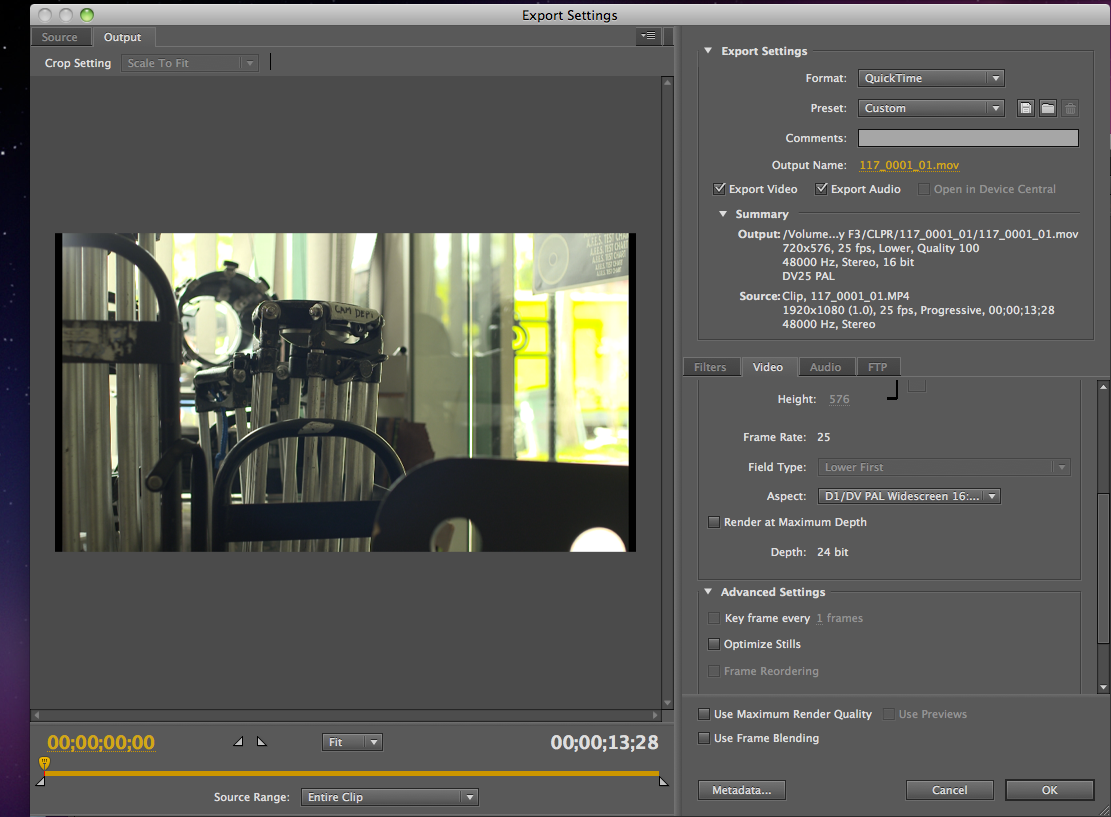
I am trying to use Media Encoder CS5.5 downconvert a HD clip (1920 x 1080) to DV PAL anamorphic (720 x 576) .
However there only seem to be 2 choice for me in the export menu in terms of pixel aspect ratio.
By selecting D1/DV PAL, the exported clip is a 4:3 letterboxed video - which is not what I want.
By selecting D1/DV PAL widescreen, the exported clip is an almost-correct anamorphic video.
I say 'almost-correct' because there are narrow black bars on the left and right side of the exported clip.
The image below shows the preview of the exported clip (with black bars at the side)
Does anyone know the reason for the black bars at the sides? And how can I get rid of them.
Thanks.


 1 Correct answer

On the Source tab, click the Crop button to enable cropping. Set the top and bottom values to 14 pixels. That will let the video properly fill the destination frame size.
Has to do with pixel aspect ratio and display aspect ratio differences between SD (widescreen) and HD.
 29
Replies
29
29
Replies
29

Copy link to clipboard
Copied
In theory, yes. In practice no, at least not in my application. Have you actually tried it? I have.
Copy link to clipboard
Copied
Hi,
Thanks for your tip! Was some time back, so not sure why I missed that setting.
Unfortunately, I no longer have access to Adobe Media Encoder , so can't test out the result. But good to know for the next time around!

Copy link to clipboard
Copied
I don't understand why the down conversion can't have the simple "Center Cut" "LetterBox" and "FHA" definitions.
I'm trying to do an export using Media Encoder and I really am not enjoying the interface of this. I want to create a simple down convert from HD to SD - FHA. What would be the best solution for this?

Copy link to clipboard
Copied
I recently struggled with the same issue, I shoot in HD and need to send my footage in Widescreen SD to a TV News organization. When I started I would edit and export on a macbook pro running FC7P and would export with these settings
Compression: H.264
Quality: High
Key frame rate: 24
Frame reordering: yes
Encoding mode: multi-pass
Dimensions: 720x576 (1024x576)
Below are pictures of the original footage shot at 1920x1080
The export from final cut which plays back at 1024x576
Then the three different adobe export source scaling options which play at 1050x576
I played the footage in Quicktime and took a screen shot
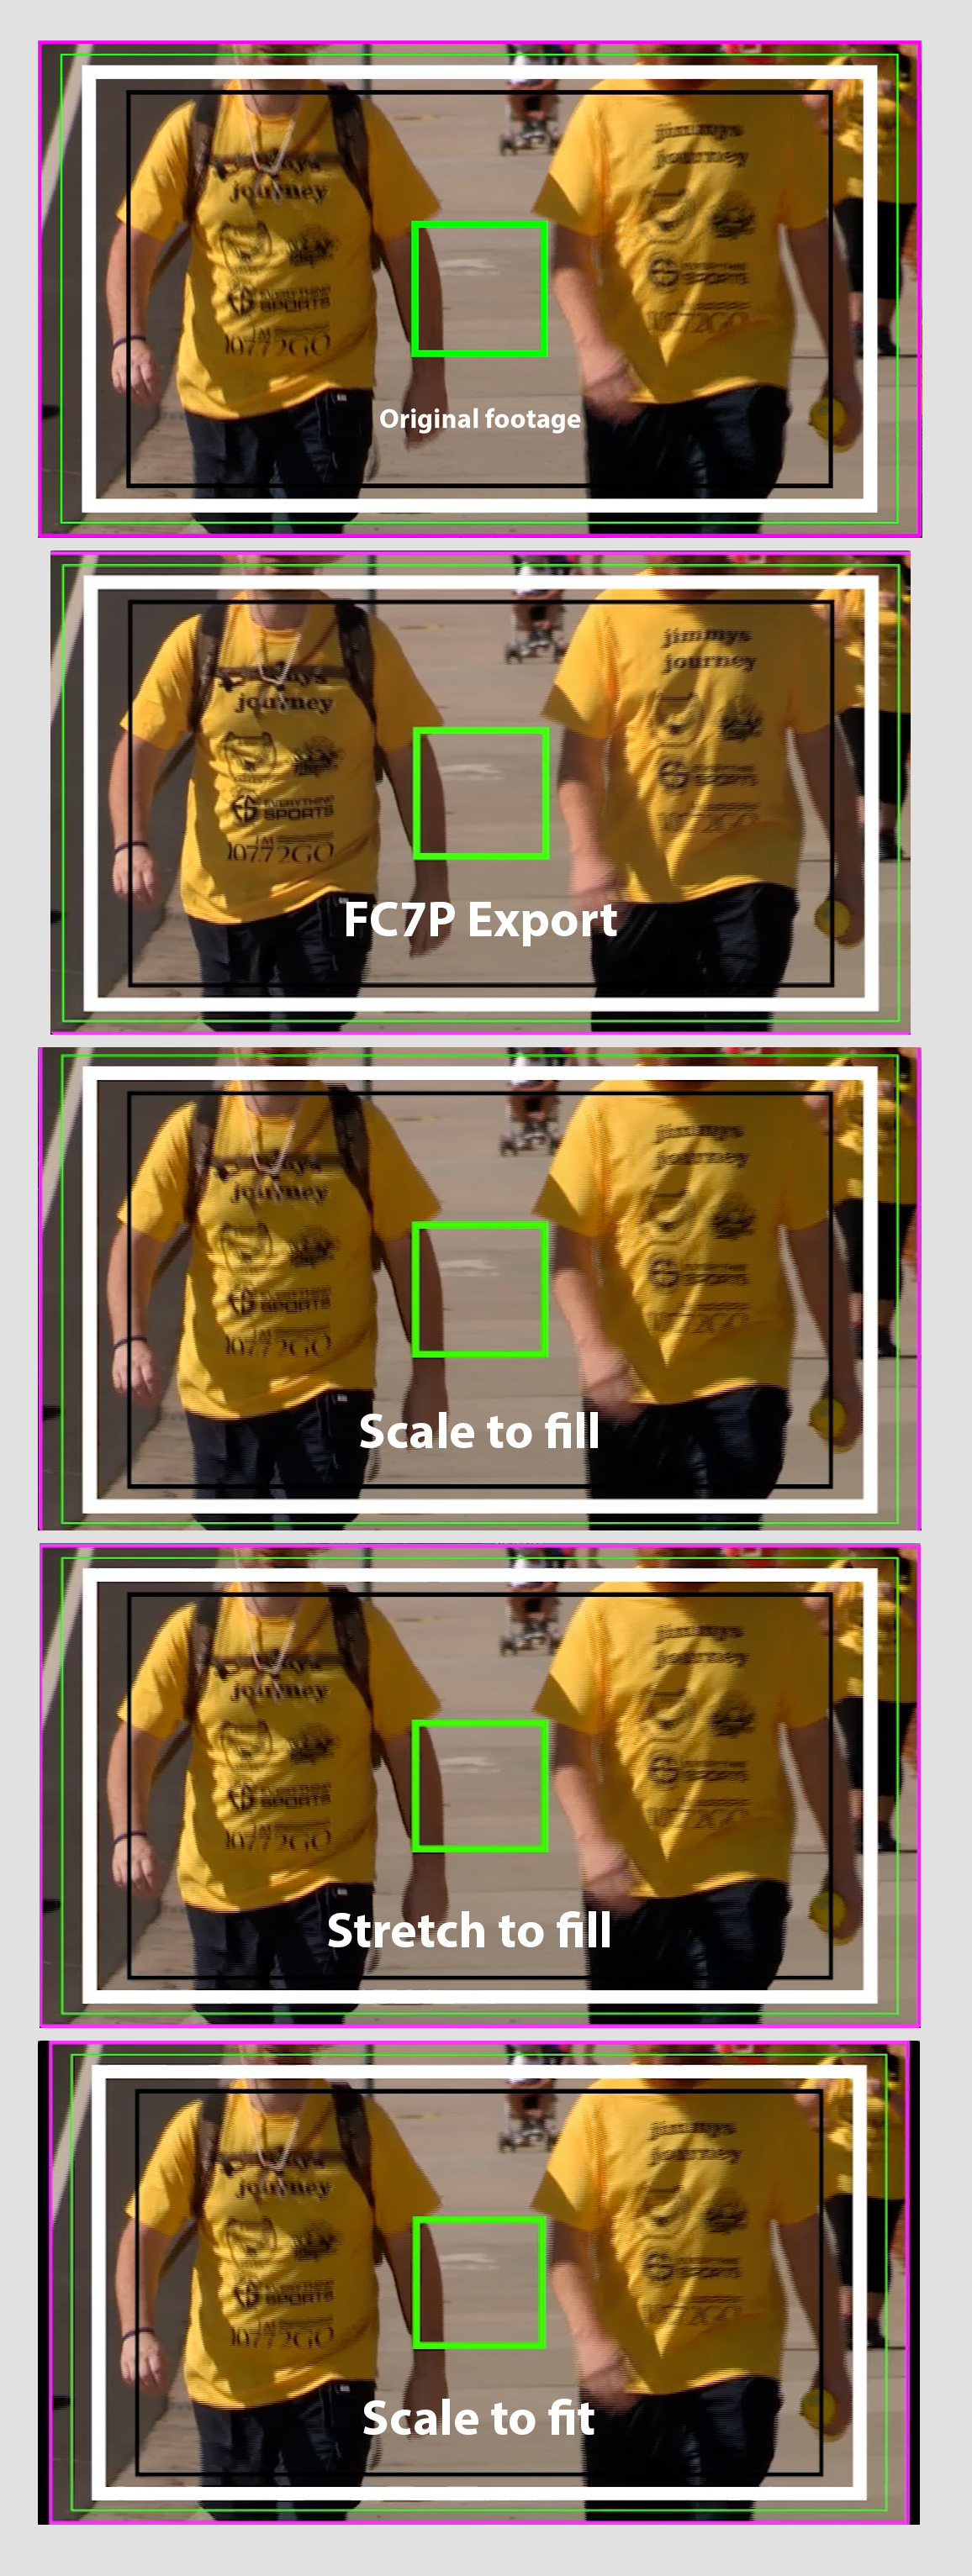
You can see there is a difference in the aspect ratio because the FC7P export is 1024x576 while the Adobe exports are 1050x576.
With the premiere exports, although stretch to fill looks correct, when the image is ingested the sides will crop from the 1050 down to 1024 so actually Scale to fit is the only option that leads to no loss of the original image once ingested.
Obviously different methods of ingesting footage may lead to different results.
These are the export settings I had for premiere.

In the process of all this I discovered a flaw in my old way of exporting through final cut, the image was stretching and cropping because I didn't select the scale crop options, this is why you cannot see the pink outline on the left and right of the export.

Copy link to clipboard
Copied
Scale to Fill is the commonly suggested resolution
Thanks
Jeff
-
- 1
- 2
Find more inspiration, events, and resources on the new Adobe Community
Explore Now
 AdChoices