Copy link to clipboard
Copied
Hi there,
I have checked a few posts about controlling the timeline with a slider but I am afraid they may be a bit too advanced for me.
Would anyone recommend a post or a resource which explains the simplest way to have a slider that controls the timeline.
Just the simplest case.
Thank you in advance
B
 1 Correct answer
// UPDATE (10/26/2018): improved version that takes into account responsive settings, drag offset and frame to position precision.
The download link is the same.
...this.button.on("mousedown", function(e)
{
e.target.offsetX = (e.stageX / stage.scaleX) - e.target.x;
}.bind(this));
this.button.on("pressmove", function(e)
{
e.target.x = this.clamp((e.stageX / stage.scaleX) - e.target.offsetX, this.bar.x, this.bar.x + this.bar.nominalBounds.width);
this.setProportion();
}.bind(this));
this.setPropo
Copy link to clipboard
Copied
html5 or as3?
component or custom movieclip?
what code have your tried?
Copy link to clipboard
Copied
Thanks for your reply. Sorry I did not specify.
It is HTML 5, any idea about the simplest slider that would change a variable or/and a frame number when sliding would be welcome.
Copy link to clipboard
Copied
there is no slider component (yet) for html5 so you'll need to make your own.
create a movieclip that displays the range
add a movieclip that will be dragged and indicate the location along the range
add a mousedown listener for the indicator that triggers a ticker loop
in the ticker listener check the indicators location and use that in your movieclip goto
Copy link to clipboard
Copied
Thank you for that. I am a beginner with JS so I would need to read a bit more to be able to implement that
Very kind of you
Copy link to clipboard
Copied
the javascript's easy to help in a forum.
help creating the movieclips in a forum isn't as easy, but you can see what you need to create by looking at the as3 slider in animate and duplicating those graphics
Copy link to clipboard
Copied
I am using primarily Adobe Captivate and this is where I use a few bits of JS.
However, I want to be able to import some more interesting features as OAM in the Captivate output.
This is where Animate comes into play. I have used Flash many years back and have lets say "decent" understanding of how timeline, objects, symbols etc. work.
I just don't want to ask for too much stuff in the forums. Everyone's time is precious. This is why I appreciate your taking time.
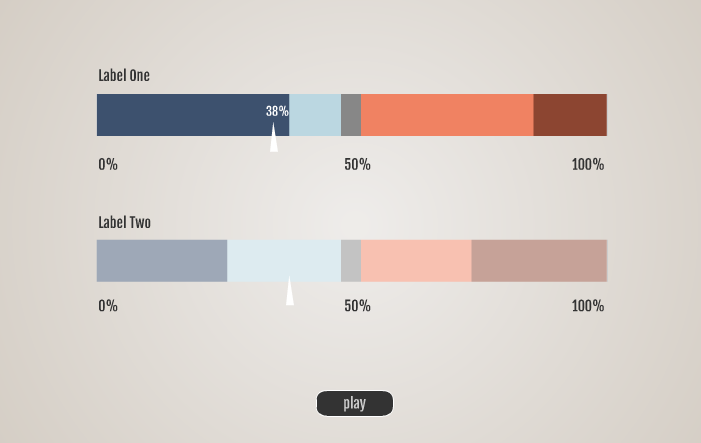
Just to visualize it, here is a slider I am working on. When the user clicks on the button Play the white markers move left or right. This is done with a classic tween.
My ultimate goal is to make it so that the user would be able to drag the white markers left and right and the percentage variable (in white) would change in the dynamic text field.
Where do you suggest I start with? Output should be OAM.
Do I see how it works first in ActionScript 3.0 file?
Thanks

Copy link to clipboard
Copied
The core issue is
slider coordinates, divided by the progress bar width, gets the number 1
The current frame divided by the total number of frames, get the number 2
When playing, the number 2 equals the number 1.
When you drag the slider, the number 1 equals the number 2.
Copy link to clipboard
Copied
Thank you for that. Would you please give me a hand with the script.
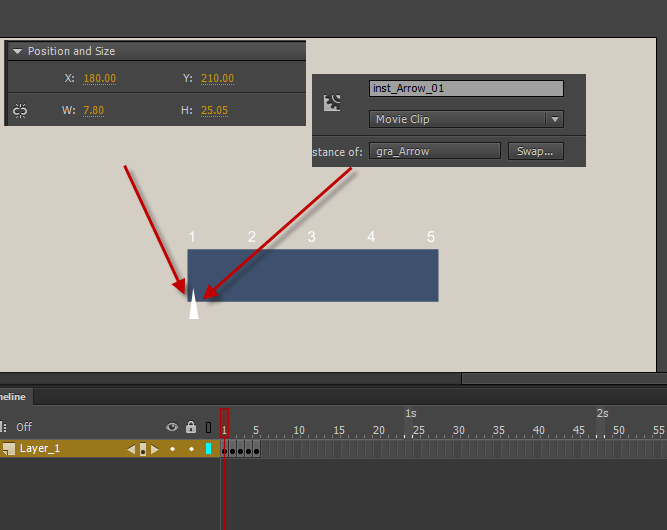
Have a look at the image. I have 5 frames. You can see on the image the coordinates and instance name.
Where do I start?
Thanks again

Copy link to clipboard
Copied
You need to make sure the file is as or HTML5.
languages are different.
Sliders and progress bars need to be 1 layers separate, because they are controlled by code, not frames.
Maybe you should go to the help of the website to download the as Help manual
Copy link to clipboard
Copied
Yes, I work with HTML 5 only so it will be JS.
Is there a section dedicated to sliders in the Animate CC help file?
Copy link to clipboard
Copied
are you going to use actionscript 3 or javascript. the code will be similar but different for each.
Copy link to clipboard
Copied
JS. I need an HTML 5 output.
Copy link to clipboard
Copied
// UPDATE (10/26/2018): improved version that takes into account responsive settings, drag offset and frame to position precision.
The download link is the same.
this.button.on("mousedown", function(e)
{
e.target.offsetX = (e.stageX / stage.scaleX) - e.target.x;
}.bind(this));
this.button.on("pressmove", function(e)
{
e.target.x = this.clamp((e.stageX / stage.scaleX) - e.target.offsetX, this.bar.x, this.bar.x + this.bar.nominalBounds.width);
this.setProportion();
}.bind(this));
this.setProportion = function()
{
var prop = (this.button.x - this.bar.x) / this.bar.nominalBounds.width;
this.txt.x = this.button.x;
this.txt.text = Math.round(prop * 100) + "%";
this.bar.gotoAndStop(Math.floor(this.bar.timeline.duration * prop));
}.bind(this);
this.clamp = function(value, min, max)
{
if (value < min)
return min;
else if (value > max)
return max;
else
return value;
}
setTimeout(this.setProportion, 0);
// UPDATE END
Hi.
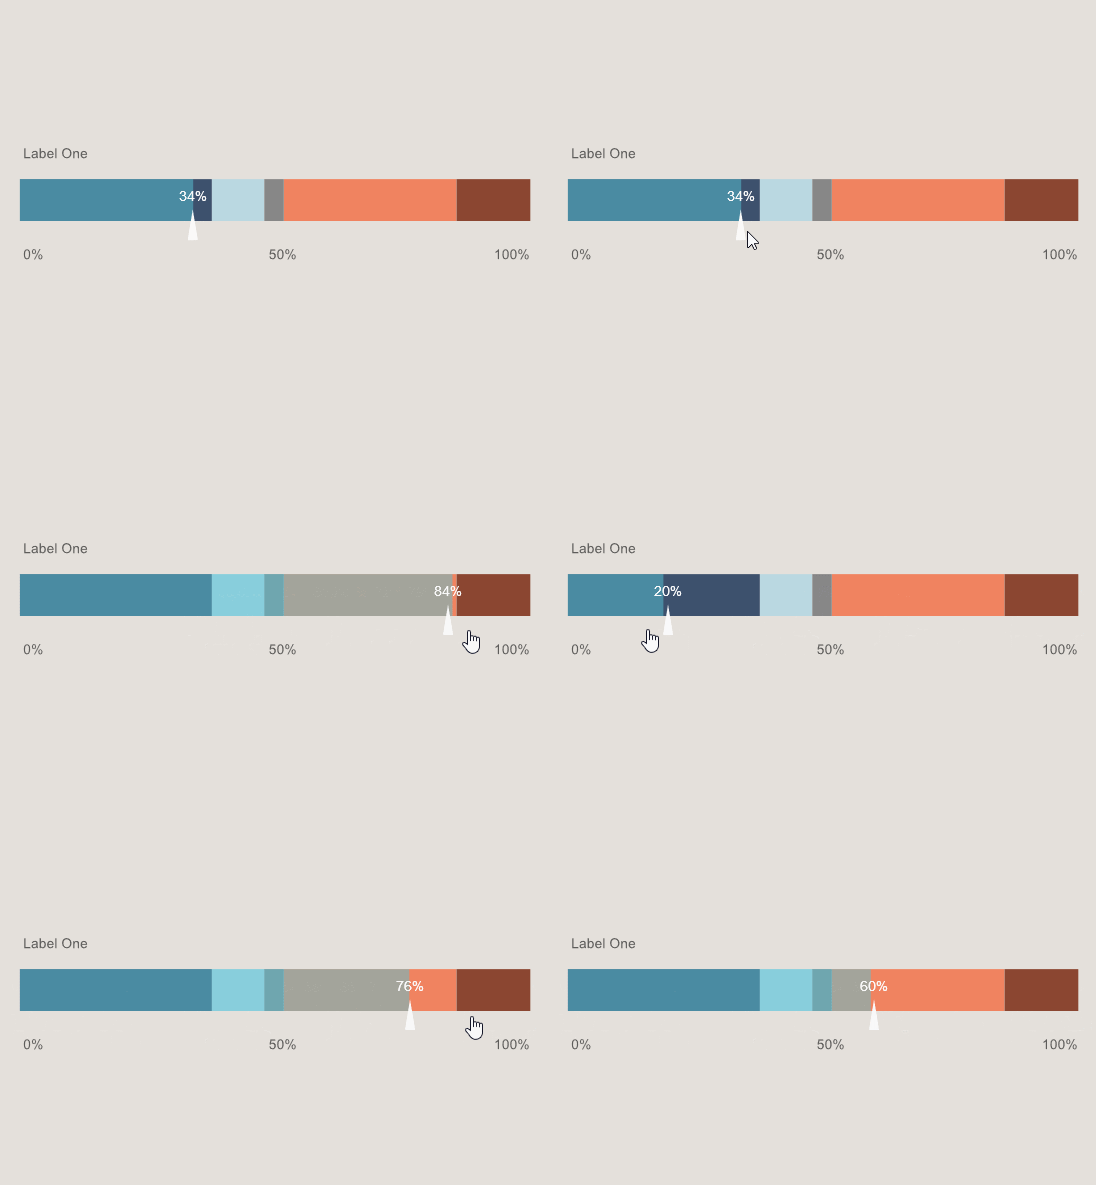
This is the simplest slider I can think of. Please notice two things:
- The highlight is a timeline animation so it won't necessarlity match the position of the slider button. But the frames are set proportionally as expected.
- I used setTimeout to call the proportion function in the beginning to make sure the bar timeline will be ready when needed.
Preview:

JavaScript code:
this.button.on("pressmove", function(e)
{
e.target.x = this.clamp(e.stageX, this.bar.x, this.bar.x + this.bar.nominalBounds.width);
this.setProportion();
}.bind(this));
this.setProportion = function()
{
var prop = (this.button.x - this.bar.x) / this.bar.nominalBounds.width;
this.txt.x = this.button.x;
this.txt.text = Math.round(prop * 100) + "%";
this.bar.gotoAndStop(Math.floor(this.bar.timeline.duration * prop));
}.bind(this);
this.clamp = function(value, min, max)
{
if (value < min)
return min;
else if (value > max)
return max;
else
return value;
}
setTimeout(this.setProportion, 0);
FLA download:
animate_cc_html5_simple_slider.zip - Google Drive
I hope it helps.
Regards,
JC
Copy link to clipboard
Copied
Wow, that is really impressive. Thank you so much.
I will try my best to understand as much as I can but a lot of that is beyond my knowledge.
I can see where you reference the button and the dynamic text, but the rest ... ![]()
Would you have a link to where I can learn a bit more about the expressions you used?
Thank you once again.
Copy link to clipboard
Copied
Excellent! I'm sure you're gonna understand all of this very fast. ![]()
You can take at look at CreateJS's official docs and especially in this mouse interactions tutorials:
EaselJS Tutorial: Mouse Interaction
And you can also look for general JavaScript tutorials on Lynda.com and YouTube, for example.
Copy link to clipboard
Copied
Wow
Could not have asked for more
Thank you Joao!
Copy link to clipboard
Copied
Joao, I have started trying out the different events described in the link you posted but I cannot even begin ...
For instance, I try the first one
circle.addEventListener("click", function(event) { alert("clicked"); })
I create the simplest file with a a button and name the instance of the button "circle"
I add the above js line on a separate layer in an action at the first frame but cannot get it right
Would you please point me in the right direction?
Thanks again
Bobby
Copy link to clipboard
Copied
Make sure you are referencing your objects using the this keword.
So you should write this.circle instead of just circle.
In the tutorials from the page, they are using pure JavaScript/HTML. But as we are using Animate CC, we have to add this to access any objects on the stage.
Copy link to clipboard
Copied
Thank you Joao.
I am on it!
Copy link to clipboard
Copied
Hi Joao
I have started playing with the different onEvenListeners and all of them work well.
I have also trying to make sense of the different blocks of your code - the function "e" - the function "setProportion" - the function "clamp" I will be working on that one, but would you please give me a hand with the basics?
In the E function you use the two other functions that you create later.
The setProportion function you set the boundary + what the text will be.
What is the clamp and the setTimeout for?
In the function E you specify only the x parameter, which means that the object cannot be drawn on the y scale, correct?
Actually I am pretty close to getting where I want to be. The final objective is to have two (or more) sliders that would have a range between 0 and 100. Then, I would like to pass the value to a separate dynamic field that would be a composite of the two sliders. So for instance, consider this case. If the Slider 1 is less than 33%, the value of dynamic text box One will be 3. If the Slider 1 is between 33% - 66%, the value of dynamic text box One will be 6. If the Slider 1 is more than 66%, the value of dynamic text box One will be 10. The same would be for Slider 2. Finally, there will be one composite summary variable/dymanmic text box that would show the Average of the two sliders. 1.
How can I pass the current value of the slider to a dynamic text I know this should be included in a if/else function but a hand would be really appreciated.
Thanks B
Copy link to clipboard
Copied
Hi, B.
The clamp function is a utility function that keeps a given value between two other values. For example: if we pass to it 0 as the minimum value and 5 as the maximum value, the results will be the following:
clamp(-2, 0, 5); // returns 0
clamp(7, 0, 5); // returns 5
clamp(3, 0, 5); // returns 3
the setTimeout function is used to delay a function call. Like this:
setTimeout(delayedFunction, 3000);
In our case, I used as a fix to make sure that all properties of the bar Movie Clip would be ready. Because if I only write:
this.setProportion();
Some properties like timeline.duration may not be ready yet. It seems to have something to do with the order that CreateJS executes code.
And, yes, I only allowed the button to be dragged on the x axis by only setting the x position property.
About what you want to do, here is a very poorly implemented suggestion. Haha
animate_cc_html5_simple_slider_02.zip - Google Drive
I hope this helps.
Regards,
JC
Copy link to clipboard
Copied
Thanks Joao
That certainly gives me some food for thought ![]()
Copy link to clipboard
Copied
This is very nice and smooth. I have been researching a lot on range sliders and this one is great. Is there a way to add steps and change the minimum value? I am looking to have a range from 10 to 100 in 10 steps. Thank you for your time.
Copy link to clipboard
Copied
Hi.
Sorry for the long delay. You've probably figure it out the solution, but I would like to leave a sample here in case you or someone else needs it.
JS code:
var root = this;
var slider = root.slider;
slider.snapping = true;
slider.min = 10;
slider.max = 100;
slider.currentValue = 75;
slider.steps = 10;
slider.precision = 0;
slider.fontSizeRatio = 0.55;
root.start = function()
{
slider.textInput = dom_overlay_container.children["txt"];
slider.keyUpHandler = function(e)
{
e.preventDefault();
if (e.keyCode === 13)
slider.positionFromCurrentValue(slider.textInput.value);
};
slider.setFontSize = function(e)
{
slider.textInput.style.fontSize = Math.round(slider.hit.nominalBounds.height * slider.stage.scaleY * slider.fontSizeRatio) + "px";
};
slider.setSteps = function()
{
for (var i = 0; i <= this.steps; i++)
{
var marker = new lib.SliderMarker();
marker.txt.text = (i * ((this.max - this.min) / this.steps) + this.min).toFixed(this.precision);
marker.x = i * (this.hit.nominalBounds.width / this.steps);
this.markers.addChild(marker);
}
};
slider.positionFromCurrentValue = function(value)
{
if (isNaN(parseInt(value)))
return;
var hitWidth = this.hit.nominalBounds.width;
var posX;
this.currentValue = root.clamp(parseInt(value), this.min, this.max);
posX = root.clamp(((this.currentValue - this.min) / (this.max - this.min)) * hitWidth, 0, hitWidth)
if (this.snapping)
{
var stepWidth = hitWidth / this.steps;
this.button.x = root.clamp(stepWidth * Math.round(posX / stepWidth), 0, hitWidth);
}
else
this.button.x = posX;
this.bar.scaleX = (this.button.x / hitWidth);
this.textInput.value = this.currentValue.toFixed(this.precision);
};
slider.positionFromMouseX = function()
{
var hitWidth = this.hit.nominalBounds.width;
var posX = (this.stage.mouseX / this.stage.scaleX) - this.x;
if (this.snapping)
{
var stepWidth = hitWidth / this.steps;
this.button.x = root.clamp(stepWidth * Math.round(posX / stepWidth), 0, hitWidth);
}
else
this.button.x = root.clamp(posX, 0, hitWidth);
this.bar.scaleX = (this.button.x / hitWidth);
this.currentValue = (this.button.x / hitWidth) * (this.max - this.min) + this.min;
this.textInput.value = this.currentValue.toFixed(this.precision);
};
slider.mouseDownHandler = function(e)
{
this.button.gotoAndStop(1);
this.positionFromMouseX();
this.stage.stageMouseMove = this.stage.on("stagemousemove", this.stage.stageMouseMoveHandler);
this.stage.stageMouseUp = this.stage.on("stagemouseup", this.stage.stageMouseUpHandler);
};
stage.stageMouseMoveHandler = function(e)
{
slider.positionFromMouseX();
};
stage.stageMouseUpHandler = function(e)
{
slider.button.gotoAndStop(0);
this.off("stagemousemove", this.stageMouseMove);
this.off("stagemouseup", this.stageMouseUp);
};
createjs.Touch.enable(stage);
stage.mouseMoveOutside = true;
stage.preventSelection = true;
slider.setSteps();
slider.positionFromCurrentValue(slider.currentValue);
slider.button.mouseChildren = false;
slider.hit.cursor = "default";
slider.setFontSize();
window.addEventListener("resize", slider.setFontSize);
window.addEventListener("keyup", slider.keyUpHandler);
slider.mouseDown = slider.on("mousedown", slider.mouseDownHandler);
};
root.clamp = function(value, min, max)
{
if (value < min)
return min;
if (value > max)
return max;
return value;
};
setTimeout(root.start, 0);
FLA download:
animate_cc_html5_canvas_step_slider.zip - Google Drive
Regards,
JC
Find more inspiration, events, and resources on the new Adobe Community
Explore Now
