- Home
- Dreamweaver
- Discussions
- Re: Styling CSS [Branched from Problems with css-d...
- Re: Styling CSS [Branched from Problems with css-d...
Re: Styling CSS [Branched from Problems with css-designer Panel]
Copy link to clipboard
Copied
I have the newest version of Dreamweaver. I just installed it last week and I'm having the same problems where the selector panel is greyed out but it doesn't happen all the time. I am trying to learn how to create a webpage in Bootstrap and successfully created a new CSS file along with 2 new styles. When I added a new row to my html file and then tried to add some style to it, the selector panel won't work. It's greyed out and my css file isn't showing as being my current file.
This has been happening to me ever since I installed the program so I gave up on Bootstrap for awhile and tried a different method for creating web pages.
I'm back to trying to figure this program out only it's now impossible to add any style using the selector panel.
Also, I see some people have said there was a problem with a font. I don't have a Font folder. Was one supposed to have installed when I installed the program?
Copy link to clipboard
Copied
Hi sheryltoo.
I have branched this to a new discussion because the old one you posted to is from 2013 and no longer relevant.
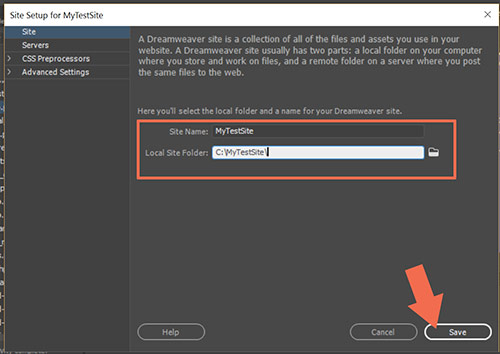
I want you to go to Site > New Site and create a new project folder. For example, C:\MyTestSite\
Next, go to Files > New > Starter Templates.
Click on Bootstrap Templates and pick any Sample Page you like. This is mainly for demonstration purposes so it doesn't matter which one you pick.
Hit the CREATE button.
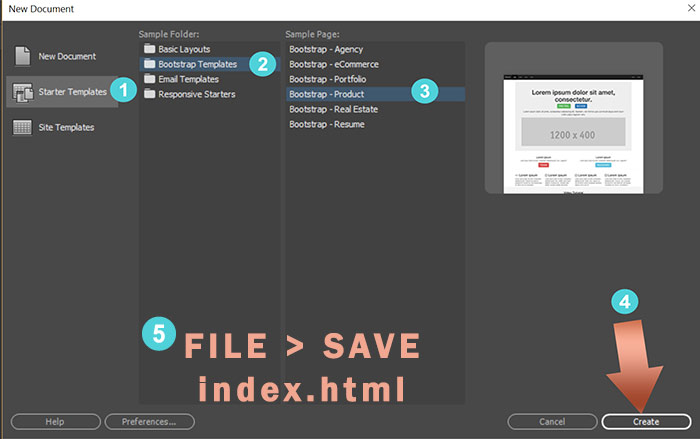
Immediately save your newly created page as index.html
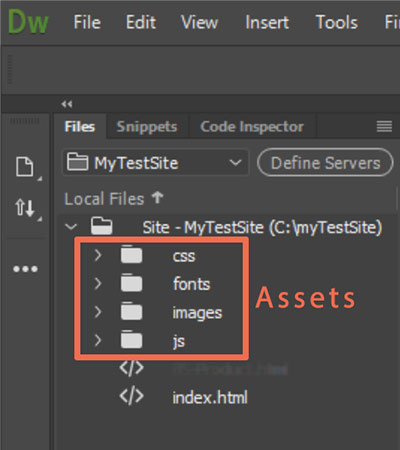
Your Files Panel should look something like this.
Now go to File > New > New Document and under document type, click on CSS.
Hit the CREATE button.
Paste the following CSS code into your CSS file. So all total it should look like this:
@charset "utf-8";
/* CSS Document */
body {
margin: 0 auto;
width: 80%;
font-family: Calibri, Candara, Segoe, Segoe UI, Optima, Arial, sans-serif;
font-size: calc(16px + 1vw);
line-height: calc(1.1em + 0.5vw);
}
Save your new CSS file to your css folder as custom.css. Close custom.css
In index.html, place your cursor underneath the link to Bootstrap CSS.
Go to Tools > CSS > Attach style sheet. See screenshot for settings and hit OK.

Your index page should resemble this. Hit Ctrl+S to save.

Now scroll down a bit and click on the first <h1> tag and hit Ctrl+E to open the Quick Edit panel.
Hit New Rule and select custom.css Remember, Bootstrap is a read only file and we never edit Bootstrap. From now on, every new style rule goes into the custom.css file.

Now let's create a style rule for the <h1> tag.
h1 {color: indianred
}
Hit Ctrl+S to save.
Close the Quick Edit Panel.
Switch to the custom.css tab to confirm that your new style rule is in your css file.

Switch back to Source Code tab.
If you scroll down the document, all <h1> tags should be indianred.
Repeat this a few more times with other selectors to get a feel for it.
Hit Ctrl+S often to save work in HTML and CSS files.
Copy link to clipboard
Copied
Next Lesson.
I want you to highlight the entire <h1>Lorem ipsum dolor...</h1> string of code.
And hit the CSS and CSS Designer buttons from the Properties panel.

Double-click in the add property field.
Type background-color: #343a40 and hit Enter.

OK so you have learned 2 ways to add global CSS styles to your <h1> tags with Quick Edit and the CSS Designer panel. But what if you don't want all <h1> tags to look the same?
The wonderful thing about Bootstrap is it has hundreds of built-in classes that can help you avoid writing new code. You can remove the custom color and background-color styles by clicking the trash can icon and close out the CSS Designer panel.
With just 2 Bootstrap classes applied to your <h1> tag, you can achieve the same results without writing any CSS code. And this is not applied to all <h1> tags the way CSS styles are so you can pick & choose when and where to use classes.
<h1 class="text-danger bg-dark">

See below for more on Bootstrap's contextual classes.
The key to using Bootstrap effectively is to use classes wherever possible instead of writing new CSS code. Bootstrap already contains just about everything except the kitchen sink. So the less new code you write, the better.
.
Copy link to clipboard
Copied
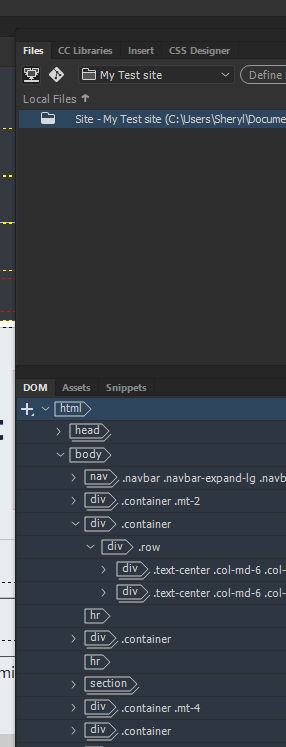
I haven't finished your directions yet because I thought I should first show you what I see after I created a test site. There are no folders listed in the program itself however there are folders in my document folder for css, js, and images. No Font folder.
Is something wrong with my Dreamweaver program?
Copy link to clipboard
Copied
That's correct. Defining a site does not create folders. That comes later.
Copy link to clipboard
Copied
Ok, I'm trying to follow your directions but when I right click the <H1> tag and try to edit it, it says "no quick edit available for current cursor position. This is a problem I've had before. Here's a picture of my highlighted file.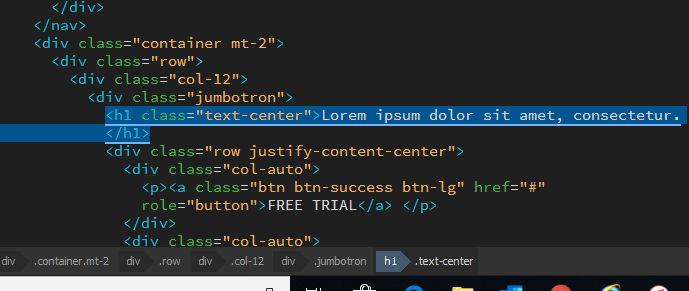
Copy link to clipboard
Copied
Dont'-right click.
Just click inside the <h1> tag. Use Ctrl+E to quick edit.
Copy link to clipboard
Copied
I got the <h1 to bring up the text editor and made the change but I can't seem to make any more changes that way.
Is my <h3> highlighted correctly? If so, it says there's no quick edit
Copy link to clipboard
Copied
You do not need to highlight the entire line. Put your cursor between h and 3. Then use Ctrl+E.
Copy link to clipboard
Copied
OK, I got it to work and I made another change to an h2 tag but I don't have time to finish the rest of your instructions tonight and I'll be gone all day tomorrow so I probably won't get back to this until Monday.
I really appreciate you being so patient with me and helping me out but perhaps there's one more question you could answer for me.
I keep hitting ctrl s to save my work but when I try and view it on Google, it keeps telling me I need to save all my files. I thought that's what I was doing.
Copy link to clipboard
Copied
Ctrl+S saves the current document only.
Use File > Save All.
Copy link to clipboard
Copied
I'm trying to go back through your instructions and make a change to an H3 tag but the editor shows I'd be changing it with the 4.3.1 read only css file. How do I get it to show my custom css file?
Copy link to clipboard
Copied
sheryltoo wrote
I'm trying to go back through your instructions and make a change to an H3 tag but the editor shows I'd be changing it with the 4.3.1 read only css file. How do I get it to show my custom css file?
Dont ever try to make changes to the default bootstrap file unless you know what you are doing. That is why its a read only file.
Link a new css stylesheet file to the page, name it custom.css
Then you can edit/over-ride any bootstrap css and make new css selectors in that, just make sure the custom.css file is linked AFTER the default bootstrap.css file
Edit:
Write an h3 { } selector in you custom css file, save it, see if quick edit picks it up. I dont use DW so I can't test for you but it should find any h3 in any linked css file.
Copy link to clipboard
Copied
That's one thing I do know which is why I was trying to figure out what happened to my custom css file.
Thanks Nancy, I didn't realize I needed to scroll down to find it.
I think I'm understanding this a bit more but I'm still wondering why I don't have a "Font" folder. Also, I when I first installed this version of Dreamweaver there was a trash can to the right on the Selector panel so I could click on a Selector and delete it when I kept duplicating selectors by mistake but it's gone. I don't know what I might have done to make it disappear and I don't know how to get it back. I tried clicking the reset standard for the layout but that didn't work. I'm also confused as to why when clicking that button it kept the layout with what I had changed it to instead of how everything was laid out the first time I opened it.
I didn't like the layout so I'm not upset about it not reverting back to that layout but just curious why it didn't go back to the original layout.
Copy link to clipboard
Copied
sheryltoo wrote
I'm still wondering why I don't have a "Font" folder.
Some Starter Templates use special fonts (font-awesome or glyphicons) and others don't. No need to worry about it. It's not important.
when I first installed this version of Dreamweaver there was a trash can to the right on the Selector panel so I could click on a Selector and delete it when I kept duplicating selectors by mistake but it's gone.
The CSS Designer Panel has trash can icons but the Quick Edit panel does not. Is that what you're looking for?

sheryltoo wrote
I tried clicking the reset standard for the layout but that didn't work.
Resetting Workspace has no effect over page layout. Workspace is how the DW panels and toolbars are arranged on your screen. I have created a custom workspace based on Developer and saved it as MyWordspce.

For more on Wordkspaces see help article below.
Overview of the Dreamweaver workspace
If you need to revert back to original layout, that's easy. Open custom.css. Highlight all your custom CSS code and hit DELETE key. Or use Ctrl+Z (Undo) to back out of recent changes.
Copy link to clipboard
Copied
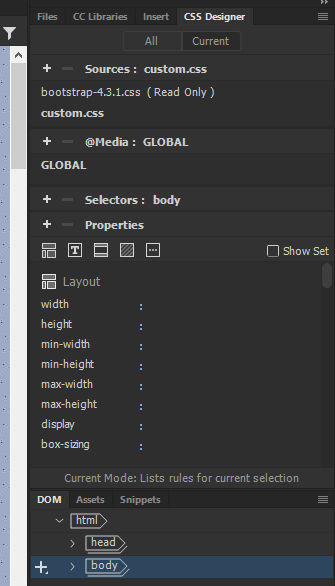
Here's a picture of my Css designer panel. I lost the trash can. I tried expanding the panel but that just puts the Properties panel to the right side of Selectors.
Copy link to clipboard
Copied
In my opinion you are far better off learning some basic css and directly writing it into your css stylesheet, rather than faffing about in some UI panel.
css is quite easily to learn, especially the basic styling like color, background-color, padding, margin, font-size etc then if you need a crutch you can refer to the css panel for something more complex, if needed.
It's so much quicker to write a selector directly into the css file itself.
Copy link to clipboard
Copied
osgood_ wrote
It's so much quicker to write a selector directly into the css file itself.
I quite agree. With code hints & auto completion, working with CSS code is much better than panels.
Copy link to clipboard
Copied
Well I've still been going at this for a couple weeks now and I did try just writing some Css codes but I must not have linked it to my html correctly or wrote the codes wrong because my styling changes didn't seem to work so I decided to stick with the CSS designer panel and I've actually created just a simple responsive page. At least it's been responsive for me.
I have my page in a container because I didn't want it the full size of a desktop screen but it's almost the width of my screen. I tried putting a width in for the body and the container of 80% but nothing changed. Do I need to do something else?
Here's a link to what I've started.
Copy link to clipboard
Copied
Shoot. I just looked at my page on my phone and it's not responsive even though it keeps looking correct when I shrink the browser on my computer.
Copy link to clipboard
Copied
There's nothing Bootstrap about this. So you can remove this link which doesn't work anyway.
<link href="../css/bootstrap-4.3.1.css" rel="stylesheet">
Copy link to clipboard
Copied
Also that GIF across the top has a fixed height & width in pixels which won't work on mobile phones. Remove the height and width values from your markup.
Add this to your CSS code.
img {
max-width: 100%;
}
Copy link to clipboard
Copied
So after all that I still haven't figured out how to build and style a bootstrap webpage?
Copy link to clipboard
Copied
David_Powers has produced a tutorial on the subject. Take out a free month to follow Speed up responsive design
Copy link to clipboard
Copied
From Quick Edit panel, you must click the New Rule button first and then select custom.css from the list. See screenshot.


