- Home
- FrameMaker
- Discussions
- Re: Empty frames after importing Illustrator CC fi...
- Re: Empty frames after importing Illustrator CC fi...
Empty frames after importing Illustrator CC files into Fm 2018
Copy link to clipboard
Copied
This is happening with Illustrator CC and FM 2017, also. It may be a bug:
I create files in Illustrator, and when I go to import them into FM, I get NOTHING other than a clear pane where the file should be. If I double-click on the "imported image" (which is nothing) to open the file in Illustrator, then make a small modification in Illustrator and re-save the file, it comes in fine.
FM now won't import .ai files directly - you get a grey box.
If you want me to start a new thread, I shall do so. (Moderator branched your question to a new thread for you.)
Copy link to clipboard
Copied
Hi Eric:
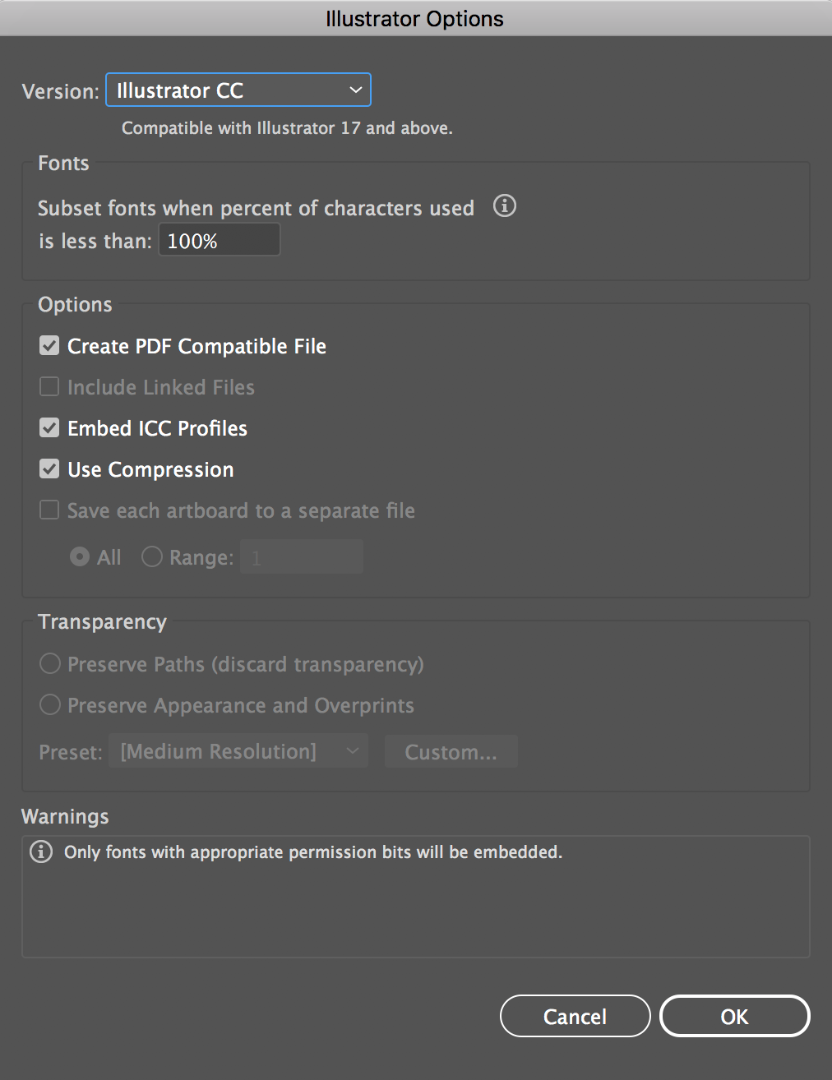
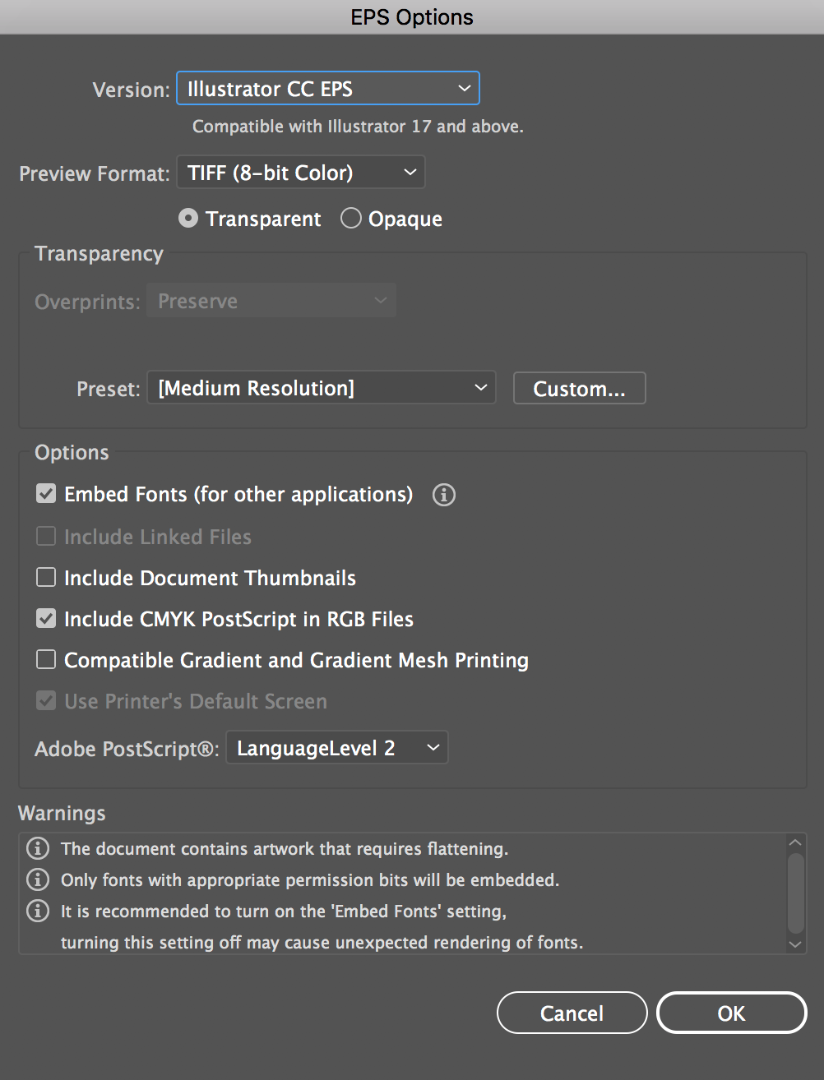
I'm not seeing this issue. Below are two files from Illustrator 2017 (v 22.01), the first saved as Adobe Illustrator (ai), the second as Illustrator EPS (eps) with these options. Are your files saved as an older version? A different preview format or no preview format? Do you see anything different in the export options dialog boxes?


The previews look different from each other in Fm but they output the same to a PDF. Imported via File > Import > File into FrameMaker 2017 (14.0.2.425):

~Barb
Copy link to clipboard
Copied
I'm using FM 2017, and Illustrator CC. Latest patches on both.
I really don't care about the quality of the previews; I know the final result will be just fine.
I tried matching your settings above, and there is no change. (The only change was in the Save As EPS... Include Document Thumbnails setting - mine was turned on.)
Let me drop in some examples so you can see exactly what's happening.
Illustrator .ai files consistently give me the 'gray boxes' warning, and .eps is the only thing that still works; but it still gives me no preview, until I go through the tap-dance below.
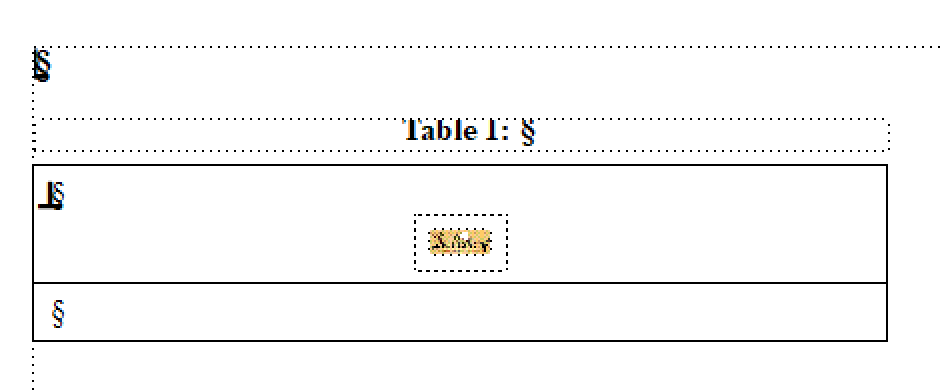
Here we go. I'm inserting a graphic. I get a tiny (highlighted) box with handles that I have to drag out to the approximate correct size of the graphic (font here is Arial 10 Bold for size comparison):
Please forgive the absence of surrounding content; I have restrictions on what may be shared.
Some background: I insert all graphics into tables; it allows me to control the leading consistently around them. So ESC -T, I gets my table inserted, and ESC - F, I, F gets my insert dialog up. I always do Insert by Reference, as the graphics files are frequently large.
Now, step two - I've dragged the box to the approximate finished size of the graphic, and clicked on the interior of the frame, then dragged through the periphery of the bounding frame to find the actual location of the graphic:
Yes, that's it, hiding down in the right corner. Notice that it's not a thumbnail, but an empty box. But at least I have grabbed it. Now I go to the Object Properties and choose an arbitrary size (say 70%) and apply it. I then click on the buttons to set it against the top of the frame and to center it. This is what we get next:
Yeah, it's too big, but I'll fix that once I can see it; it may be a matter of tuning the graphic in Illustrator; but I need to see it in place, first.
Notice that the graphic 'kind of' appears to be inserted, but no thumbnail is visible. (Oh, and printing the page gives me a blank frame; so the graphic isn't really inserted.) From here, I double-click on the graphic, which will then eventually open in Illustrator. I then make a tiny change - enough to cause Illustrator to think the file is changed. I then SAVE from Illustrator. As soon as the Save completes, I then go back to FM and click once on the graphic. This will cause it to be both imported and displayed, and from there I can tune the layout. Once it's in, it's in for good. No problems afterward.
Thing is, I'm not sure what's going on here. Or why. I must always work off the server, to keep the files in a location which is backed up daily. We have encryption in both directions, and I suspect that it might possibly be a server latency issue that I'm seeing. But that doesn't explain why re-saving the file will cause it to display.
Other notes: this is consistent. Every file comes in this way, every time. Doing the above steps fixes it every time, but without putting too fine a point on it, it's starting to get rather old.
Looking forward to your help; this has been an ongoing problem for a long time.
Copy link to clipboard
Copied
Hi Eric,
In order to simplify your problem, do you get the same behavior when you skip the part about importing into a table?
In other words, if you simply have your cursor at the end of a paragraph, and then use either the Insert > Image dialog or the File > Import > File dialog, do you get the same behavior?
FrameMaker Course Creator, Author, Trainer, Consultant
Copy link to clipboard
Copied
AHA ... !
A straight import works fine for both .ai and .eps files! ...So there's 'something not right' when importing the graphic into a table.
This is nuts, but I can be flexible. I'm big on content visual consistency, and having to do graphics as a straight import is going to mess up the leading in the layouts...
Any suggestions to make the graphics correctly import into tables, or am I going to have to just deal it and redesign all my layouts?
Copy link to clipboard
Copied
Hooray!
I suggest you use Object Styles to speed up and control the formatting of graphics.
That's what I do in my workbooks and reference books.
FrameMaker Course Creator, Author, Trainer, Consultant
Copy link to clipboard
Copied
Good catch, Matt. When I import the same image from above into a table, I get:

You can test the server issue, by testing with just one file and you'll have that answer about server latency and the visibility.
But there's something with the Fm 2017 table (see postscript below) so, where are you in the workflow? Are you still busy adding images into tables? If so, how about:
- Add a table, format as per usual
- Add the image to the page (no insertion point)
- Cut, paste into table cell.
- Shrink-wrap to tighten frame, anchor at insertion point: Esc mp (use Table Cell margins in ¶ Designer to control the space instead of anchoring below)
- Then move just the graphic out of the table (leaving the empty anchored frame behind) and copy the table
- Move the graphic back in: re-shrinkwrap to center
Now instead of inserting new tables, just paste that one. Import the images onto the page, the drag into frame, shrink-wrap and on to the next one. Should be a lot quicker.
~Barb
P.S. I tested importing the same image into a table in Fm 2015, and came in at the normal size. It is something with 2017.
Copy link to clipboard
Copied
Now, THAT works. Much, much easier. Thank you!!
Because my graphics are of variable width (owing to their origins), I don't care a lot about shrink-wrapping (but that IS a great idea). What I do care about is that the type in screenshots is of a consistent size. And we all know that windows often are of larger and smaller sizes. So, yes, the above works great.
Let me write in a clearer answer.. Here's what I just did, and it works slick:
Insert the illustration table.
Drop in a blank line below it (my typical format is Body Text.)
Insert the graphic onto that line.
Click on and Cut the graphic.
Paste the graphic into the table. Frame automatically inserts a graphic frame around it, placing it correctly in the table.
Resize as necessary with the Object Properties menu, center with the toolbar buttons.
Done!
Copy link to clipboard
Copied
Fantastic, Eric!
And I want to note that I amended my answer above to say that I tried this in Fm 2015, and got the normal size in the table. This is an issue with Fm 2017. You can report it here: Tracker. If you can come back and post the link, I'll follow and vote on it.
~Barb
Copy link to clipboard
Copied
Hi Barb,
I attempted to go to Tracker and for some reason it wants me to log in again. I click on Log In, and .... nothing. This may be due to browser blocking by our Corporation.
I guess I may have to leave it to someone else to report the bug. Meanwhile, the workaround above works very well. I've used Frame for almost 20 years, and am used to workarounds...
Guys, thanks for your help!
Eric
Copy link to clipboard
Copied
I'm betting that the behavior has to do with the new Insert > Image workflow.
My guess is that the engineers weren't expecting you to place images into a table cell, so the autosizing feature they added is fiddling with the math.
FrameMaker Course Creator, Author, Trainer, Consultant

