How to adjust and save text formatting?
Copy link to clipboard
Copied
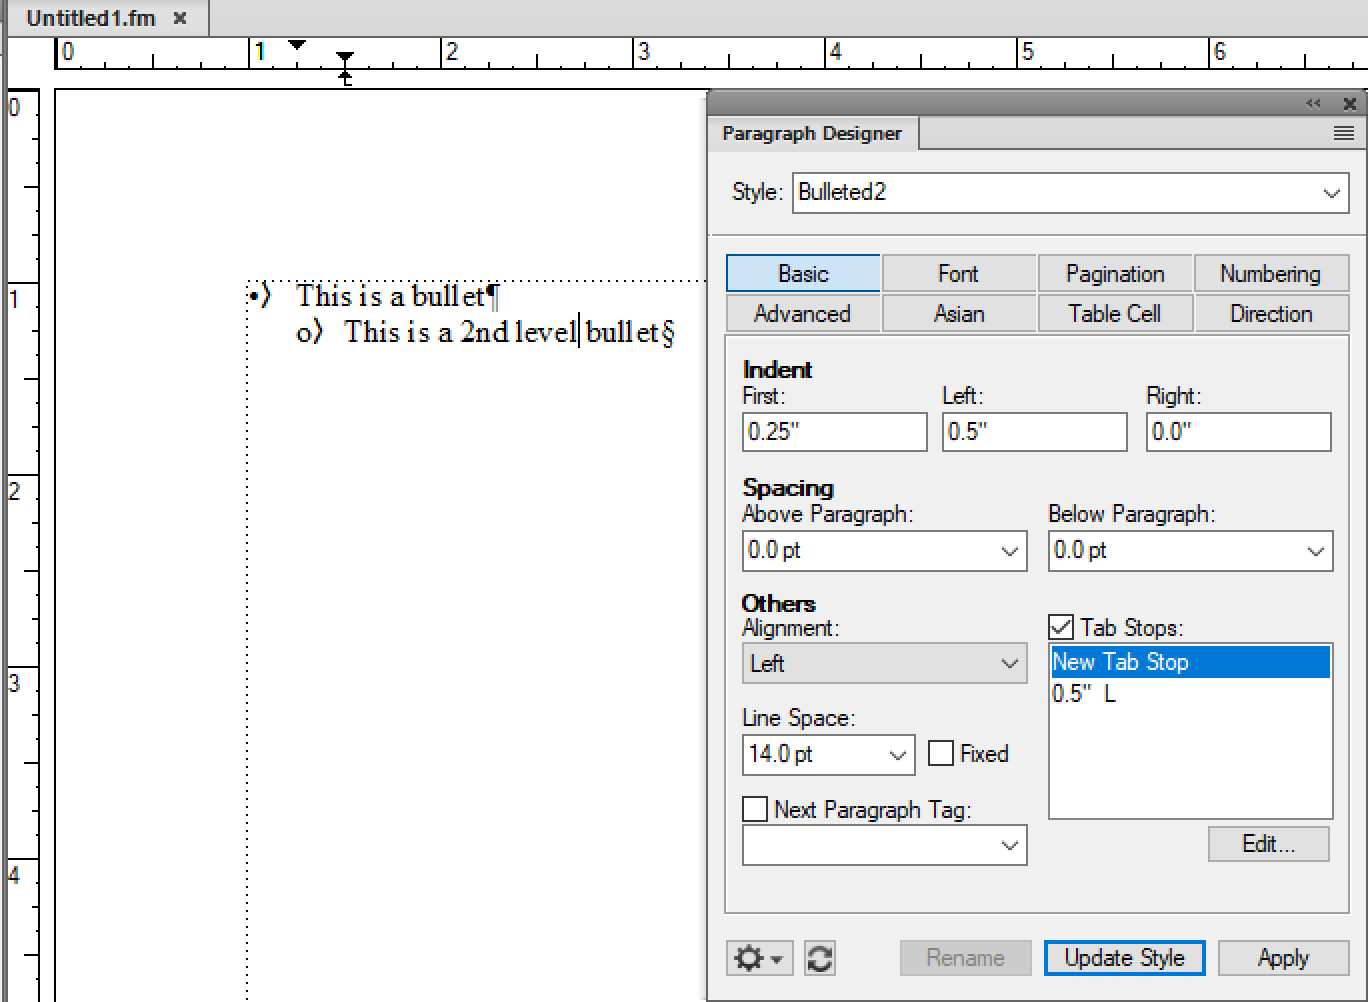
I am able to adjust the formatting for both the bullet and text separately using the tab stops in the Ruler. However, I have added a different Bullet 2 type to be used and can't adjust the text separately as there is no tab stop unless I click Tab. However, this doesn't apply the changes to all other Bullet 2 types, even when click Update Style. We need to be able to save the formatting with the text appropriately spaced out, like Bullet 1, so that every time we add that bullet type, the appropriate spacing appears.

Copy link to clipboard
Copied
That sounds like you are applying manual overrides to the formatting of the paragraph tag for Bullet 1 and Bullet 2 - you should "bake in" your changes into the paragraph tag settings so it can be used elsewhere as a template or format import.
Copy link to clipboard
Copied
That's what we're trying to do. We were able to do so with the Bullet setting, already embedded in FrameMaker. We manually added the second white Bullet and we click Tab on the keyboard to create the desired spacing. We clicked Updated Style but the Tab didn't carry over.
Copy link to clipboard
Copied
What settings do I need to adjust to move the "Bullet 2" text?

Copy link to clipboard
Copied
No, you need to use the Paragraph Designer to call up your Bullet 2 paragraph tag and define the tab stops within it.
Copy link to clipboard
Copied
Each time we generate a Tab Stop, it seems to override.
Copy link to clipboard
Copied
Ok, just saw your screenshot - so that looks correct (other than you have some weird location settings for your tab stops) - what's not working?
Copy link to clipboard
Copied
Oh, could it be that your tabs seem to be defined from the "Right" instead of the "Left"?
Copy link to clipboard
Copied
A couple of thoughts here, Rachel:
- When defining tabs, it is helpful to work with text symbols showing. We can't tell from your first screen shot if there is a tab between the hollow circle and the text, or not.
- You have a lot of tab stops defined in your second screen shot. I would remove all of them and start over. (Use Paragraph Designer > Basic > Edit > Delete All > Continue > Update Style.
Then, set up the level 1 bullet with a single tab character on the line and single tab stop in the ruler/Paragraph designer. The Left indent should match the tab stop so that you will have a hanging indent for text that wraps to a second line. You can add tabs and set indents either in Paragraph Designer > Basic > or by working in the ruler, but always choose Update Style and remove any overrides when you get the look you want.

Once that is working again, change the name and click on Create Style to create a level 2 bullet. Change the First line indent to match the tab stop for the level one bullet, and increase the Left indent and tab stop. Again, the Left indent and tab stop values should match to give you a hanging indent. Choose Update Style and remove any overrides.

~Barb

