- Home
- FrameMaker
- Discussions
- Re: Images Imported from Word to Framemaker Have W...
- Re: Images Imported from Word to Framemaker Have W...
Images Imported from Word to Framemaker Have Weird Artifacts When Publishing to HTML5
Copy link to clipboard
Copied
Problem Description
I am in the process of migrating a fairly large set (>1000 pages, >30 files) of technical documentation from Word to Framemaker 2019 in order to publish future updates simultaneously in both PDF and Responsive HTML5 formats. The existing design standard calls for a 1 pt black border around every screenshot that I would very much like to preserve in both PDF and Responsive HTML5. The problem is that when I add a 1 pt border to the anchor frames that contain the screenshots using Object Properties > Stroke, I see a weird little "shadow" of the anchor frame border in HTML5 output (see screenshots below).
Please note:
- I am aware that I can apply a 1 pt black border to all images using the Publish settings (Settings File > Edit > Style Mapping > Image Settings > Borders). The problem is that this setting does not get applied to the PDF output. My goal is to work on a single Framemaker book that can be published in both PDF and Responsive HTML5 with an absolute minimum of re-styling in between.
- This "shadow" only appears on imported images, but deleting and then re-copying every single screenshot after importing from Word is not a viable solution given the size of the document set.
- I have already spent quite a while trying to use Robohelp to generate Responsive HTML5 from the Word files, but I ran into too many problems maintaining other required formatting. Framemaker gives me the necessary control over formatting, and importing is relatively fast and easy now that I've mapped Word styles to Framemaker paragraph and character styles.
I've been trying to resolve this issue for days now, and it's the last thing stopping me from proceeding with the migration. Any advice would be very much appreciated.
Thank you kindly in advance.
Screenshots
Here's a test document that includes a screenshot, first in Word:

This imports to Framemaker just fine:
I then apply a 1 pt black border and shrink wrap the anchor frame using Esc 0 p and Esc m p (respectively). The black border shows up just fine:
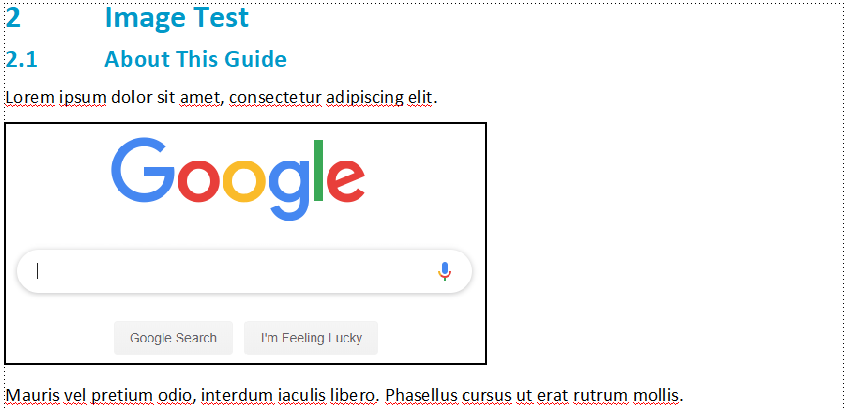
But when I output to Responsive HTML5, there's a little gray box where there ought not be:

I've confirmed that this "shadow" only appears when I apply a Stroke to the anchor frame containing the screenshot by changing the style and thickness of the stroke. The "shadow" changes accordingly. This is a 10 pt cross hatch stroke applied to the same anchor frame:
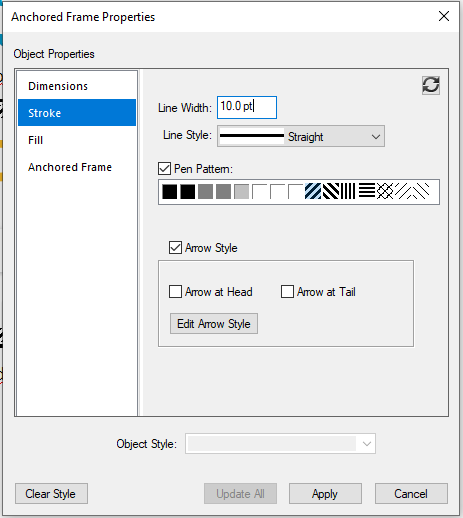
Here's the Framemaker result:
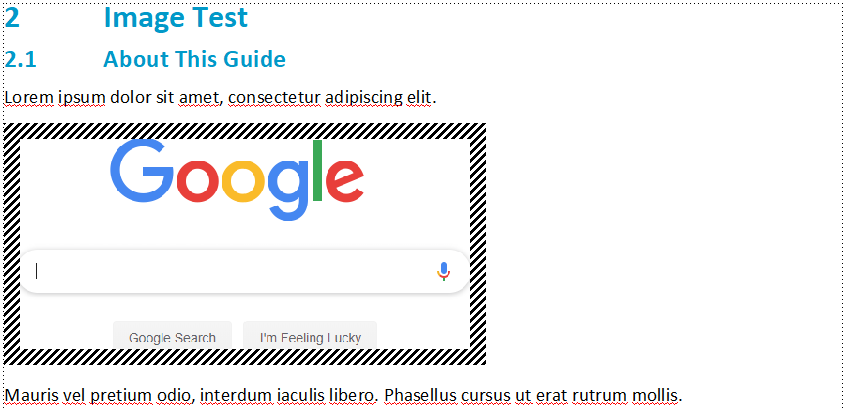
And here's the Responsive HTML5 output. Note that the artifact has changed accordingly:

Where is this stupid little shadow coming from?!
Copy link to clipboard
Copied
While this doesn't address the issue directly, are you able to publish to pdf with the image borders present, and then publish to html5 without image borders? If you can do this, you can always apply the image borders using CSS.
Copy link to clipboard
Copied
Yes, when publishing to PDF, the borders show up perfectly.
I'll explore the CSS option. Thank you very much.
Copy link to clipboard
Copied
Hi Benjamin,
This small artifact looks like an empty object or text frame which was not visible without the borders.
Can you select the anchored frame (or the screenshot) and then press CTRL+A? Is there something selected at the position of this artifact?
Apart from this issue the border works correctly, doesn't it?
Best regards
Winfried
Copy link to clipboard
Copied
Winfried-
Selecting the anchor frame (or the image within it) and then pressing CTRL+A reveals nothing else. Only the original imported screenshot.
Benjamin
Copy link to clipboard
Copied
Hi Benjamin,
Still I believe that this is an additional object in your anchored frame. I do not know why the export would create something like this.
What happens, when you select the screenshot and delete it and then (without any other changes) convert to HTML5? Do you still see this artifact?
When you delete the screenshot and press ESC m p and then convert to HTML5. What happens?
What happens, when you import this screenshot file somewhere else in your document and convert to HTML5?
If the artifact disappears together with the screenshot, can you check the screenshot in a graphics editor (Photoshop, Corel Photopaint or something else)? Do you see any differences? What happens, when you paint part of this artifact area with another color?
Best regards
Winfried
Copy link to clipboard
Copied
What happens, when you select the screenshot and delete it and then (without any other changes) convert to HTML5? Do you still see this artifact?
No, the artifact disappears. Framemaker on the left and HTML on the right:

When you delete the screenshot and press ESC m p and then convert to HTML5. What happens?
Shrink-wrapping the anchor frame with Esc m p appears to convert the anchor frame to 0 x 0 (there is still a 10 pt border applied using Object Properties > Stroke). Publishing to HTML shows the region once occupied by the anchor frame has shrunk dramatically. Again, Framemaker on the left and HTML on the right:

If the artifact disappears together with the screenshot, can you check the screenshot in a graphics editor (Photoshop, Corel Photopaint or something else)? Do you see any differences? What happens, when you paint part of this artifact area with another color?
Copying the image from the anchor frame into Paint and then using the paint bucket to fill with purple reveals nothing hiding in the background:

It really seems like Framemaker is not properly sizing the border for images imported from Word.
Copy link to clipboard
Copied
Hi Benjamin,
Thank you very much for checking all this!
Very strange. I do not have any explanation, but I am sure that Stefan finds a cause.
Best regards
Winfried
Copy link to clipboard
Copied
I tried to reproduce this but was not able to get this effect.
Could you please send me the sample file from your screenshot + your STS file?
Copy link to clipboard
Copied
Could you please send me the sample file from your screenshot + your STS file?
I'll direct message you a link to download them. Thank you.
Copy link to clipboard
Copied
I have tested this on my machine, and the problem seems to be with the embedded image coming from Word (which are of course embedded in FrameMaker as well after importing the Word Document into FrameMaker). I also get the "mystery frame" in the converted graphic in the output.
I also saved the embedded screenshot from Word (right-click on the graphic > Save as Picture) and reimported it into FrameMaker as a referenced graphic. But even then the "mystery frame" is coming in the published output.
If I take a screenshot on my own, save it as a PNG, and import it by reference into the FrameMaker document, the effect does not happen. Even if I embed my own screenshot it's coming fine.
I then took your sample Word document and imported it (untouched) into FM. Still getting the "mystery frame" in output.
But then I just did a simple "save as" of your Word Document with my version of Microsoft Word (Microsoft Word for Office 365 (16.0.10730) 64-bit) as a new DOCX and imported that one again into FrameMaker. Et voilà! No mystery frame is coming any longer!
Can you try to open the word documents you have in the latest version of Word you have and "save as" as a new DOCX and then reimport them into FM and try publishing again?
Copy link to clipboard
Copied
Stefan-
I re-saved both "image test.docx" and one of my actual documents in Word (Version 1906 Build 11727.20210), but both still produce the artifact. The fact that re-saving my Word document on your machine removes the artifacts would seem to indicate that the true problem is with my Word settings. Up 'til now, I've done all of my experimentation in Framemaker, but now I'll shift my focus to Word settings.
Just to confirm this, I created a brand new Word document from the basic Word template:

This Word document was imported to Framemaker using the same .sts file. I applied a 1 pt black border to the anchor frame using using Esc 0 p:

And when I export to HTML5 I still see the artifact:

I put all of these files (screenshot, Word document, Framemaker document, and HTML output) in the folder I already shared with you. I would very much appreciate any other advice you might be able to offer.
Thank you.
Benjamin
Copy link to clipboard
Copied
Strange, strange … What are your settings in Word for saving images in a document?
Mine look like this:

Copy link to clipboard
Copied
Stefan-
I have the same Word settings:

But never mind all that! I've identified a solution:
- Remove the 1 pt black border from the anchor frame
- Apply a 1 pt black border to the image via either the Object Style Designer or Esc 0 p
- Shrink wrap the anchor frame using Esc m p
I don't understand why this makes a difference, but it clearly does (the following screenshots were taken from Word, Framemaker, PDF output, and HTML output, respectively):




One minor issue is that if Borders are visible in Framemaker (View > Borders, or Esc v b), then the anchor frame border conceals the 1 pt black border applied to the image:

But I can live with this.
Actually, wait. This might be the original source of my problem. When I first started importing documents from Word, I tried to apply a 1 pt black border to the images using Esc 0 p. But I couldn't see that the border had been applied because the border of the anchor frame was concealing it. I only resorted to applying the border to the anchor frame because I thought Esc 0 p wasn't working on the image itself.
In any case...
One recommendation for anyone else in my same situation: instead of applying the border to an image directly, it's much easier to create an Object Style using the Object Style Designer (Graphics > Object Style Designer, or Esc g i) that applies the 1 pt black border. Just change the Stroke properties as follows:
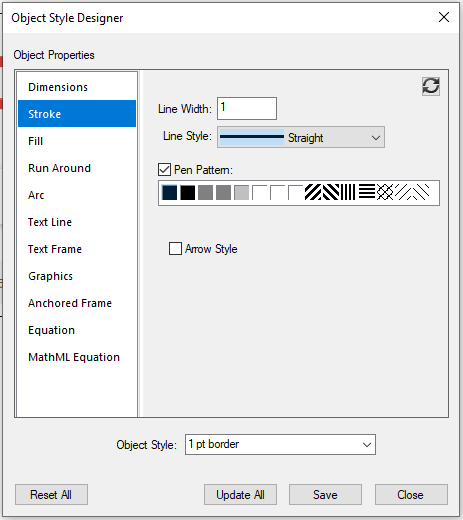
(Leave all of the other areas unchanged.) Give the new object style a name, then save and close the Object Style Designer. Now, you can add the 1 pt black border to an image by simply left-clicking it and selecting the 1 pt border Object Style from the Object Style Catalog.
This also makes it easy to change the border style of every image in the document at once.
Thank you for your help, Stefan.
