Accurately resize repeat pattern artwork to a larger artboard/tile size
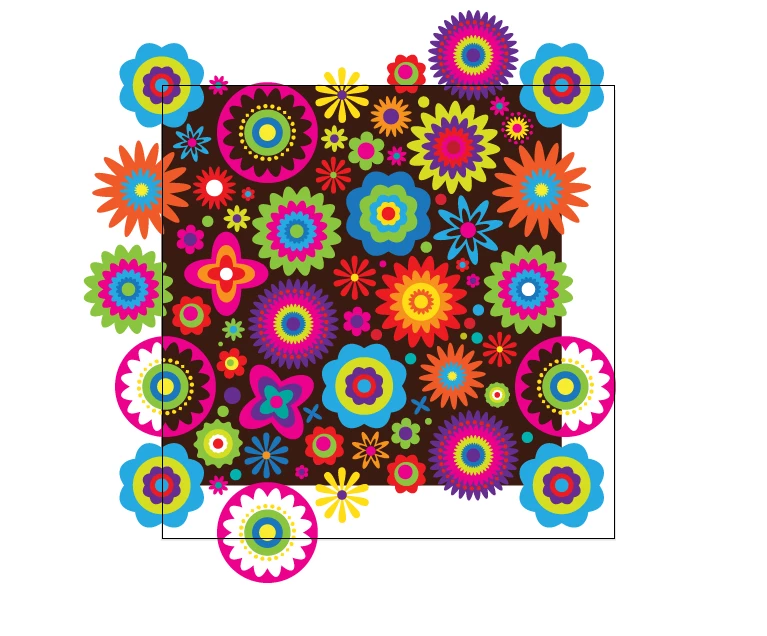
I have a 'tile' which I created a few years ago at a (now seems) random document/artboard size and I want to transfer my patterns from the old tile/artboard size to a new (rounded number 0f 40mm) size.
I have to make sure that the pattern resizes perfectly, if it doesn't the tiles won't match up and my repeat pattern will look bad, so my question is, (using the screen snap attached as reference, the square outline being my new 40mm artboard/tile size and the black square being my previous tile/artboard size) is there a way I can resize the black background and the all of the pattern to fit the new tile/artboard size perfectly please?
I realise that if it was just the black square alone I could set it the X and Y co-ordinates a 0 and make the box 40mm x 40mm but the flowers are the tricky bit and the spill over the black box (until I crop them to make the finished tile for repeating) and therefore to select all of it and set X and Y at 0 won't be correct.
What ideally I need to do is select everything and just resize the black area with the flowers following along so once the black box is in place if the flowers have followed the resizing and repositioning of the black box then the flowers will be in the exact position they need to be to make a perfect tile.
I hope I am explaining this clearly!
Any help would be greatly appreciated.