- Home
- Illustrator
- Discussions
- Re: Accurately resize repeat pattern artwork to a ...
- Re: Accurately resize repeat pattern artwork to a ...
Copy link to clipboard
Copied
I have a 'tile' which I created a few years ago at a (now seems) random document/artboard size and I want to transfer my patterns from the old tile/artboard size to a new (rounded number 0f 40mm) size.
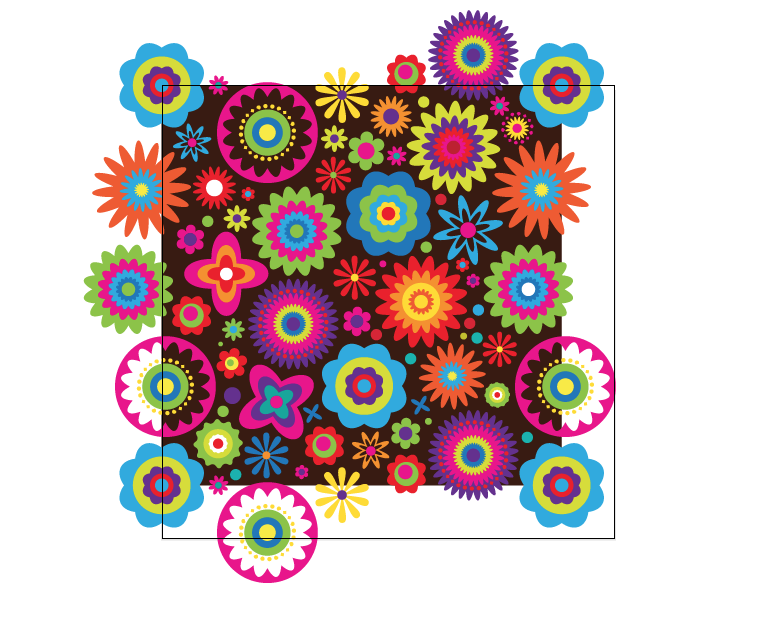
I have to make sure that the pattern resizes perfectly, if it doesn't the tiles won't match up and my repeat pattern will look bad, so my question is, (using the screen snap attached as reference, the square outline being my new 40mm artboard/tile size and the black square being my previous tile/artboard size) is there a way I can resize the black background and the all of the pattern to fit the new tile/artboard size perfectly please?
I realise that if it was just the black square alone I could set it the X and Y co-ordinates a 0 and make the box 40mm x 40mm but the flowers are the tricky bit and the spill over the black box (until I crop them to make the finished tile for repeating) and therefore to select all of it and set X and Y at 0 won't be correct.
What ideally I need to do is select everything and just resize the black area with the flowers following along so once the black box is in place if the flowers have followed the resizing and repositioning of the black box then the flowers will be in the exact position they need to be to make a perfect tile.
I hope I am explaining this clearly!
Any help would be greatly appreciated.
 1 Correct answer
Miss Sparkles,
In 3), with the top left Reference point chosen (to keep the top left corner in place), after the value in the W box insert first * (to multiply) then 1.1338 (the value to reach the 40) and press Ctrl/Cmd+Enter to retain proportions.
Explore related tutorials & articles
Copy link to clipboard
Copied
Miss Sparkles,
As I (mis)understand it, you can just us the Transform palette, click the top left Reference point (to the left) and have Scale Strokes and Effects ticked (in the (flyout) options), then:
1) Click the black rectangle and see the present W (or H) value,
2) Determine the desired scaling factor (40 mm divided by the present value from 1)),
3) Add * followed by the scaling factor from 2) to the W value and press Ctrl/Cmd+Enter.
Always keep a copy of the original artwork before making such changes.
Copy link to clipboard
Copied
Thank you Jacob, though sorry you've lost me after point 2, so the percentage I need to scale up by is 113.38% can you just elaborate on what I have to do next please?
Copy link to clipboard
Copied
Miss Sparkles,
In 3), with the top left Reference point chosen (to keep the top left corner in place), after the value in the W box insert first * (to multiply) then 1.1338 (the value to reach the 40) and press Ctrl/Cmd+Enter to retain proportions.
Copy link to clipboard
Copied
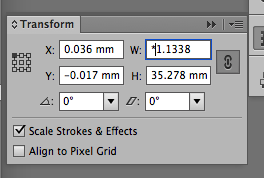
Still a bit confused, insert an asterisk followed by 1.1338 into the W values? That hasn't worked?
Copy link to clipboard
Copied
Miss Sparkles,
Here is an amended version:
1) Click the black square (black fill) currently in use and see the present W (or H) value,
2) Determine the desired scaling factor, the size of the stroked square (is it actually 40 mm?) divided by the present value from 1)),
3) Select all the artwork and then add * followed by the scaling factor from 2) to the W value and press Ctrl/Cmd+Enter, in other words add it in the W box after the value already there, so that the value will be multiplied by 1.1338; it is important that the present value is not selected, otherwise it will be deleted.
From the value in the H box it seems that the present W/H value is only 35.278 mm, so multiplying it with 1.1.338 (when you add you would get 35.278 mm*1.1338 in the box which would give the 40 mm, which seems to indicate that the artwork outside the filled black square is not included.
By the way, it may be convenient to move the artwork to X = Y = 0.
Copy link to clipboard
Copied
Oh my gosh, you mean literally put *1.1338 in after the W value and then hit Cmd/Shift? That has done it!! Well I never knew you could do that, thanks so much!

Copy link to clipboard
Copied
Miss Sparkles,
Crossposting, and you are welcome.
Copy link to clipboard
Copied
Yes, I was deleting the W value before putting the asterisk in, I never knew you could add something after the value, that's so clever!
Yes, crossposting indeed.
Thanks again, chuffed to bits, I have a lot of repeat patterns I want to enlarge to this size so this now will save me a lot of time.
Copy link to clipboard
Copied
Miss Sparkles,
As you may have guessed, you can also use / and + and - in the same way.
You may also extend the use to many other boxes, such as adding to (or subtracting from) the X and Y values, and in the Object>Transform>Scale or Move, where you can even set a value as a (single) operation, such as such as a horizontal move of 275.316-173.114 (convenient if you wish to move everything by the amount that moves a specific Anchor Point from an initial X value of 173.114 to a final X value of 275.316). Working with Scale, remember to multiply by 100 (as in 5000/45 to scale from 45 to 50).
In many cases it is easier to let Illy (job description Adobe Illustrator) do the calculations. She is always eager to help, but (so far) she has only learned to allow one operation; it would be even easier if you could add the whole calculation, as in *40/35.278.
It could form the basis of a feature request, I believe.
Copy link to clipboard
Copied
Thanks so much Jacob, your help has been muchly appreciated, goodness knows where I'd be without the help of you guys on Adobe Forums, you're excellent.
Copy link to clipboard
Copied
For my part you are welcome, Miss Sparkles.
The advice from Ton was indeed invaluable, as always.
Copy link to clipboard
Copied
![]()
Copy link to clipboard
Copied
MissSparkles75 wrote
I have a 'tile' which I created a few years ago at a (now seems) random document/artboard size and I want to transfer my patterns from the old tile/artboard size to a new (rounded number 0f 40mm) size.
Be careful when using mm for the tile size.
If you ever want to export the tile as an image (pixel) format, 40mm will result in extra, unwanted pixels.
40 mm becomes 113,3858 px. Because a fraction of a pixel does not exist, the resulting tile wille export like this:
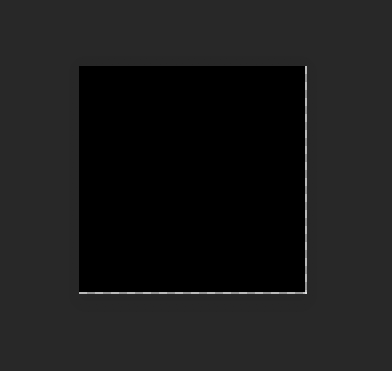
adding extra transparent pixels to the tile.
If you want to export as an image It would be better to use point or pixels as the unit.
113 px would not give you the unwanted pixels when exported at 72 ppi or a multiple of 72, but the mm size would be 39,864.
Copy link to clipboard
Copied
Thanks Ton, that is excellent, invaluable advice, I didn't know that, I shall resize the tile to be 113 pixels so I don't get any unwanted pixels. Thanks so much.
Copy link to clipboard
Copied
Hello Ton, so I just went to change my document size from mm to pixels in order to make the doc 113px and thought all would become clear but I'm trying to work out how you know 113 pixels would not give me extra transparent pixels, can you explain for me please? Is it just a case of always just using pixels and therefore no fractions of pixels will be used (because they don't exist)?
I would most likely be exporting the tile at 300dpi for professional printing.
Many thanks.
Copy link to clipboard
Copied
Miss Sparkles,
Illy (job description Adobe Illustrator) uses pixels as an actual unit equaling 1/72 inch. And 1 inch equals 25.4 mm
So, with 113 px = 113/72 in = 25.4*113/72 mm ~ 39.864 (0.136 mm smaller than 40 mm) you get the closest you can to 40 mm with whole pixels ; 114 px ~ 40.217 mm (0.217 mm larger than 40 mm).
Obviously, if you wish to have a print of exactly 40 mm, you will need to stay with mm.
But actually, since you are creating vector artwork, you may get the best of both worlds if you scale/create the artwork in mm to get the exact 40 mm, then create the corresponding PNG24 image (never use JPEG for crisp and clear artwork like yours) using the Legacy Save for Web and set the Image Size to 113 or 114 px (or whichever value suit the purpose); or if applicable, you may use the vector format SVG for web/screen use without having to worry about pixel sizes.
And by the way, why export at 300 PPI instead of saving a copy as PDF and let the printer get the best possible from it?
Copy link to clipboard
Copied
Okay, I'm a bit confused (I'm more creative than mathsy!) but let's say I create the tile 40mm x 40mm, I drag the tile into the Swatches to make a pattern tile, then create an area which I fill with that pattern and save the artwork, which includes that patterned area, as for example a pdf, are we saying that the extra transparent pixels will appear in my pattern when printed professionally?
Copy link to clipboard
Copied
Miss Sparkles,
For print, you can just use the artwork as it is (based on the 40x40 mm tile), preferably saving as PDF.
For web or (other) screen use, you should change the size of the whole artwork into the corresponding whole pixel size that best fits your purpose. You can do that by using the exact same artwork size as for print, simply setting the desired pixel size in the Image Size window (using Save for Web); or using SVG if applicable.
By the way, for best appearance of a PNG24 (or other raster format if you must), tick Art Optimized in the Image Size window.
Copy link to clipboard
Copied
Gotcha, thanks so much.
Whilst I'm here and because you have referred to 'saving a copy as PDF and let the printer get the best possible from it' can I just ask another question, I hope you don't mind, it's just something that plays on my mind and I'd like to know whether I am doing something wrong?
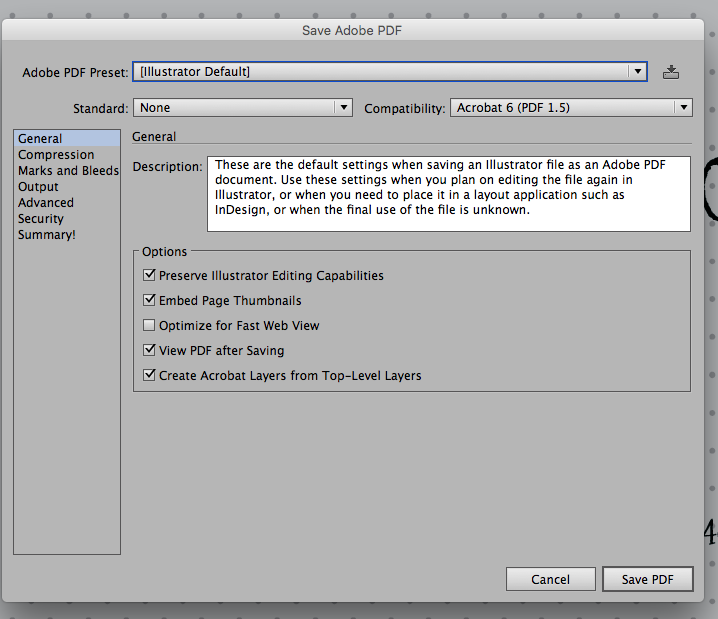
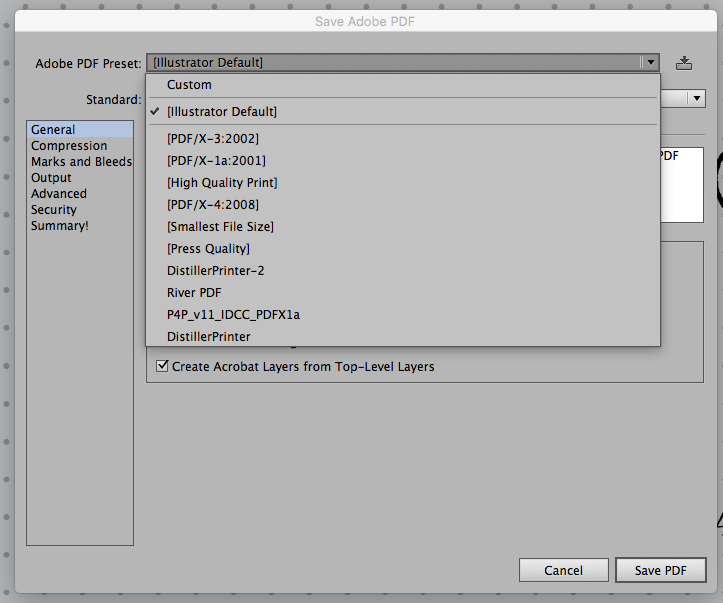
Often when I have sent items to be printed professionally and have asked the print house for their PDF specifications in order to set up my PDF correctly for the best possible results I am often met with a question as to why I am requesting them, (by PDF specifications I mean the options that I am showing in the screen snaps below, and all the options that come within those selections), am I wrong to be asking for this information from the print house or is there just a 'standard' pdf I should send and let the print house make sure the result is of a high quality?
I am wary of sending a PDF willy nilly as I worry that it may be too low resolution when printed.
Thanks, and sorry for the extra question!
Copy link to clipboard
Copied
Miss Sparkles,
Presuming your Document Color Mode is CMYK and the artwork is going to be printed with CMYK inks, with a PDF you will avoid colour wrecking from a double conversion (CMYK>RGB>CMYK), and you can get the best possible printing resolution (also differentiated depending on kind such as higher resolution for line art/monochrome), as compared with an Export to a format like PNG24,
It certainly makes sense to ask the printer because everything depends on their equipment and which PDF versions they (can) handle.
You may forget about Illustrator Default, and about Preserve Illustrator Editing Capabilities, and the is no reason to consider reducing the file size (compression), but make sure that you Save a Copy and/or save with another name lest you lose your original full artwork.
Concerning the options in the second screenshot, you can read on here under Adobe PDF Presets,
How to create Adobe PDF files in Illustrator
and here under Color management,
Adobe PDF options | Illustrator
To go (far too) far out concerning (apparent) resolution, you can also have a look at concepts like these,
Copy link to clipboard
Copied
Jacob,
What do you mean "avoid colour wrecking from a double conversion (CMYK>RGB>CMYK)", what is colour wrecking and what's a double conversion?
"(also differentiated depending on kind such as higher resolution for line art/monochrome)" Can you explain this a bit more please, I don't understand your terminology here?
Thanks for the links. I think to summarise it's best to speak to the printers who will receive the print job, isn't it?
Copy link to clipboard
Copied
Miss Sparkles,
If your Document Color Mode is CMYK, so are the colours in all your artwork (whether you have set them as such or as (the nearest) RGB equivalents).
The (most used) raster formats PNGs and (normal, non CMYK) JPEGs are fundamentally RGB corresponding to RGB Color Mode.
Print is CMYK.
So, going through such an Export, then print from that implies that double conversion; and such a beating will leave a rather dead horse.
As you can see in the first link, with the PDF options (you can set the resolutions as you wish with customized setting), but the general resolution is 300PPI for colour/greyscale (where the ink(s) will be diluted by halftoning (see the last two links) and 1200PPI for monochrome/line art (where 1 solid ink is used) so the latter will be crisp and clear instead; reducing the latter to a general resolution of 300PPI will make line art just as woolly as the areas with colour transitions.
I mentioned this because it can prove important (especially) in other connexions.
Copy link to clipboard
Copied
Miss Sparkles,
I think to summarise it's best to speak to the printers who will receive the print job, isn't it?
Certainly; too many do it too little, I am afraid.
Copy link to clipboard
Copied
Miss Sparkles,
Speaking to the printer just came up here, with crucial advice from Test Screen Name:
-
- 1
- 2

