Mark,
As I (mis)understand it, you may:
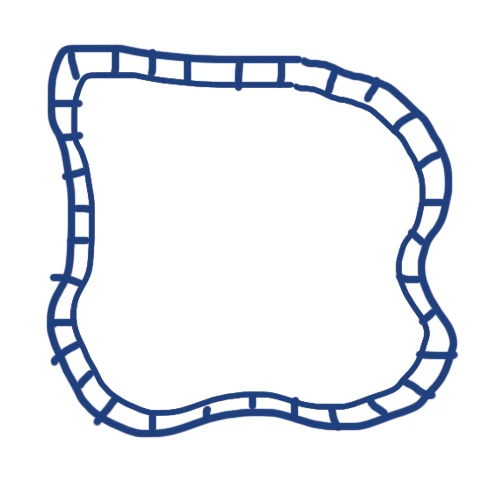
1) Create the race track as a stroke/nofill path with a Stroke Weight equalling the width of the outer bounds of the race track (40 or something) and the colour of the outer line set (black maybe);
2) In the Appearance palette flyout click Add New Stroke with a Stroke Weight equalling the width of the inner part (the squares) of the race track (30 or something) and the colour of the outer line set (white maybe);
3) In the Appearance palette flyout click Add New Stroke with the same Stroke Weight as in 2) (30 or something) and the colour of the dividing lines, same as the outer line set (black maybe), then tick Dashed LIne and set the Dash to the desired dividing line thickness (5 or something) and set the Gap to the Stroke Weight (30 or something).
With the figures given (in some unit which could be mm), you will get a path with 30 x 30 (more or less depending on curvature) squares with bounding lines that are 5. You can try that to get a first impression, and choose the right proporties as desired.