

- Home
- Illustrator
- Discussions
- Re: Basic Pattern Brush Question: Empty Path techn...
- Re: Basic Pattern Brush Question: Empty Path techn...

Copy link to clipboard
Copied
Hi,
I'm struggling to recall how to implement this technique correctly- you know the one...
You're making a pattern brush component but you need a slight overlap or offset in the graphics so you drag the brush to the canvas and tweak it using the empty background Path to reposition your artwork.
Once you're done you Alt-drag it on to the Pattern brush to update your original brush.
I must be doing something wrong because my pattern brush doesn't use the empty path for reference, instead it uses the whole damn artwork! (see screen grab).
What have I forgotten?
Is there a video tutorial that shows how to do this right?


 1 Correct answer
Fixed it- had a look at your post here Monica:
pattern brush with negative spacing?
and it appears the technique is fine as is except that I found it now only works if you group the artwork components above the Empty Path (I found leaving that name as "Rectangle" was fine for this purpose).
Maybe that's what I forgot?
I could have sworn it should work OK though so long as the empty path is the lowest in the stack.
Here's the proof:
BTW: The "knees" (bulging greenish pipe joints) are also a Pattern B
...Explore related tutorials & articles
 8
Replies
8
8
Replies
8

Copy link to clipboard
Copied
Are you creating your brush using the automatic corners and then adjusting the automatic corners?
Somehow that does not work.
When you want to use automatic corners, don't adjust them.
When you want to adjust, at least be very careful with automatic corners.
Copy link to clipboard
Copied
Thanks Monica but no, that's not what I'm doing.
I recall I used the technique (successfully) on a brush that used a png a long time back.
I was able to use the well-known "Empty Path" technique to arrange overlaps and offsets then but I've forgotten something in the intervening years.
Copy link to clipboard
Copied
If you're referring to the invisible rectangle, then there are two important things:
it needs to be without fill or stroke
it needs to be bottom of the object stack
Of course it needs to be a perfect rectangle, not even slightly rotated or tilted.
Copy link to clipboard
Copied
Yeah, that's what I've done but it's still not bahaving.
I even tried naming the empty rectangle "<Path>" as that's what the base AI generates is called.
No joy.
Copy link to clipboard
Copied
Fixed it- had a look at your post here Monica:
pattern brush with negative spacing?
and it appears the technique is fine as is except that I found it now only works if you group the artwork components above the Empty Path (I found leaving that name as "Rectangle" was fine for this purpose).
Maybe that's what I forgot?
I could have sworn it should work OK though so long as the empty path is the lowest in the stack.
Here's the proof:
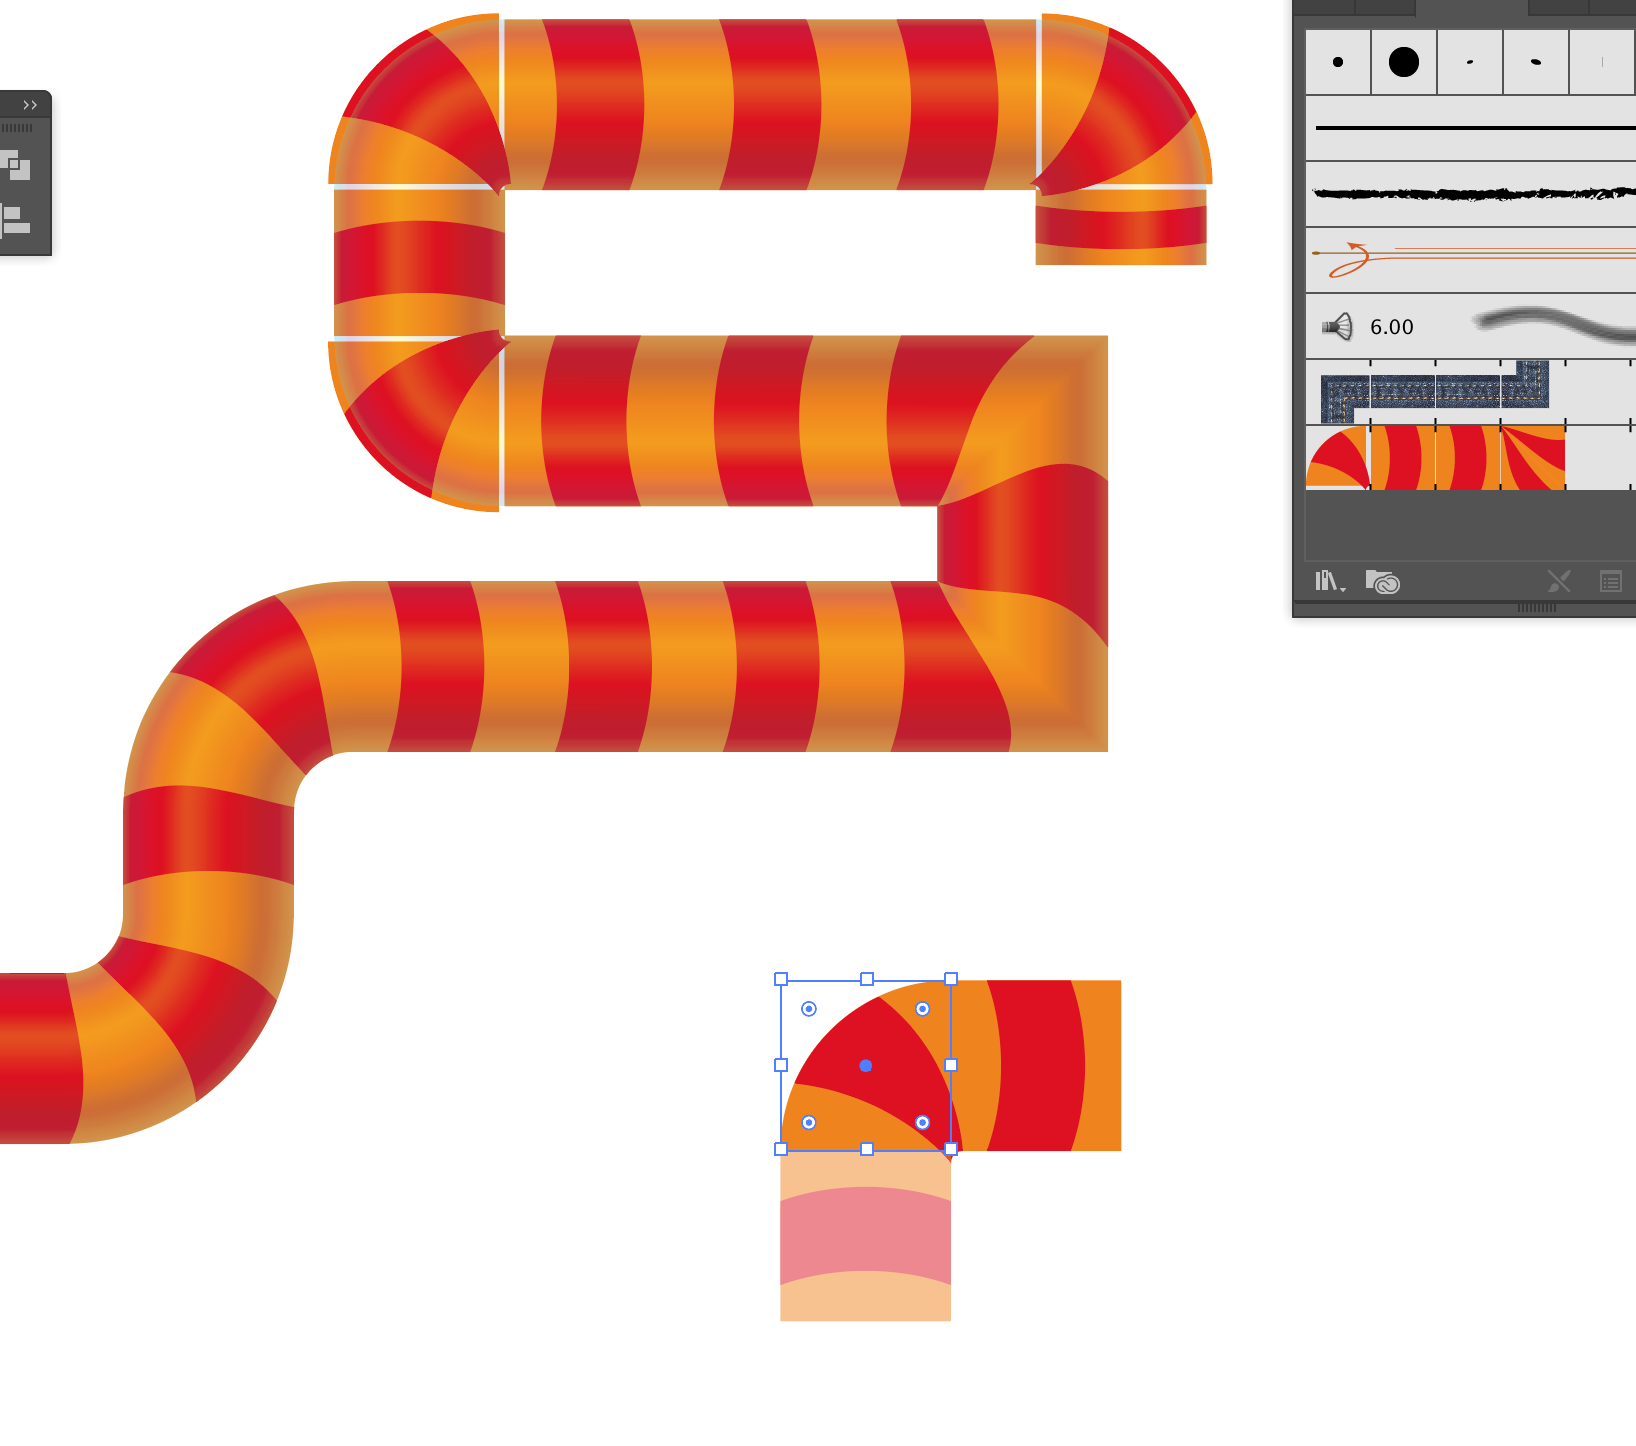
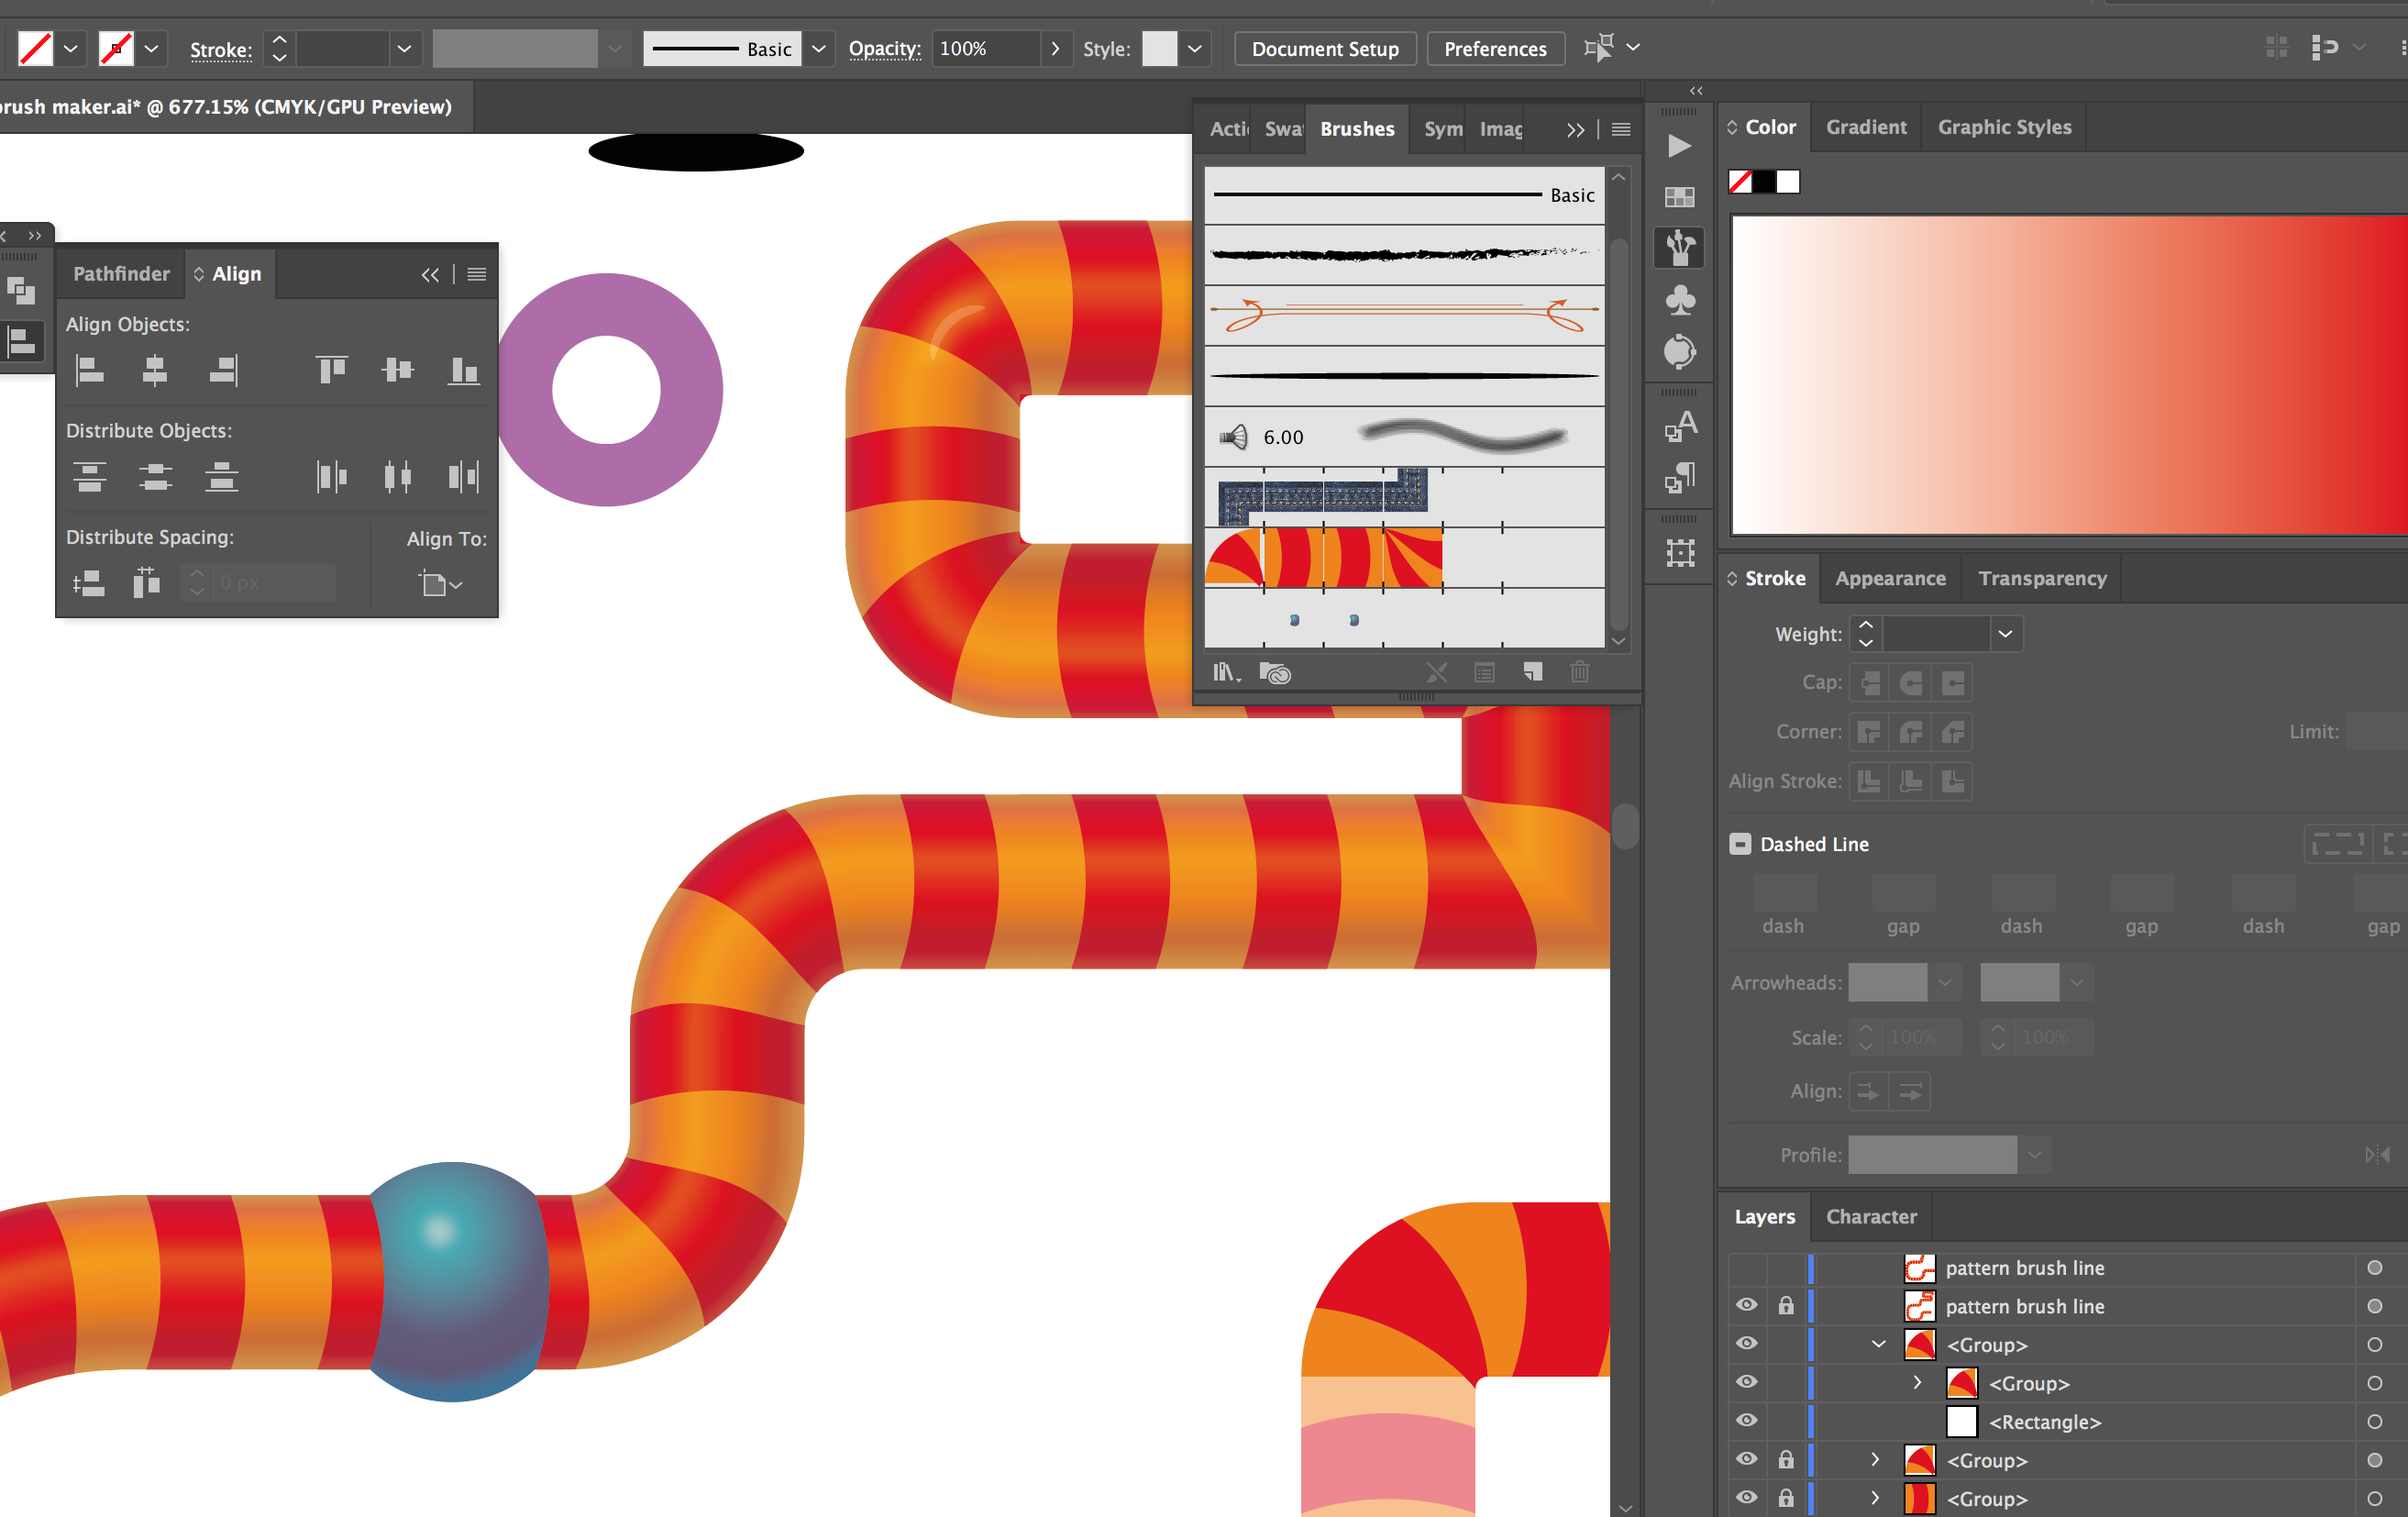
BTW: The "knees" (bulging greenish pipe joints) are also a Pattern Brush with a gradient that uses an expanded gradient fill, blurred and clipped and the pipe shading is done with an overlaid Gradient Stroked path, the same thickness as the striped pattern brush.
Both useful techniques for anyone who might stumble across this post in years to come.
Thanks
Copy link to clipboard
Copied
Thank you for the added information and glad you could solve it.
Nice design!
Can you mark your post as the correct answer? Thank you.
Copy link to clipboard
Copied
Thanks Monica, done.
Copy link to clipboard
Copied
Just realised how many of these issues are still problematic so long after another long-running thread here...
pixellation of embedded images in a pattern brush
That thread also described issues with pattern brushes using the empty rectangle technique not always updating correctly.
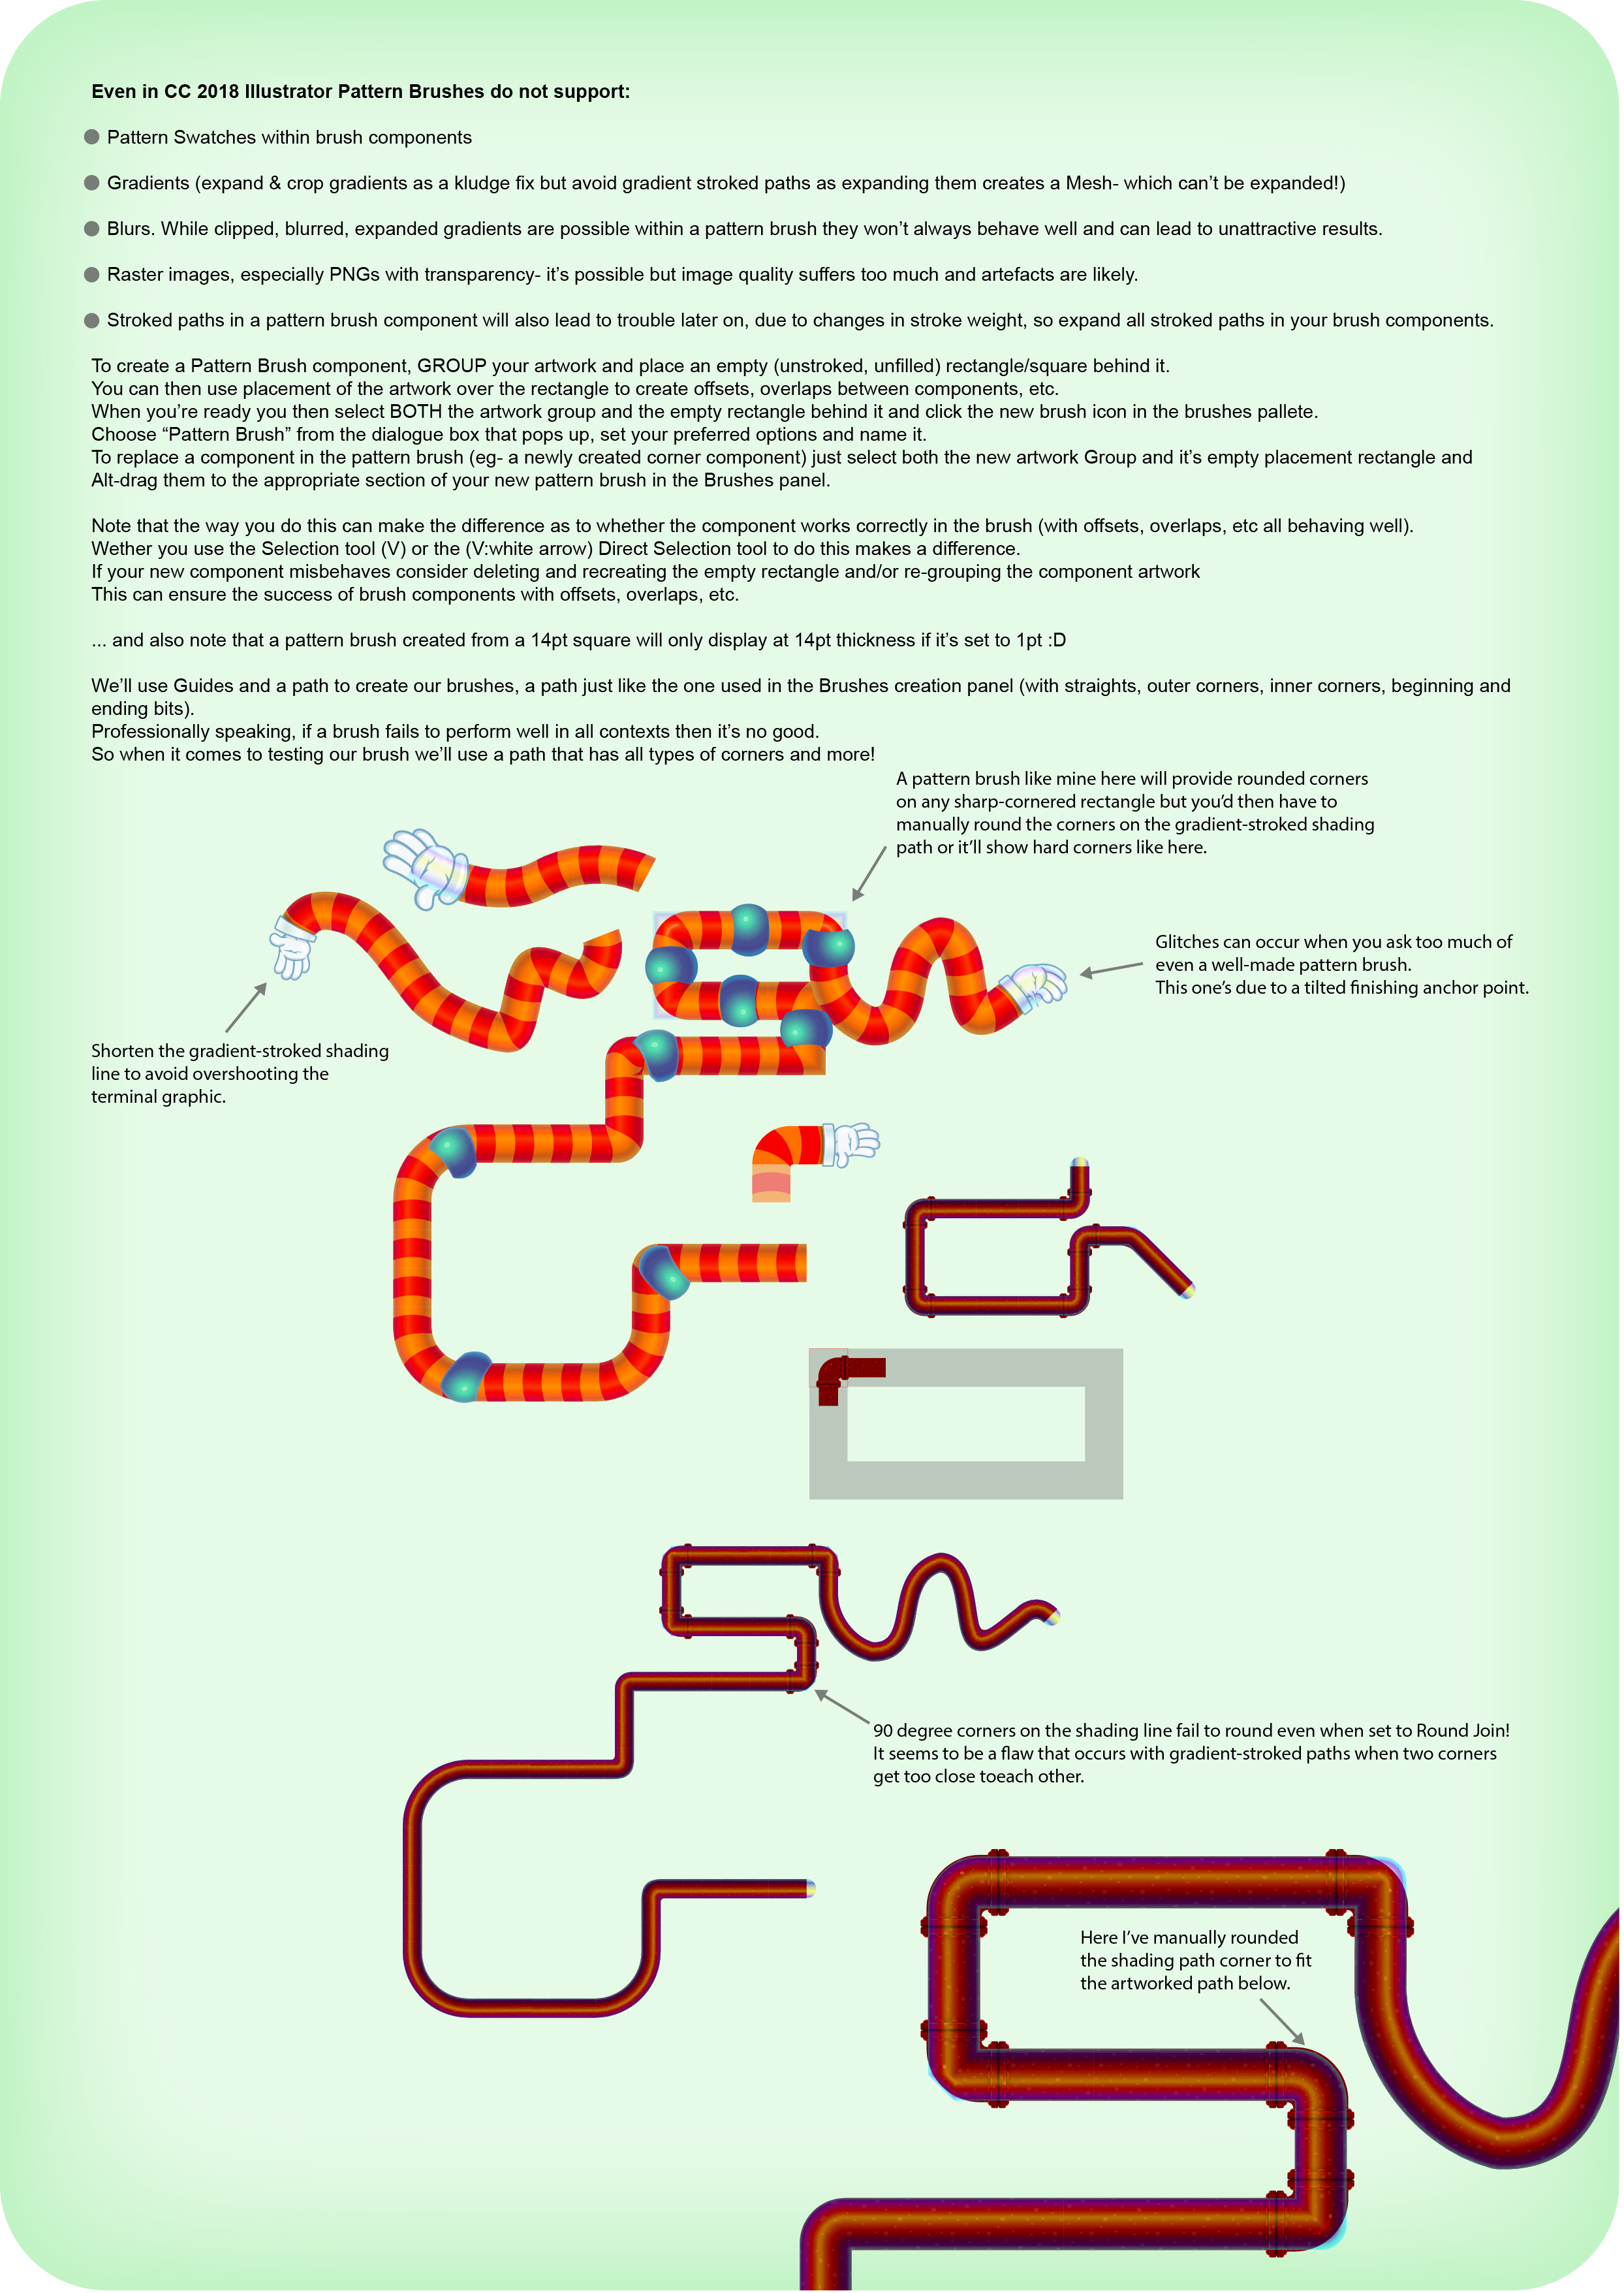
I've decided to start a file that demonstrates useful techniques for pattern brushes and outlines some of the pitfalls, as much for my own reference as to help others (colours are off as I forgot to embed the ICC profile).

Get ready! An upgraded Adobe Community experience is coming in January.
Learn more
 AdChoices