Piter,
I believe that this whole thread has been driven by the woolliness of the concept of distance, which have made us all give to the right answer to the wrong question:
More specifically, it is like the question: how far is it from here to there?
In our trying to suggest solutions we have all worked on the understanding that you are measuring distance along the path, which is the requirement in (almost) all other cases, whereas you are measuring distance across the Artboard/Workspace, thus corresponding to the equally significant difference between distance along the road(s) and as the crow flies.
As I (mis)understand it now, the solution is of a completely different kind.
Smart Guides being your friends saying when you are within snapping distance, one way is to:
1) Create your dot circle as desired, then create a nostroke/nofill circle with a W = H = twice the desired centre to centre distance exactly on top of the dot circle, then Ctrl/Cmd+G to Group them (you can keep the original somewhere convenient for further use and work with a copy, or just grab the set for the next path);
With this, any spot on the nostroke/nofill circle is exactly the desired distance from the centre of the dot, and therefore it acts like one ruler working in every direction at once;
2) ClickDrag the set by the common centre where Smart Guides say centre, first to the start of the path (Smart Guides saying anchor), then for each following dot Alt/OptionClickDrag (thereby moving a copy) to the next spot where the current circle crosses the path; where Smart Guides say intersect; you can get hone in by watching the nostroke/nofill circle getting close to the centre of the former dot, and you can use the Bounding Box of the former dot as a guide on vertical/horizontal parts, but overall it is easy to get close enough be eye and then move about till Smart Guides can help.
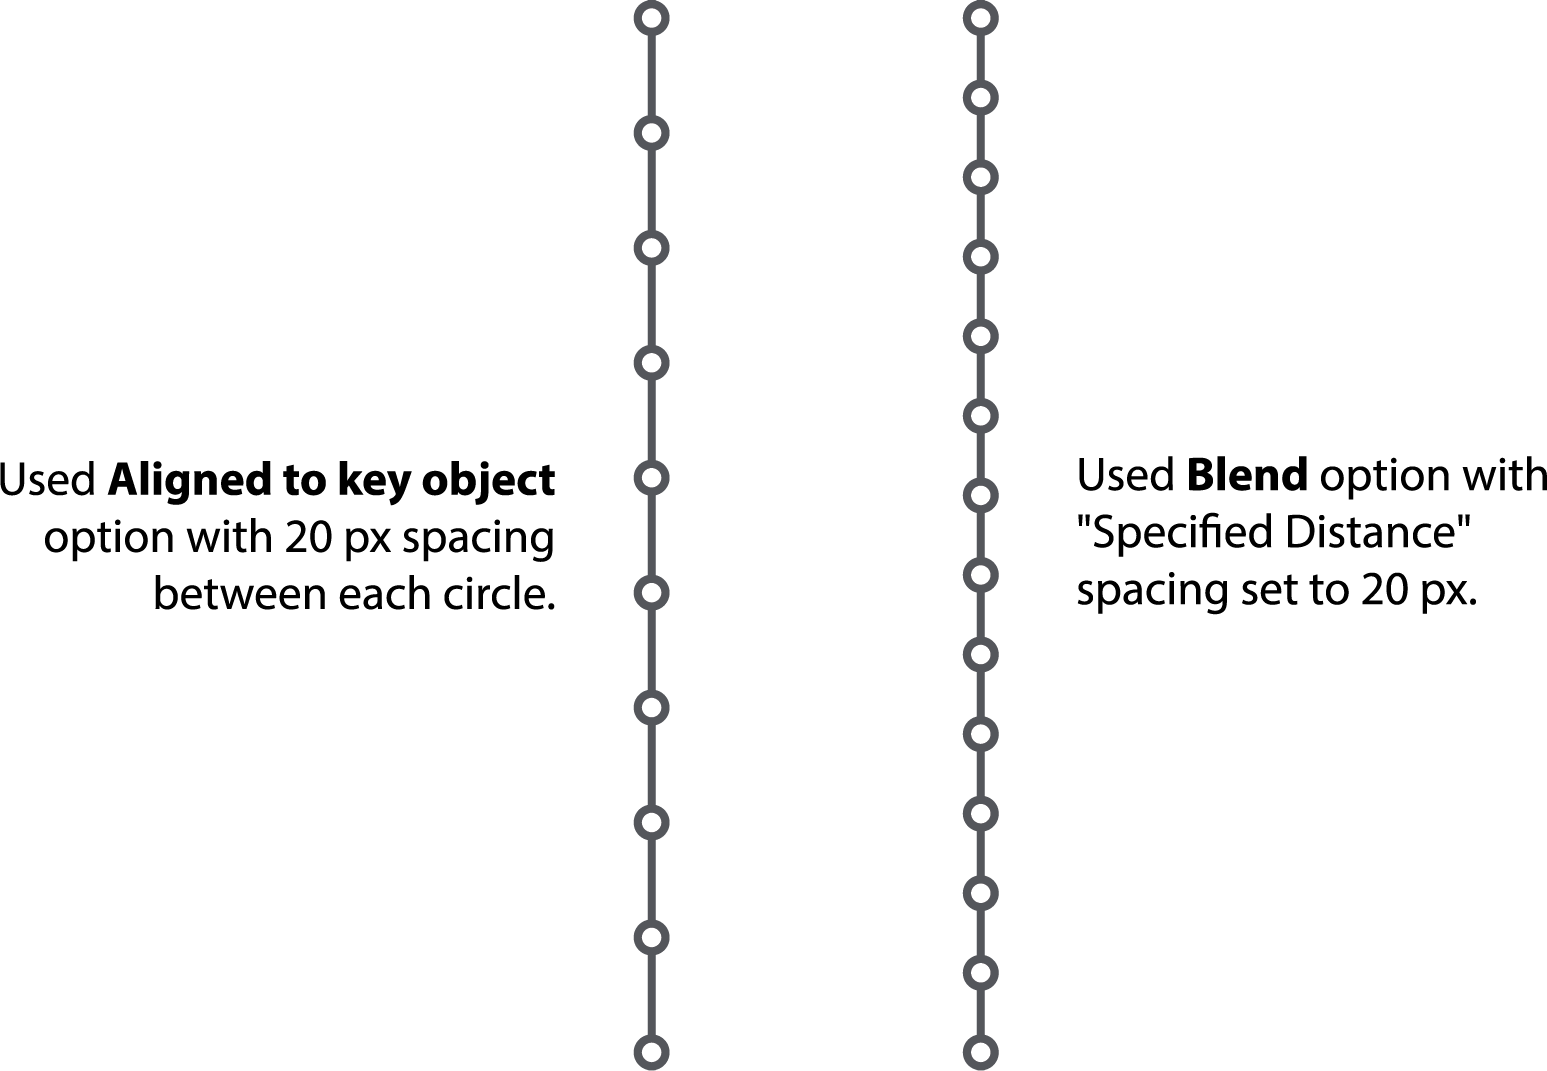
Edit: You can see the difference clearly here, and also insert other places of your own choice:
https://www.freemaptools.com/how-far-is-it-between-london_-uk-and-glasgow_-scotland.htm
Edit edit: If you (still) wish to have a learger dot circle at the start and end, you may start with the following:
0) Create your larger start/end dot circle as desired, then create a nostroke/nofill circle with a W = H = twice the desired distance to the first normal dot circle (or with a W = H that gives you the desired spacing bewteen the (outer bounds of the) dot circles) exactly on top of the larger dot circle, then Ctrl/Cmd+G to Group them (you can keep the original somewhere convenient for further use and work with a copy, or just grab the set for the next path), and then ClickDrag it by the centre to snap to the start Anchor point;
Then go on with the normal circle set as in 1) and 2), and then:
4) Alt/OptionClickDragging the large circle set by the centre to snap to the end Anchor point.


 25
Replies
25
Replies


 AdChoices