

- Home
- Illustrator
- Discussions
- Re: Convert a solid filled shape into a single lin...
- Re: Convert a solid filled shape into a single lin...

Copy link to clipboard
Copied
Hello,
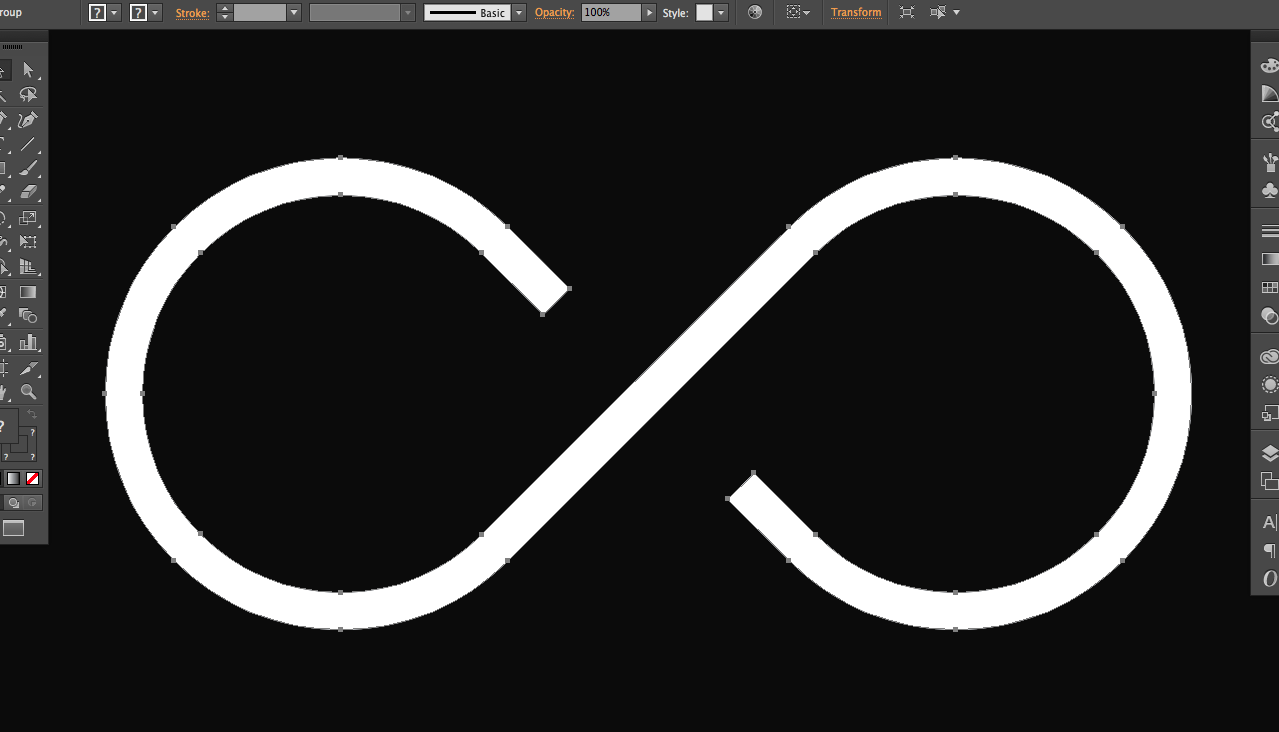
I am trying to convert a solid fill object (see attached image) into a single line.
The reason I want to do this is so that I can make the solid fill object thinner.
If it was a single line, this would be easy, because I could simply reduce the stroke of the line and have control over how thin the line was.
Is this possible please without having to re-draw it.
Thank you.


 1 Correct answer

James,
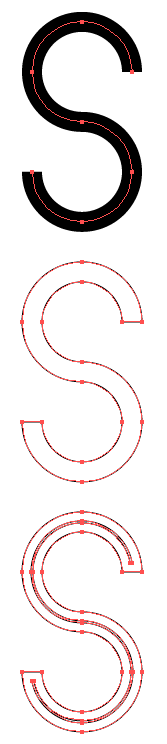
Here is an improved description, and a set of screenshots (using a Helvetica S):
1) With the Direct Selection Tool (first deselect by Clicking an empty spot and then) Click each end path segment and press Delete (that will give you two paths forming the curved parts);
2) Select everything and switch from Fill to Stroke in the Toolbox (that will give you stroked paths (and you can see what you are doing));
3) Object>Blend>Blend Options, set Spacing to Specified Step with 1 step (that will prep
...Explore related tutorials & articles
 27
Replies
27
27
Replies
27
Copy link to clipboard
Copied
Antistandard,
You may (save a copy of the original path so you can fall back on it):
1) With the Direct Selection Tool Click each end path segment and press Delete (that will give you two paths forming the curved parts);
2) Select everything and switch from Fill to Stroke in the Toolbox (that will give you stroked paths (and you can see what you are doing));
3) Object>Blend>Blend Options, set Spacing to Specified Step with 1 step (that will prepare the right blend);
4) Select everything and Object>Blend>Make, then Object>Expand Appearance, then delete both the original paths (that will give you the stroked path midway between the curved paths), then set the Stroke Weight as desired..
Copy link to clipboard
Copied
Thank you Jacob,
I can't seem to get this to work sorry.
I deleted all 4 end corners of my path, then changed the object to stroke
not fill, then did the blend options but the 'preview' button is disabled
at this step and after changing the options to what you suggested nothing
happened.
thank you though, i'll keep trying.
James
On Mon, Oct 5, 2015 at 4:22 PM, Jacob Bugge <forums_noreply@adobe.com>
Copy link to clipboard
Copied
James,
What happens if you click the end path segments as suggested in 1), not the Anchor Points (just Click between them), then go on as suggested? That should ensure that you only have the two curved paths.
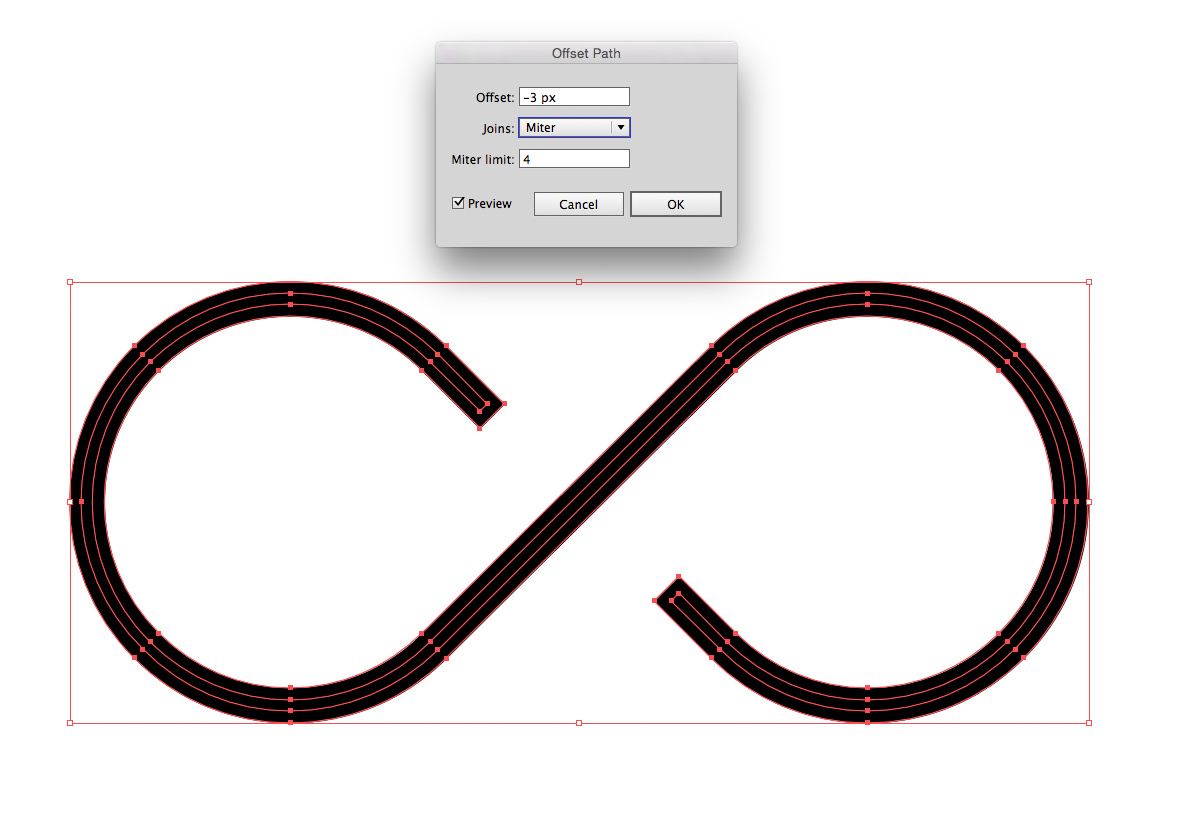
As far as I can see the (negative) Offset Path will make the resulting path shorter, and it will still result in a filled path instead of a path with an easily (re)adjustable Stroke Weight.
And as far as I can see, the filled path must have started out as a stroked path that was Object>Path>Outline Stroke. So if the original path is hidden somewhere, you can just use it again. Without that, the 1 step blend may be seen as the reversal to it (as accurately as can be done).
Copy link to clipboard
Copied
James,
Here is an improved description, and a set of screenshots (using a Helvetica S):
1) With the Direct Selection Tool (first deselect by Clicking an empty spot and then) Click each end path segment and press Delete (that will give you two paths forming the curved parts);
2) Select everything and switch from Fill to Stroke in the Toolbox (that will give you stroked paths (and you can see what you are doing));
3) Object>Blend>Blend Options, set Spacing to Specified Step with 1 step (that will prepare the right blend);
4) Select everything and Object>Blend>Make, then Object>Blend>Expand, then Ctrl/Cmd+Shift+G to Ungroup, then hide or delete both the original paths (that will give you the stroked path midway between the curved paths), then set the Stroke Weight as desired (in the screenshot both paths are kept to show that the middle path fits).


Copy link to clipboard
Copied
This was just a 'stroke' of genius!
Copy link to clipboard
Copied
Thank you for the kind words, yatrikb.

Copy link to clipboard
Copied
But what if it´s a font like Arial Black with non uniform shapes?

Copy link to clipboard
Copied
Certain things will not work very well or at all.
You can try brushes or variable width strokes
Copy link to clipboard
Copied
Kenneth,
Have you tried the long description, which was used on a Helvetica S?
Almost all fonts, including Helvetica and Arial (including Black) have non uniform shape.
As a curiosity, in days long gone, among certain folk, Arial was known as fake Helvetica.
Copy link to clipboard
Copied
James,
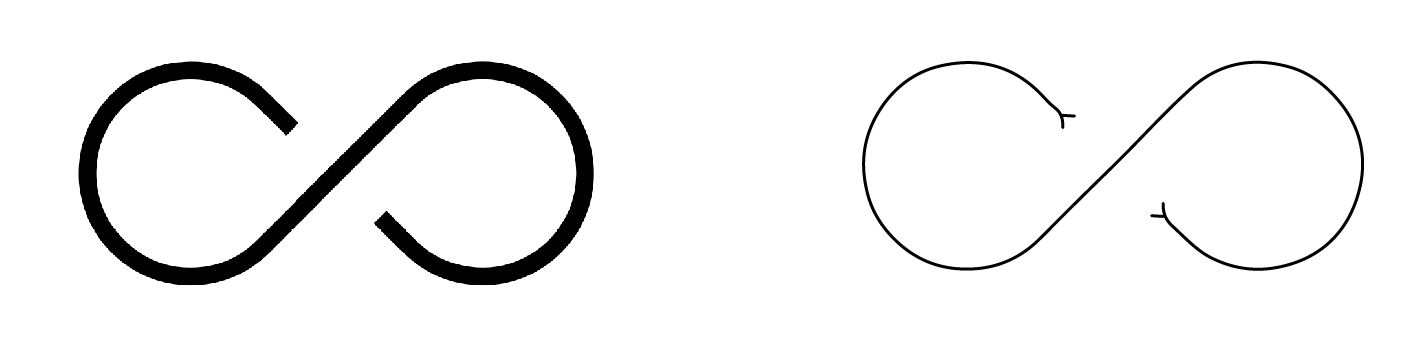
And here is another way using Offset Path to get the full length and (also) accurate shape of the stroked path, here starting with the original stroked path (as 0) to show the fundamental identity:
0) Select the original stroked path and Object>Path>Outline Stroke (this is what has been done already, in the past);
1) Select the filled path and switch from Fill to Stroke in the Toolbox (that will give you stroked paths (and you can see what you are doing));
2) With the Direct Selection Tool (first deselect by Clicking an empty spot and then) Click each end path segment and press Delete (that will give you two paths forming the curved parts), then Ctrl/Cmd+Shift+G to Ungroup;
3) Select one of the paths and increase the Stroke Weight to equal the distance between the paths (identical to the original Stroke Weight);
4) Object>Path>Outline Stroke;
5) Switch from Fill to Stroke;
6) Cut at the ends of the desired mid path with the Scissors Tool and delete the unwanted part/path with the end segments;
7) Select the mid path and increase the Stroke Weight to the original value; now it is identical to the original.
The original shapes of the filled path are kept (visible) so you can see the development and accuracy clearly.
It is crucial to use Object>Path>Outline Stroke on an open path as here to keep the full length, because the path will be shortened for a closed path as you can see on the additional image below.

Copy link to clipboard
Copied
To make it thinner just use Object > path offset path or Effect > Path > Offset path with a negative value.
Copy link to clipboard
Copied
Thank you Monika,
A negative value doesn't seem to do anything in my version of illustrator
unfortunately.
Thanks for the help though.
James
On Mon, Oct 5, 2015 at 4:35 PM, Monika Gause <forums_noreply@adobe.com>
Copy link to clipboard
Copied
Antistandard schrieb:
Thank you Monika,
A negative value doesn't seem to do anything in my version of illustrator
unfortunately.
Then the value is probably too high.

Copy link to clipboard
Copied
James,
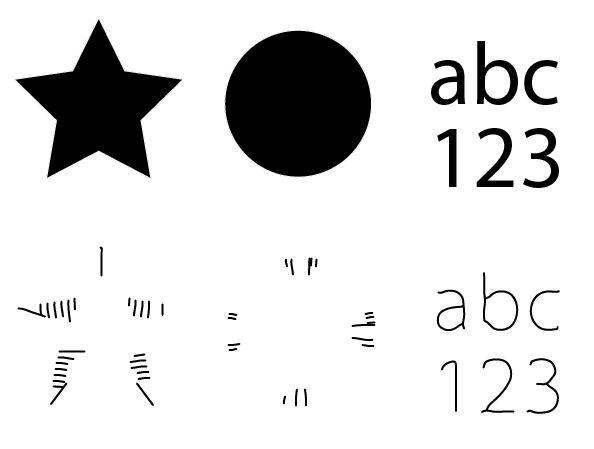
To convert all the shapes to lines is almost impossible, as you know all the shapes have X and Y dimension. For example how can you convert an ellipse to line?
Ok, maybe, a line with a good profile can do that. But what about the star? The result is smaller shape.
If you have one or two shapes, you can use all above mention methods. But what about some lines of text?
There is another approach that can convert shapes to lines, but it works best with letters and numbers.
First you Rasterize (object>Rasterize), and then you Image trace, using LINE ART preset.
I hope this helps!

Copy link to clipboard
Copied
Monika is correct — just use Offset Path if you want to make the shape thinner. Incidentally, if you really want to turn this particular shape into a single path, it should take you about 30 seconds to make it from scratch. Take a circle, delete one of the four arcs, rotate 45°, flip and duplicate, connect two of the endpoints, and extend the others a bit.

Copy link to clipboard
Copied
Got this one to work. Thanks.
Found all other ways too complicated to follow for my purpose.
Copy link to clipboard
Copied
Ricky,
That is fine, but only if you have lower/other ambitions than James (the OP = original poster), firstly that you can live with a shortened path = greater distance between the open ends, secondly that you can live with a(nother) filled path istead of a stroke so you will have to start over if you need any further editing instead of just changing the Stroke Weight.
Different ways can lead to identical results, or to fundamentally different ones, as in this case.
I am convinced that the original path was stroke/nofill, and then it was unfortunately outlined, and my endeavour was to restore the original, and the freedom to edit freely.
As mentioned on 6th October 2015:
"As far as I can see the (negative) Offset Path will make the resulting path shorter, and it will still result in a filled path instead of a path with an easily (re)adjustable Stroke Weight."

Copy link to clipboard
Copied
Step 1 - Create Object without stroke
Step 2 - Select your solid filled shape & newly created object
Step 3 - Using the shape builder tool deselect the unwanted object and delete the solid filled shape.
Step 4 - Convert a remaining object into stroke.

Copy link to clipboard
Copied
this is the correct answer

Copy link to clipboard
Copied
I am not following 100%. I have an object without a stroke. When I select the shape builder and click the object nothing happens. If I hold alt and click, it removes the object and leaves nothing.

Copy link to clipboard
Copied
I WISH there was a simpler way to convert a fill into a stroke. Im a motion designer and EVERY graphic asset and template I download are compound paths that can't be used because they bascially did a "Object > Path > Outline stroke". It's easy to turn a stroke into a closed fill. But not the other way around. Adobe, if you're reading this can you add a feature where this can be? Like "Object > Path > Create Strokes from Fill" or something?
Sincerely,
A Tired Motion Designer

Copy link to clipboard
Copied
Adobe will read feature requests here: https://illustrator.uservoice.com/
Copy link to clipboard
Copied
Abraham,
I am afraid this is a (too) tough request.
Kurt has worked on the solution and shown ready ways that work in many cases, you can look here and follow links:
Copy link to clipboard
Copied
😢
-
- 1
- 2

Get ready! An upgraded Adobe Community experience is coming in January.
Learn more
 AdChoices