Nick,
I just came upon this, and I hope it is in time.
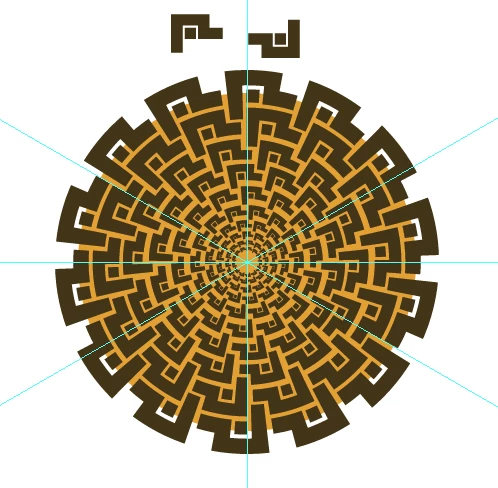
Is this the kind of vortex pattern you are after (see description of steps below)?
Click/RightClick to get closer and Click again to get closer still, Click Here to see in Chrome
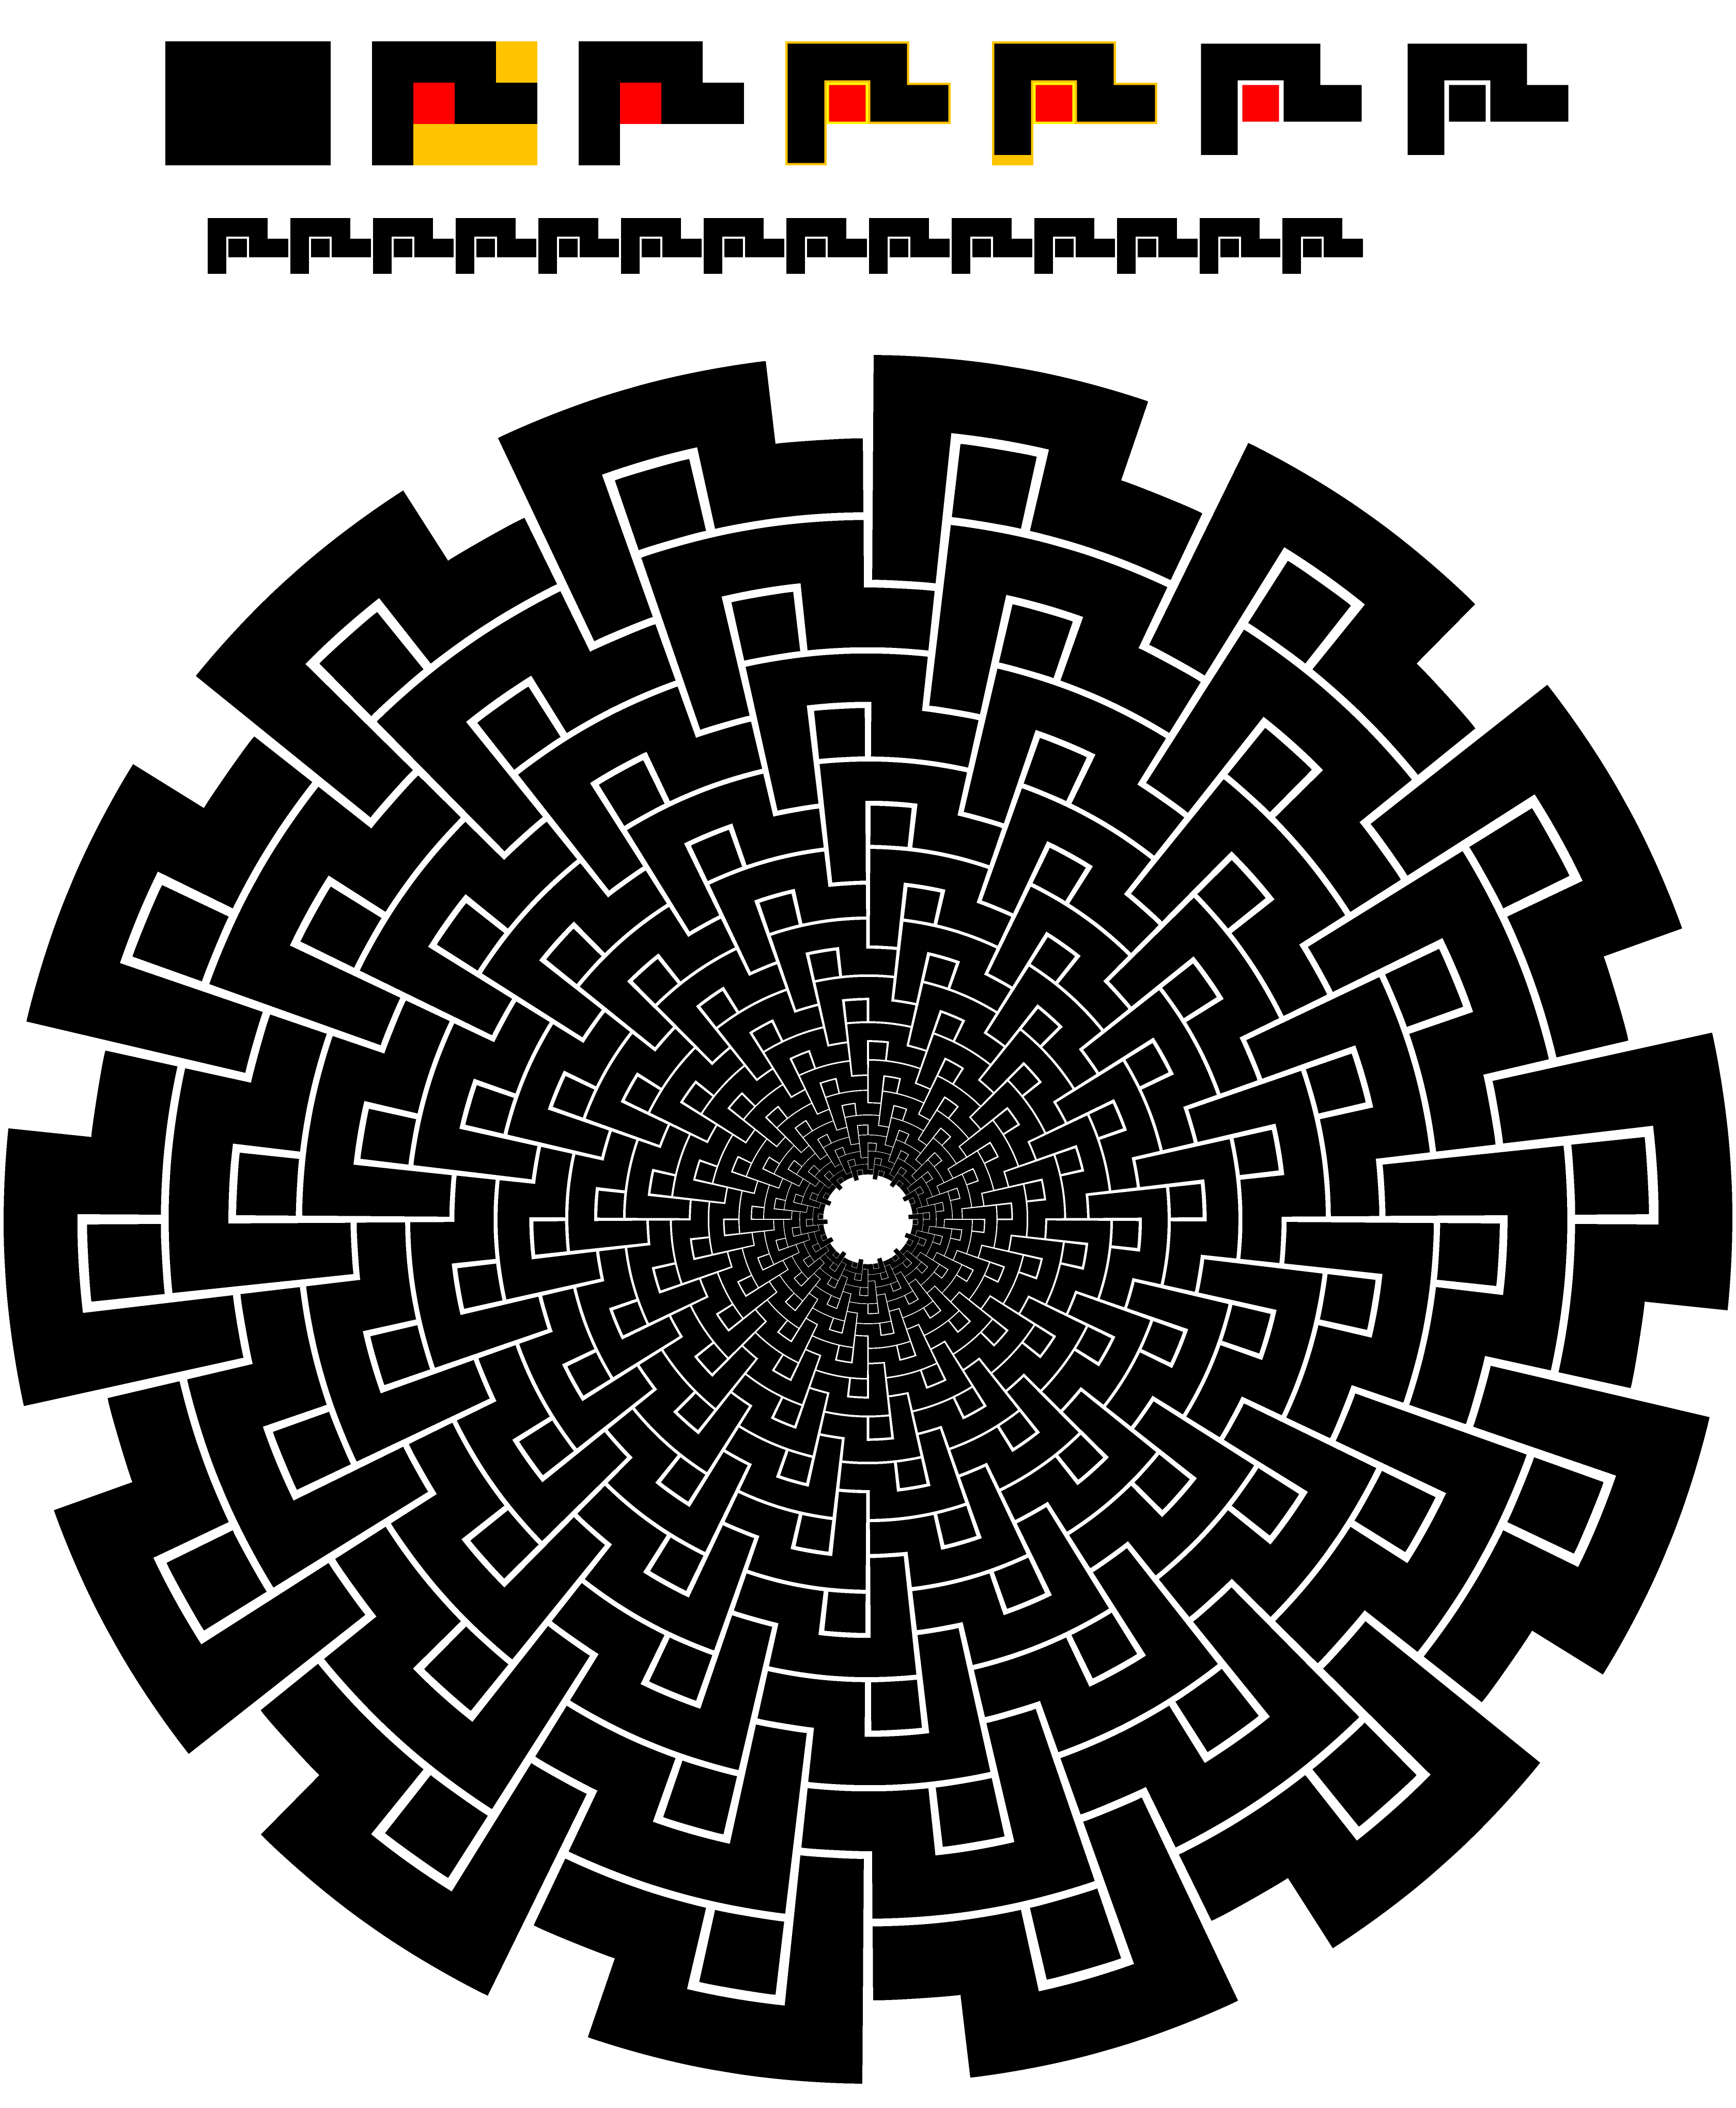
DESCRIPTION OF STEPS (WITH VALUES USED):
First row: creation of the basic shape (with measures):
1) Simple rectangle (80x60 pt),
2) Cutouts (red to form separate part 20x20 pt, dark yellow to remove 20x20 pt and 60x20 pt),
3) Two paths left, black and red (to discern),
4) Negative offset (-1.2 pt) of each path to create the gaps and still keep the size, original paths in pale colours to discern,
5) Additional negative offset at the downward part of the black path (moved up by 3.8 pt, highly customized, may require Undoing of all the following steps and redoing) to adapt the gap to the downscaling in the vortex,
6) Opacity of original paths changed to 0% to implement the gaps,
7) Red path recoloured to black and all paths Grouped (total size still 80x60 pt)
Second row:
1) Basic shape copied and reduced in size (40x30 pt), optional done here to show in full,
2) Basic shape copied as effect (Effect>Distort&Transform>Transform, moved 40 pt, 13 copies),
3) Basic shape with copies turned into Art Brush with Proportional ticked to keep the shape(s).
Third row:
1) Circle created (720x720 pt) with adapted Stroke Weight (2pt, with no reduction in second row it would be 1pt) and cut at the top Anchor Point (Scissors Tool) to start/stop the Art Brush there, optional,
2) Artbrush applied to circle,
3) Circle with Artbrush copied as effect (Effect>Distort&Transform>Transform, scaled (by 80.9% both ways, highly customized, may require Undoing and redoing) to get the right fit and gaps, rotated (by -360/56 degrees) to make the basic shapes fit into one another thereby creating the vortex, a suitable number of copies (13 copies chosen to clearly show the 14 downward parts at the centre), can be chosen as desired.