Answered
Delete line without changing Shape
Hi iam new on illustrator how can I delete the bottom line, without changing the shape like it is on the left side? 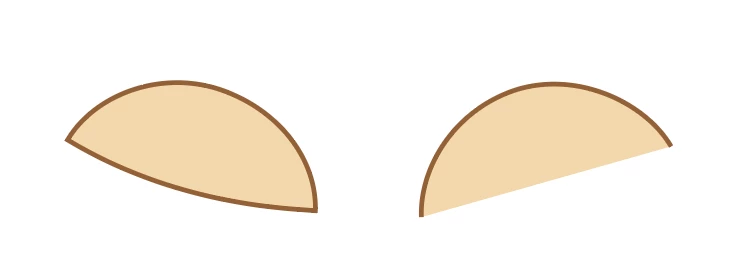

Hi iam new on illustrator how can I delete the bottom line, without changing the shape like it is on the left side?
Triexy,
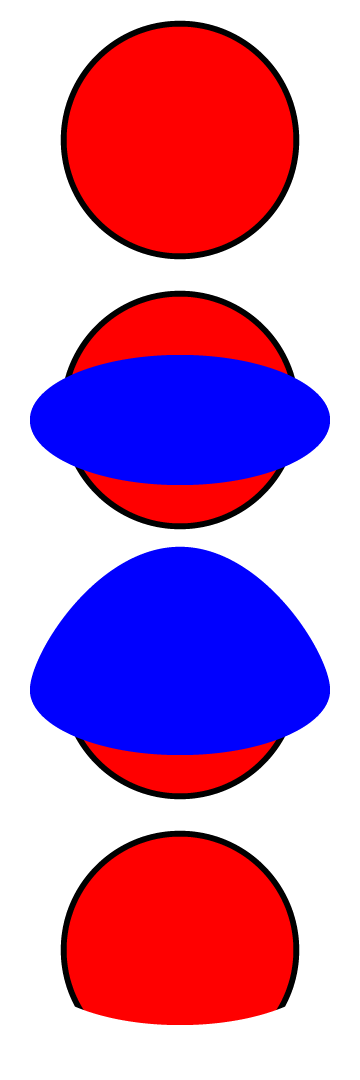
I believe you wish to have a nice curved ending of the strokes at the bottom corners.
In this case a simple way is to build it from the original ellipses as follows, easiest if you work vertically/horizontally then rotate, but you can work wit a rotated bottom shape:
1) Create the one with the top shape with stroke and fill;
2) Create the one with the bottom shape as desired on top; it is easier to see what you are doing with no stroke and no fill, but easier to show with fill and no stroke, so that is done below;
3) Deselect and ClickDrag the top Anchor Point of 2) upwards so it covers the top part of 1);
4) Select both and Ctrl/Cmd+7 to make a clipping set (with 2)/3) as the Clipping Mask).
Edit: And what Hans-Jürgen is about to say.
Hi Hans-Júrgen.
Already have an account? Login
Enter your E-mail address. We'll send you an e-mail with instructions to reset your password.