• Global community
    • Language:
      • Deutsch
      • English
      • Español
      • Français
      • Português
  • 日本語コミュニティ
    Dedicated community for Japanese speakers
  • 한국 커뮤니티
    Dedicated community for Korean speakers
Exit
0

Detailed Isometric Grid

New Here ,
Mar 30, 2017 Mar 30, 2017

Copy link to clipboard

Copied

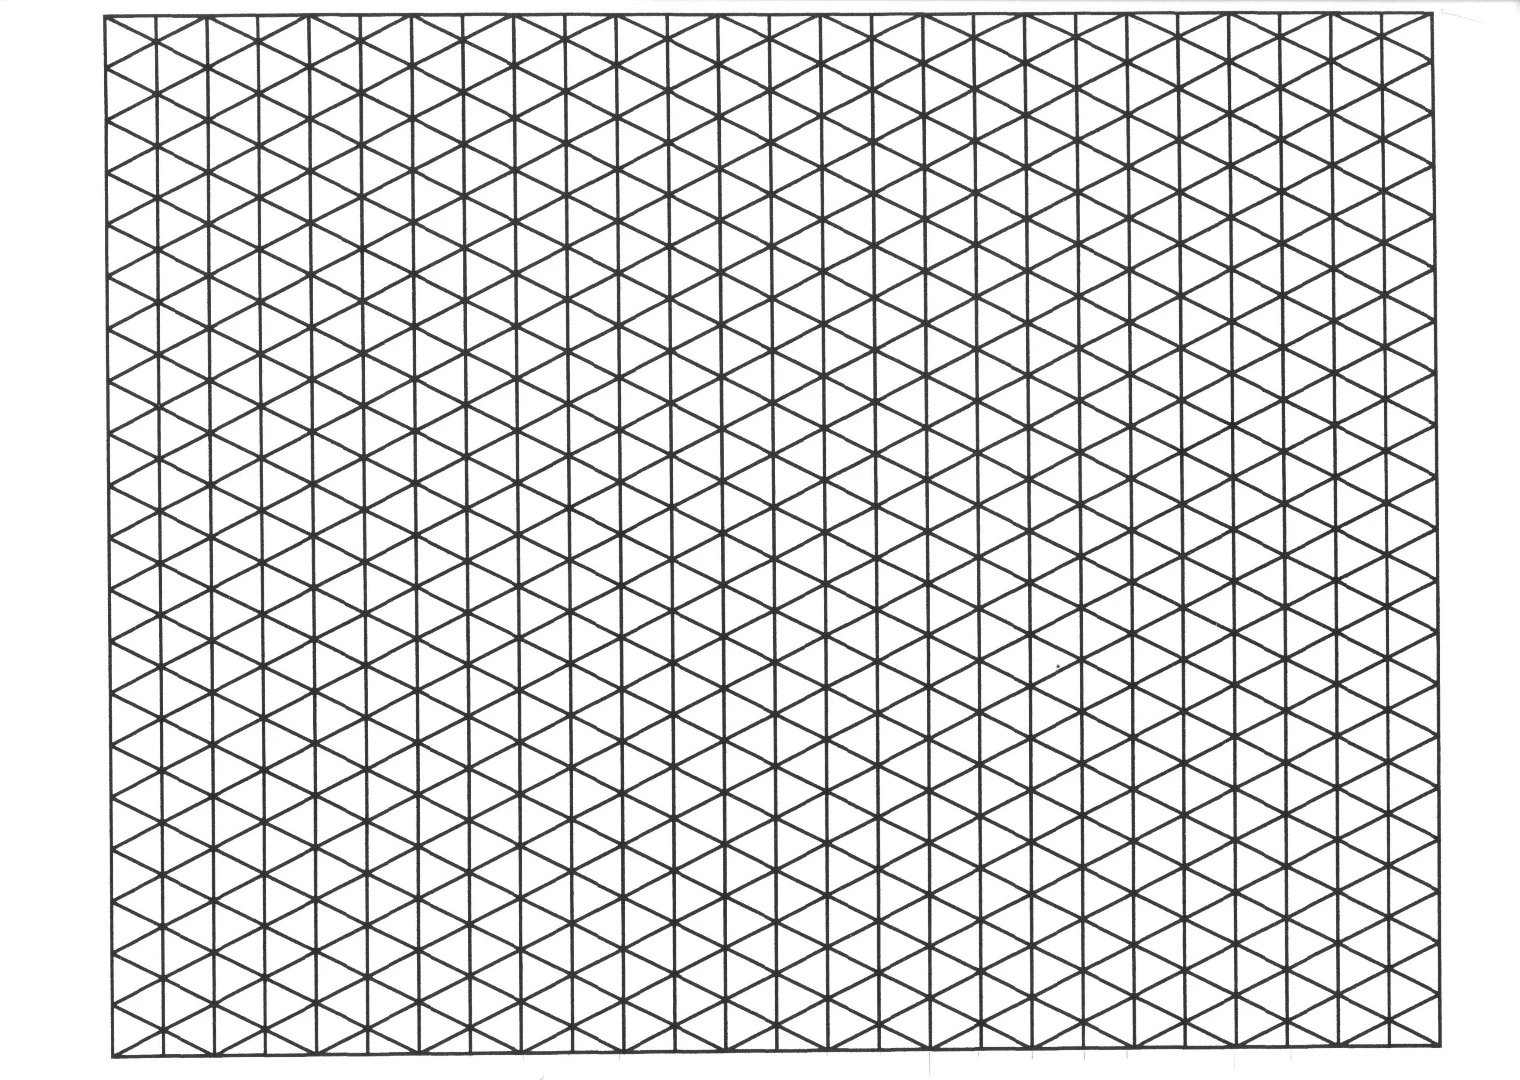
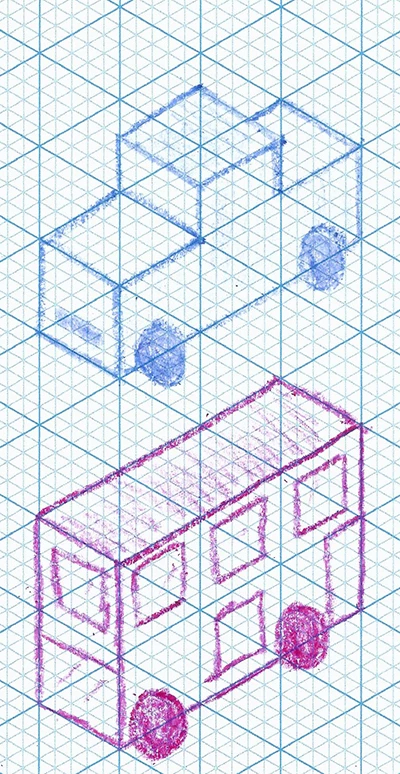
Does anyone know a good way to make a highly detailed isometric grid within Adobe Illustrator? I want the grid to look like picture 1 rather than picture 2. Ive searched the internet for a while now and all i can find is tutorials to create simpler isometric grids like picture 2. 

Thanks!

Picture 1:

seamless-isometric-graph-paper-vector-2244466.jpg

Picture 2 :

iso-grid.jpg

Views

22.4K

Translate

Translate

Report

Report
Community guidelines
Be kind and respectful, give credit to the original source of content, and search for duplicates before posting. Learn more
community guidelines

correct answers 1 Correct answer

Engaged , Apr 01, 2017 Apr 01, 2017

You can combine the steps in the video Bahaar mentioned with the pattern steps Mike wrote about already. This will create a pattern with both major and minor axes. Looks messy, but you only have to draw one 2cm vertical line.

Here's some numbers to use when you follow the video:

Image 739.jpg

Here's the end result. My son likes 'triangle paper'.

scan0001.jpg

Votes

Translate

Translate
Adobe
Community Expert ,
Mar 30, 2017 Mar 30, 2017

Copy link to clipboard

Copied

Draw  shape on right, and use default option in object pattern make.

Screen Shot 2017-03-30 at 4.09.33 PM.png

Screen Shot 2017-03-30 at 4.10.15 PM.png

Draw the triangular shape to an even numbered size, and add the dots stepping and repeating by a evenly divisible of that size

Votes

Translate

Translate

Report

Report
Community guidelines
Be kind and respectful, give credit to the original source of content, and search for duplicates before posting. Learn more
community guidelines
Community Expert ,
Mar 30, 2017 Mar 30, 2017

Copy link to clipboard

Copied

Sorry could not finish earlier had to help someone at work.

You will probably want to put a mask over the object before you create a tile, this will trim the stroke edges to an exact 2" x 1" (size I used)  tile.

Screen Shot 2017-03-30 at 5.10.50 PM.png

Screen Shot 2017-03-30 at 5.13.07 PM.png

Votes

Translate

Translate

Report

Report
Community guidelines
Be kind and respectful, give credit to the original source of content, and search for duplicates before posting. Learn more
community guidelines
Enthusiast ,
Mar 31, 2017 Mar 31, 2017

Copy link to clipboard

Copied

Votes

Translate

Translate

Report

Report
Community guidelines
Be kind and respectful, give credit to the original source of content, and search for duplicates before posting. Learn more
community guidelines
Engaged ,
Apr 01, 2017 Apr 01, 2017

Copy link to clipboard

Copied

LATEST

You can combine the steps in the video Bahaar mentioned with the pattern steps Mike wrote about already. This will create a pattern with both major and minor axes. Looks messy, but you only have to draw one 2cm vertical line.

Here's some numbers to use when you follow the video:

Image 739.jpg

Here's the end result. My son likes 'triangle paper'.

scan0001.jpg

Votes

Translate

Translate

Report

Report
Community guidelines
Be kind and respectful, give credit to the original source of content, and search for duplicates before posting. Learn more
community guidelines