 Adobe Community
- Home
- Illustrator
- Discussions
- distributing shapes in a geometrically perfect fas...
- distributing shapes in a geometrically perfect fas...

Copy link to clipboard
Copied
Say you want to create a 'checkerboard' of hexagons...
given, say, a regular hexagon.
you Alt/Shift drag it to clone it vertically.
then Ctrl+D to repeat the op as many times as needed and you got yourself a column of evenly spaced hexagons.
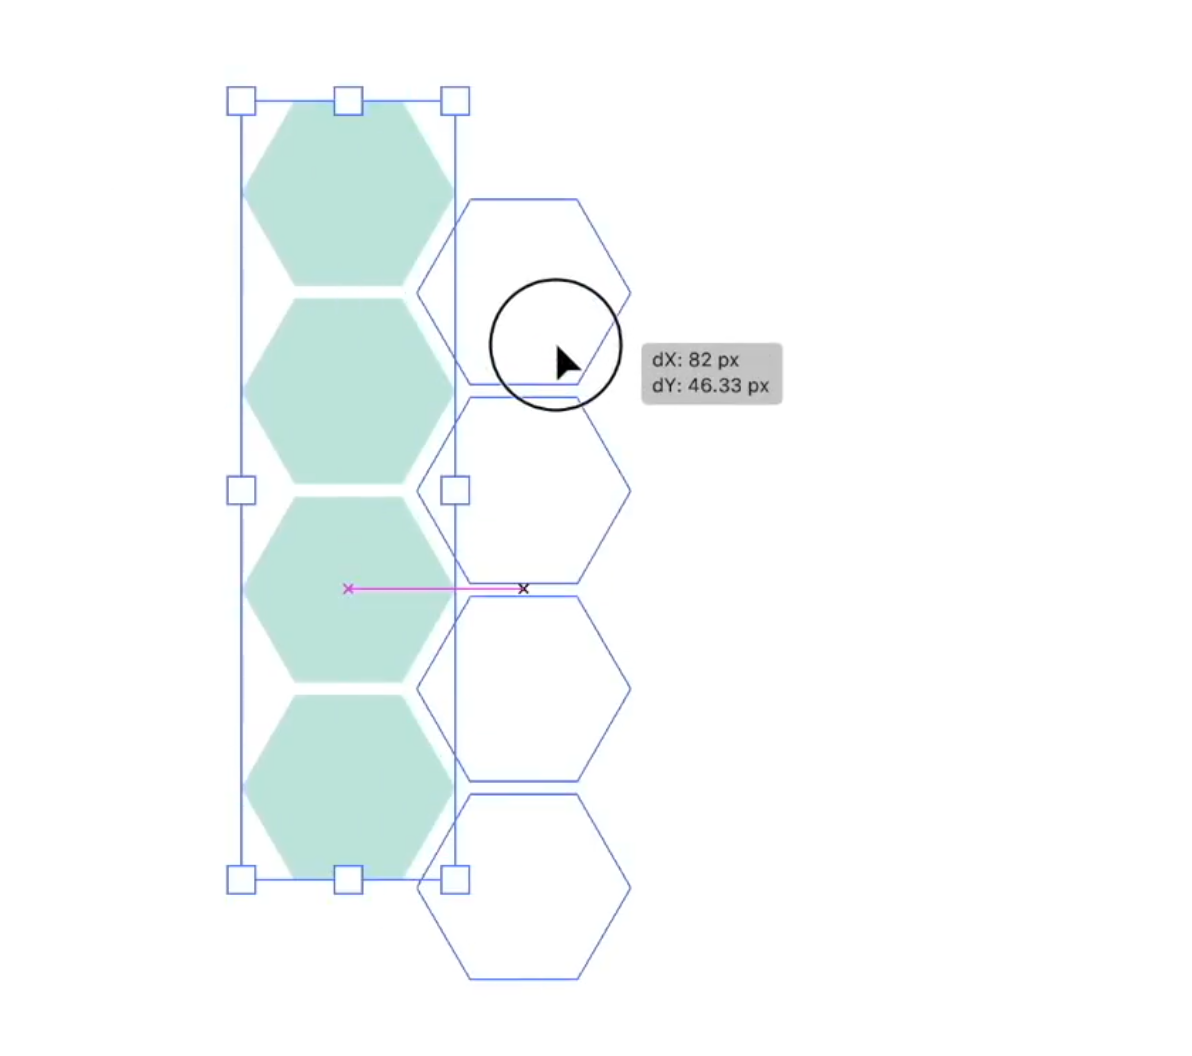
now you want a second column...and of course, you need the spacing between hexagons to be the same horizontally as it is vertically - in the screengrab below, smart guides show the vertical alignment is good, but they don't tell you anything about the horizontal alignment. Can one get smart guides to show that, or is it the case smart guides don't go this far?
Is there an alternative way to do it? possibly pattern making? I haven't tried this yet.
Many thanks


 1 Correct answer

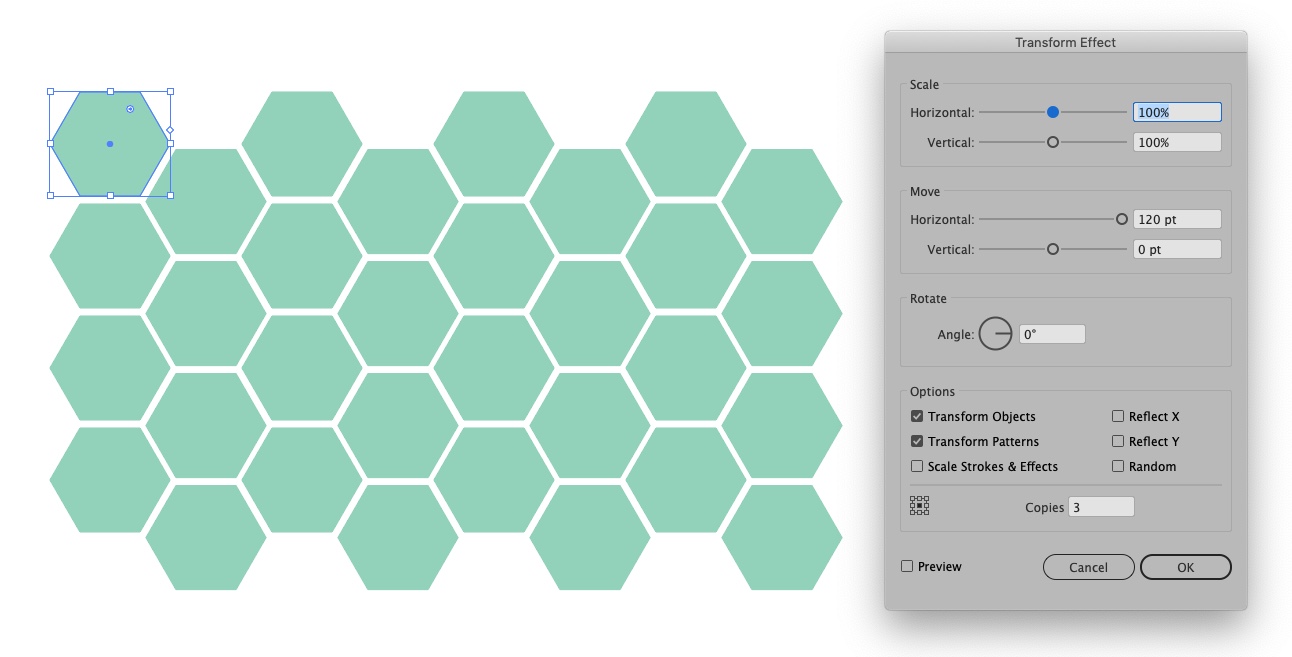
I wouldn't clone it manually. I'd use the Transform Effect instead.
- Create your hexagons
- With hexagons selected, choose Effect > Distort and Transform > Transform. Turn the preview on and adjust the horizontal and/or vertical movement until the position is as desired and set the number of copies to 1.
- Now with the original hexagons still selected, choose Effect > Distort and Transform > Transform again and with the preview on adjust the spacing again but this time pulling the repeat up vertically.
Explore related tutorials & articles
 6
Replies
6
6
Replies
6

Copy link to clipboard
Copied
hi, you are doing it errm wrong.. you must use transform effect. UI is relatively easy to follow
(you will prob have to do 2 transform effects)
/G
Copy link to clipboard
Copied
I wouldn't clone it manually. I'd use the Transform Effect instead.
- Create your hexagons
- With hexagons selected, choose Effect > Distort and Transform > Transform. Turn the preview on and adjust the horizontal and/or vertical movement until the position is as desired and set the number of copies to 1.
- Now with the original hexagons still selected, choose Effect > Distort and Transform > Transform again and with the preview on adjust the spacing again but this time pulling the repeat up vertically. Increase the number of copies to achieve the result that you want.
This solution is based on the approach you were taking when asking the question. Another approach would be to create a pattern swatch.


Copy link to clipboard
Copied
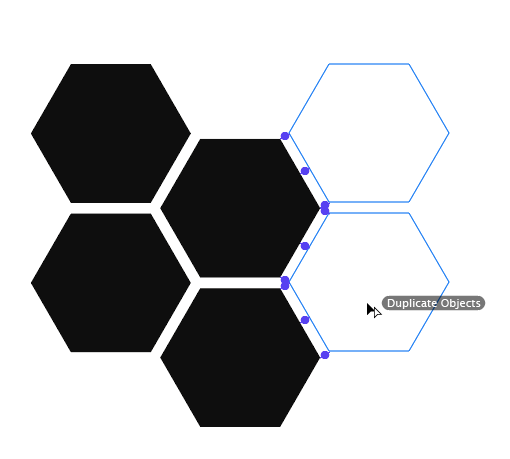
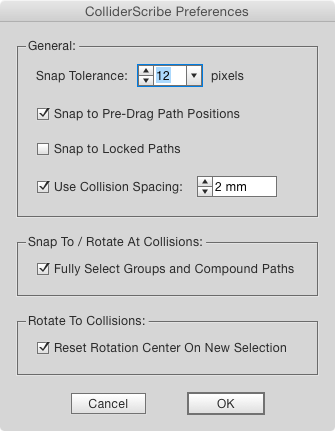
I would use the plugin ColliderScribe:

Copy link to clipboard
Copied
...smart guides show the vertical alignment is good, but they don't tell you anything about the horizontal alignment. Can one get smart guides to show that...
To answer this part of your question: Yes, Smart Guides can display more than one construction guide at a time.
Example using version CS6. Construction Guides are set to 30° angles.
- White Pointer, all nodes selected: Mousedown on the node to be dragged.
- Press and hold Ctrl.
- Drag to one of the nodes to be used as an alignment reference.
- Drag to another node to be used as an alignment reference.
- Drag to approximately where you want the path to be and "feel around" until the intersecting Construction Guides appear.
- Mouseup.
- Release Ctrl.

It's documented in the Help files.
JET

Copy link to clipboard
Copied
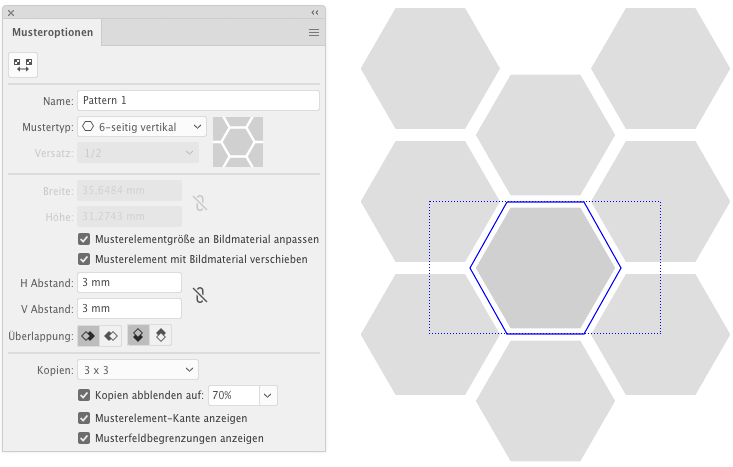
In case you want to go the pattern route:

Copy link to clipboard
Copied
I agree with Kurt, Patterns are a great way to go. It's easy to create, easy to change and totally repeatable.
Here's a video tutorial about creating Patterns that should help: http://www.jeffwitchel.net/2012/07/create-simply-amazing-patterns/

 AdChoices