• Global community
    • Language:
      • Deutsch
      • English
      • Español
      • Français
      • Português
  • 日本語コミュニティ
    Dedicated community for Japanese speakers
  • 한국 커뮤니티
    Dedicated community for Korean speakers
Exit
0

Eraser tool leaves outline after applying, or using scissor tool a better option?

New Here ,
Feb 06, 2018 Feb 06, 2018

Copy link to clipboard

Copied

Dear Sir/Mdm

I am currently working on creating a room's interior using Illustrator CS6, and there are still some tools I am trying to figure out at the moment.

The eraser/scissor/knife tool. I had a several inner lines i created that i would like to erase away, taken a screen shot, please refer to it as follows:

Illustrator CS6 - Line To Erase.png

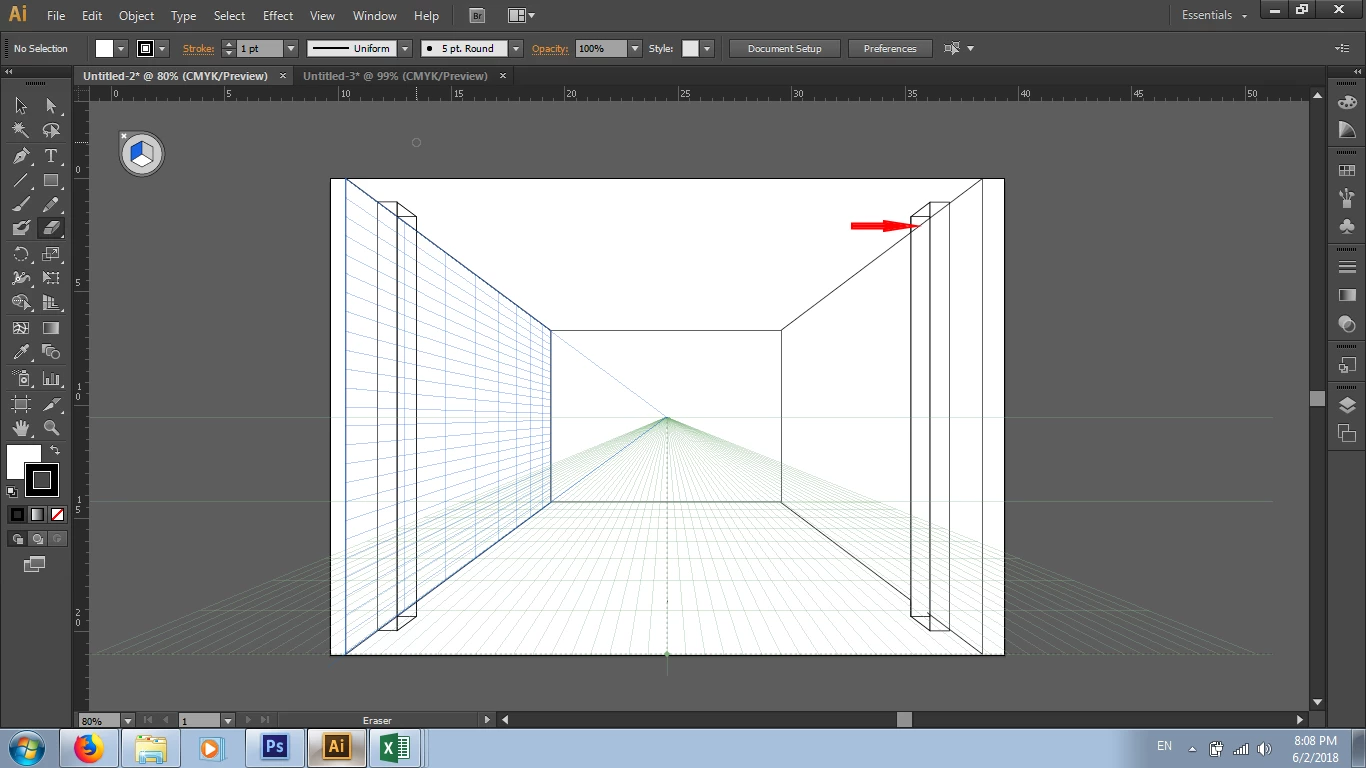
The red arrow shows one of the inner lines i would like to erase, so i decided to use eraser tool as a start, but when i applied it on, the result was as follows:

Illustrator CS6 - Eraser Applied.png

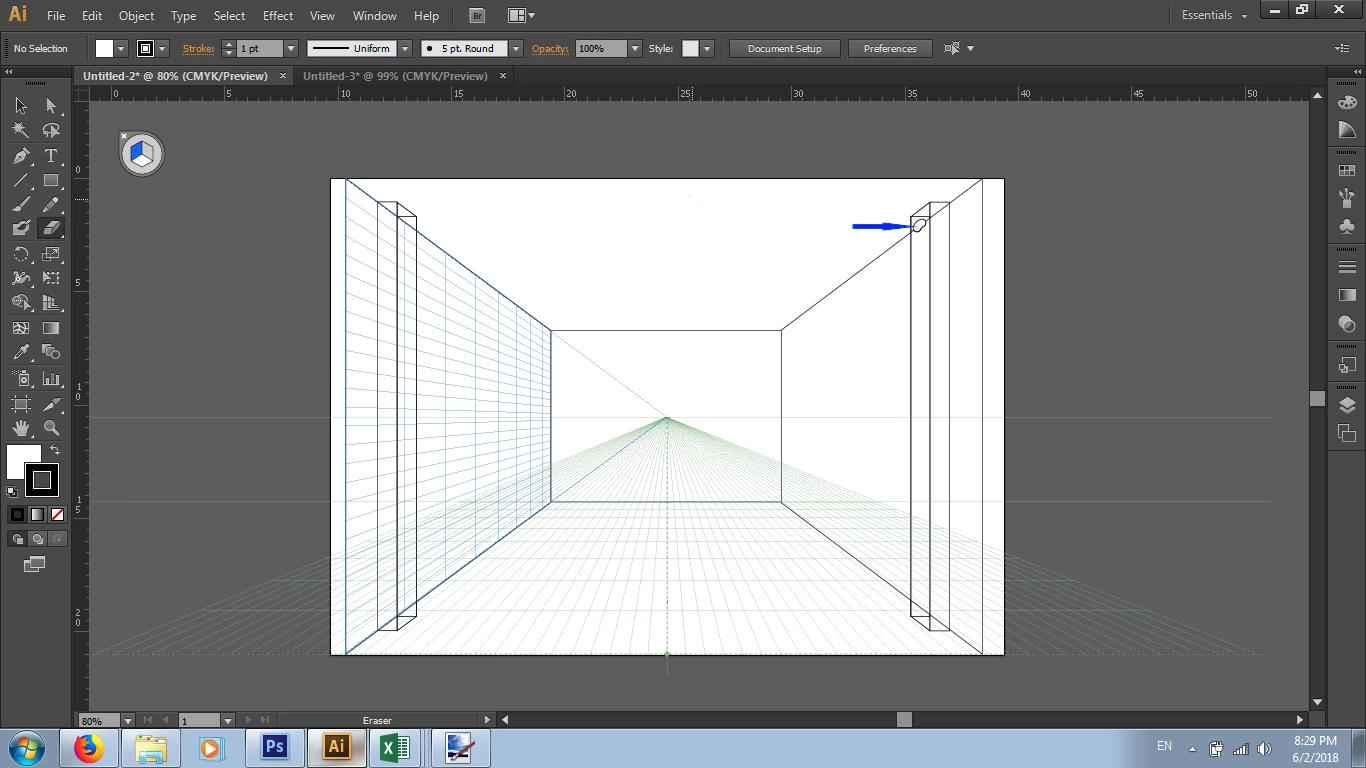
As shown above the blue arrow indicated the result after applying the eraser on. Any solution/s or method/s that i had missed? Or would it be better to use the scissor tool to cut away the inner lines? If so, would you mind if you can share with me how am i gonna use the eraser or scissor tool successfully?

Sincerely

Kyle Au Yong

Views

10.8K

Translate

Translate

Report

Report
Community guidelines
Be kind and respectful, give credit to the original source of content, and search for duplicates before posting. Learn more
community guidelines
Adobe
Community Expert ,
Feb 06, 2018 Feb 06, 2018

Copy link to clipboard

Copied

There are a number of ways to do this but certainly the scissor tool is quick and efficient. See screen shot below:

Scissors.png

In the first picture I select the entire line that is to be cut. In picture two I click with the scissor tool where I want my first cut. In picture three I click on the second tool (note that now only the segment to be deleted is selected). In picture four I delete the unwanted segment. Please note that the lines to be cut are unfilled paths which may be open or closed paths. If you try and do this with a closed path that has a color or pattern fill you will then have to re-close all of the paths involved to maintain the integrity of the fills.

Votes

Translate

Translate

Report

Report
Community guidelines
Be kind and respectful, give credit to the original source of content, and search for duplicates before posting. Learn more
community guidelines
New Here ,
Feb 06, 2018 Feb 06, 2018

Copy link to clipboard

Copied

Dear Bill

Thank you so much for your explaining. I tried using the instructions you gave, below are the screenshots of each step i took while using the scissor tool:

1st Step (Pic as shown below). I selected the entire object which it's top & bottom line intersected with another vertical object i created (My intention was to cut out the lines that intersected with the vertical object). It then showed 4 anchor points on the 4 corners of the entire object.

Illustrator CS6 (Scissor Tool) - Object Selected.png

2nd Step (Pic shown below). I Then applied the 1st cut on the 1st intersection point (marked with a red arrow), which resulted in 2 of the 4 anchor points of the entire object (further right top and bottom points) to move to the point where i applied my 1st cut.

Illustrator CS6 (Scissor Tool) - 1st Cut.png

3rd Step (Pic below). After I applied my 2nd cut (marked red circle), the 4 anchor points of the entire object disappeared, and the result was a triangular selection with 4 anchor points.

Illustrator CS6 (Scissor Tool) - 2nd Cut.png

That wouldn't be my intention to cut out the triangular selection, only the line that i had described in my starting post of this topic. Would you mind if you can kindly enlighten me further on this?

Sincerely

Kyle Au Yong

Votes

Translate

Translate

Report

Report
Community guidelines
Be kind and respectful, give credit to the original source of content, and search for duplicates before posting. Learn more
community guidelines
Community Expert ,
Feb 07, 2018 Feb 07, 2018

Copy link to clipboard

Copied

The triangle that you are left with, was it a separate shape to begin with? I downloaded your drawing to use as a template and drew those two vertical columns as adjacent rectangles and then drew a single line to connect them. If you had drawn an actual triangle there to begin with then that would explain everything you said above since you were actually applying the Scissor tool to the triangle and not the segment. If this was the case then lock the triangle (Control-2) so that you can apply it directly to the original segment. When I did it the way I just described I got the result shown below using the same process I described in my initial post:

SCISSOR REDUX.png

By the way when you said that the anchor points of the entire object disappeared what actually happens during this process is that the point that is created by the Scissor tool becomes the endpoint of the segment before it and the rest of the original object is deselected. When you put in the next scissor point only what is left of the original is selected. This assumes that you are actually "scissoring" the original segment.

Votes

Translate

Translate

Report

Report
Community guidelines
Be kind and respectful, give credit to the original source of content, and search for duplicates before posting. Learn more
community guidelines
New Here ,
Feb 08, 2018 Feb 08, 2018

Copy link to clipboard

Copied

Dear Bill

Firstly, thanks for staying and your efforts in helping me solve my issue. Appreciate it. Somehow, out of a sudden it works, I guess I will have a long story to tell in here now..

To answer your question, "The triangle that you are left with, was it a separate shape to begin with?"

Ans: It was not a separate shape, I created the vertical object using similar method you did ("drew those two vertical columns as adjacent rectangles and then drew a single line to connect them").

I try to be as clear as possible now, I have labelled the 2 objects i created, "A" and "B", as shown below:

Illustrator CS6 (Scissor Tool) - Object A & B.png

So I listened to your advice, using the selection tool (V), I clicked on the top line of object "A", a vertical rectangle with anchor points covering object "A" appeared:

Illustrator CS6 (Scissor Tool) - Object A Selected.png

I mouse over and clicked on scissors tool, 4 anchor points on 4 corners of object "A" appeared:

Illustrator CS6 (Scissor Tool) - Object Selected.png

I did my 1st cut on the 1st intersection point (marked with a red arrow), it turned out that 2 of the 4 anchor points of object "A" had moved:

Illustrator CS6 (Scissor Tool) - 1st Cut.png

Illustrator CS6 (Scissor Tool) - 1st Cut (New Anchor Points).png

I applied my 2nd cut (marked red circle), the 4 anchor points of the entire object disappeared, and the result was a triangular selection with 4 anchor points:

Illustrator CS6 (Scissor Tool) - 2nd Cut.png

After I deselected the triangular selection, i then once again use selection tool (V), mouse over and clicked on the top line of object "A" (where red arrow pointed), somehow miraculously the result turned out object "A" was partially selected now (show on 2nd pic below), as compared to my first attempt when i clicked on the same line (where red arrow pointed) the selection covered the whole of object "A":

Illustrator CS6 (Scissor Tool) - Object A

Illustrator CS6 (Scissor Tool) - Object A Partially Selected.png

So I knew in order to cut a portion of a line i intended to remove, the whole line has to be selected first, I then mouse over and clicked on the line of the un-selected part of object "A" (where red arrow pointed in 1st pic below), it turned out as shown below in 2nd pic:

Illustrator CS6 (Scissor Tool) - Object A

Illustrator CS6 (Scissor Tool) - Object A Partially Selected II.png

So now I can finally cut out the line I had previously talked about..! How weird is that.......:

Illustrator CS6 (Scissor Tool) - Object A

I am not sure why it suddenly happened that way and I have to go through these just to cut a line.. lol...zzz...

Sincerely

Kyle Au Yong

Votes

Translate

Translate

Report

Report
Community guidelines
Be kind and respectful, give credit to the original source of content, and search for duplicates before posting. Learn more
community guidelines
Community Expert ,
Feb 06, 2018 Feb 06, 2018

Copy link to clipboard

Copied

Votes

Translate

Translate

Report

Report
Community guidelines
Be kind and respectful, give credit to the original source of content, and search for duplicates before posting. Learn more
community guidelines
Community Expert ,
Feb 07, 2018 Feb 07, 2018

Copy link to clipboard

Copied

I second Monika's suggestion of the Shapebuilder tool. Maybe give it a try to see which approach works better for you. It looks like removing lines might be a frequent operation for the type of drawing you're doing, so finding an efficient workflow will save you a lot of time.

Votes

Translate

Translate

Report

Report
Community guidelines
Be kind and respectful, give credit to the original source of content, and search for duplicates before posting. Learn more
community guidelines
New Here ,
Feb 08, 2018 Feb 08, 2018

Copy link to clipboard

Copied

Dear Myra

Thanks for recommending Monika's suggestion, I will try to work on using that method...

Sincerely

Kyle Au Yong

Votes

Translate

Translate

Report

Report
Community guidelines
Be kind and respectful, give credit to the original source of content, and search for duplicates before posting. Learn more
community guidelines
Guide ,
Feb 07, 2018 Feb 07, 2018

Copy link to clipboard

Copied

Best use just a stroke oe work in outline mode

Select the area with the Direct Selection Tool (white arrow)

Use Shapebuilder Tool.

Hold Alt (option on mac) down, hover mouse over line,

when line turns red press  click with mouse to delete

Votes

Translate

Translate

Report

Report
Community guidelines
Be kind and respectful, give credit to the original source of content, and search for duplicates before posting. Learn more
community guidelines
New Here ,
Feb 08, 2018 Feb 08, 2018

Copy link to clipboard

Copied

LATEST

Dear Ray

Thanks for showing your instructions. Appreciate.

Sincerely

Kyle Au Yong

Votes

Translate

Translate

Report

Report
Community guidelines
Be kind and respectful, give credit to the original source of content, and search for duplicates before posting. Learn more
community guidelines