Known Participant
August 18, 2017
Question

Expand appearance creates loads of new paths.

  • August 18, 2017
  • 5 replies
  • 8798 views

Hello,

I'm trying to learn illustrator. I apologise if this has been asked before but I did a search and could not understand if the answers were right for my question.

I have been following this Jason Secrest tutorial.  Beginner Adobe Illustrator CC Tutorial: Teddy Bear Beginner - YouTube

I used the pen tool and hit 'P' everytime I was finished with one line.  I then I hit 'Shift +C' to curve my line. Then I hit 'P' again to start my next stroke. When I got to the part where you have to select all your brush strokes and expand appearance loads of new paths were created.

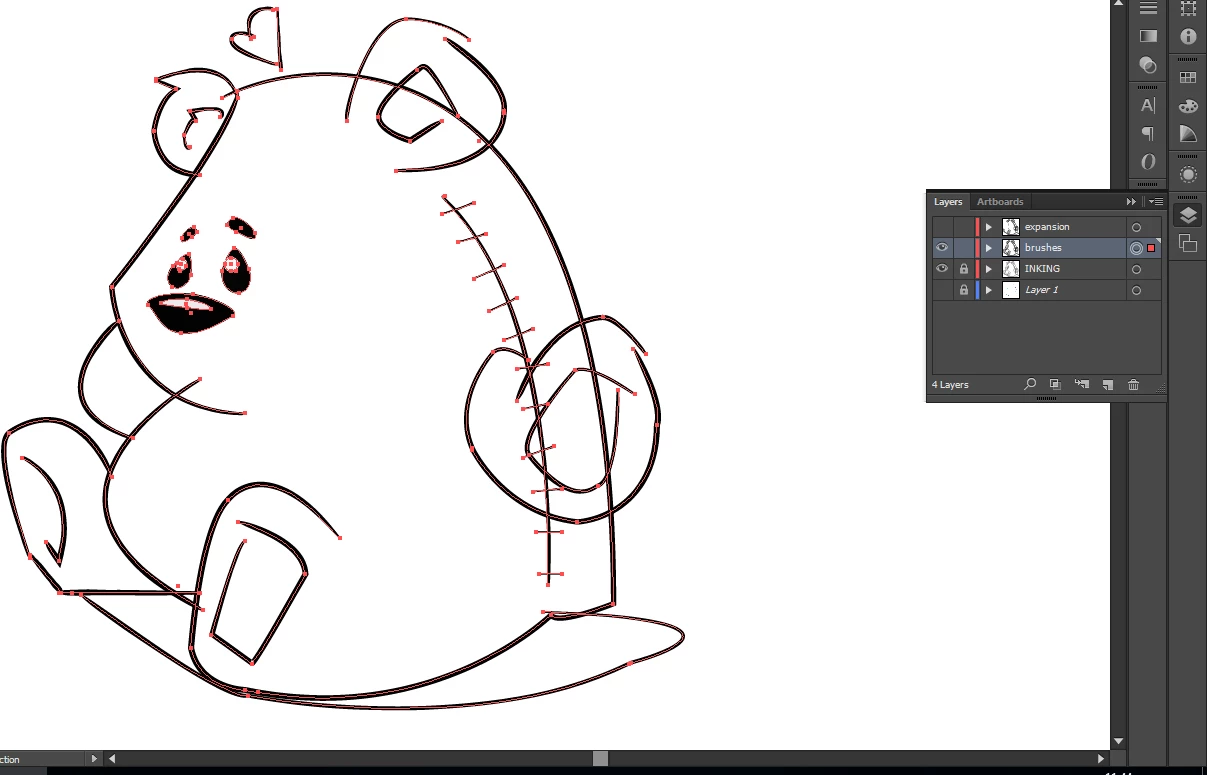
Here is the amount of points I had before expansion:

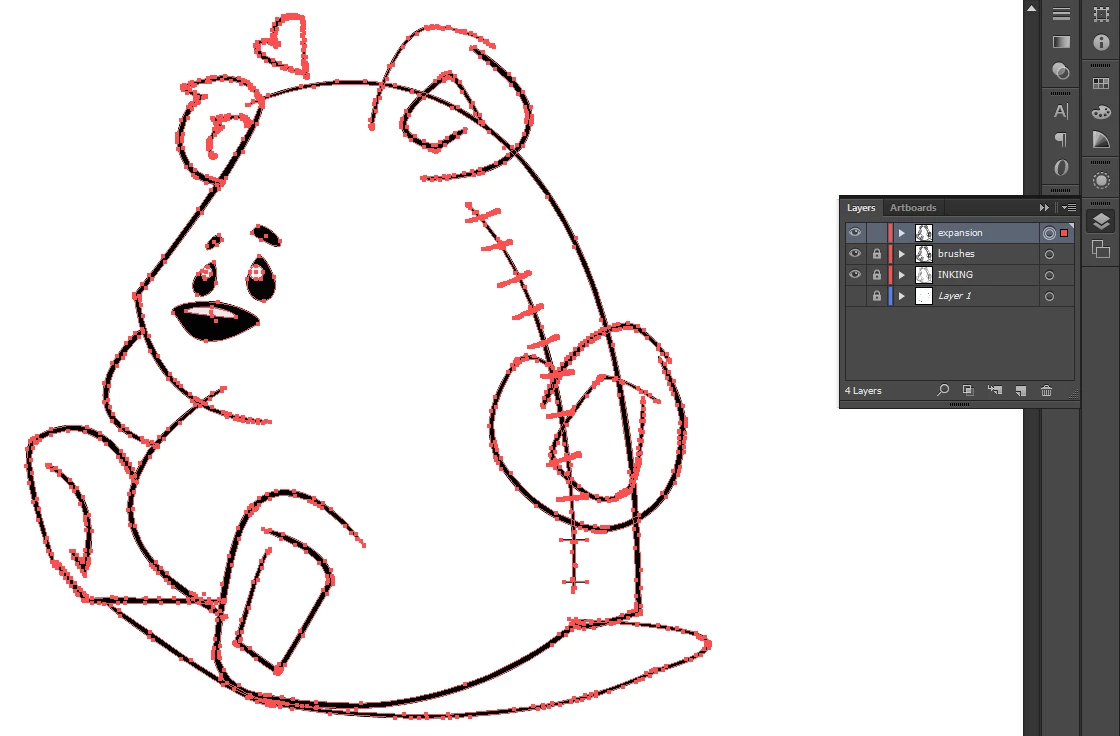
and here is the amount I had after I selected all and hit 'expand appearance'

Can someone tell me if I've done something wrong? I asked in a comment on his video but I don't think he reads comments anymore.

Thanks in advance.

This topic has been closed for replies.

5 replies

missfaceAuthor
Known Participant
August 19, 2017

What would the reason be that the eraser works before expansion but not after even though I've selected what I wanted to erase? the line disappears but then pops up again?

its interesting that different people are getting different results when expanding his brushes. Maybe it's a version issue?

Ton Frederiks
Community Expert
Community Expert
August 19, 2017

When expanding his brushes, I get many points (just like you).

That's because the brushes were made with many points.

What happens when the line disappears and pops up again, I can only replicate that when there is a visible copy on a layer below it.

It seems to erase (and it does) but when you release the eraser, the layer below becomes visible.

JETalmage
Inspiring
August 18, 2017

I used the pen and then changed the shape in the brushes panel ( I used his cartoon brushes).

Many features in vector programs are so-called "live effects." This just means they are other artwork "piled onto" the paths you draw, and that additional artwork is automatically re-drawn on-the-fly whenever you make changes to the paths you are deliberately drawing.

Brushes are an example of just such a "live" construct.Someone else has already drawn paths and stored them in the Brushes palette. When you apply a Brush to a path you are drawing, the program is just stretching a copy of the paths contained in the Brush along the direction of the path you are drawing.

All the while, so long as the Brush is being applied to your path in "live" mode, the interface is only displaying the anchorPoints of the base path you are deliberately drawing. But be assured: all the anchorpoints of the artwork contained in Brush are still there; they're just not being displayed.

When you invoke an Expand command, you are essentially telling Illusrator to stop the automatic re-drawing and "nail down" the distored artwork from the Brush.  That exposes the actual paths which resulted from the paths in the Brush having been distorted along your path.

It can be a bit alarming (as it was for you), because you think you are drawing nice, tidy, elegant paths (which you may have). Then, when you're happy with the shape of your paths, you invoke the Exapnd command. The actual artwork that you have been stretching along the paths you are drawing become fully exposed as ordinary paths. You see all those kazillion anchorPoints and think "Egads! What a mess."

And you're right. Here's why:

Vector-based graphics are, by their mathematically-defined nature, smooth. That's part of their reason for existence. Vector graphics lend themselves to smooth, efficiently-defined shapes, which are generally devoid of "texture."

Raster graphics, on the other hand, are just a grid of tiny squares, each assigned a color. That lends itself to highly irregular shapes and grainy texture (because the "shapes" are not actually defined at all).

That's why vector-based graphics programs have long been metaphorically called "drawing programs" while raster-based graphics programs are called "painting programs." That's why both exist and why a well-rounded illustrator needs to be proficient with both.

Somewhere along the development of vector-based drawing programs, users demanded more "painterly" effects in drawing programs: they wanted to "paint" with paths. Well, you just don't get high degrees of irregularity and "texture" from vector graphics without using a lot of jagged paths with a kazillion anchorPoints.

So vector-based Brushes which try to emulate the appearance of so-called "natural media" (chalk, paint, etc.) tend to contain convoluted jagged paths with a lot of anchorPoints.And they vary wildly in their elegance, depending upon who created them.

And yes, it can be a problem. In attempts to emulate "paint" textures, with paths you can easily reach a point at which the inherent data-efficiency of vector-based graphics is lost and the resulting file sizes exceed those of comparable--or even more convincing--raster images. This is one reason why many drawing programs provide raster-based Brushes, which step and repeat or stretch raster images along a vector path, and then flatten them to a single raster image.

Now back to your specific example:

You are using a vector-based Brush which contains very jagged paths in order to suggest the "texture" of natural media. But depending on the final scale of the intended reproduction, there may very well be far more roughness in the resulting paths than are needed to make that visual suggestion. That's where the Simplify command may serve to at least reduce the file size. With the Expanded artwork selected:

1. View>Hide Edges. This turns off the display of paths and anchorPOints. The artwork will appear to be unselected, but it's not.

2. Object>Path>Simplify...

3. In the resulting dialog, make sure the Straight Lines checkbox is off. Set the Curve Precison slider all the way to 100%. Turn on the Preview checkbox.

4. The dialog will tell you how many anchorPoints are currently in the artwork and how many will result from the current Simplify settings. Right now, they will be equal.

5. Slowly move the Curve Precison slider leftward. Watch the artwork. Stop sliding when the artwork loses too much of its texture-suggesting roughness.

It depends on scale, but savings of 50-75% are common.

JET

Eternal Warrior
Inspiring
August 18, 2017

Perfectly explained JET!!

I need your patience and the particular choice of words to explain this as well as you have just done!

Jacob Bugge
Community Expert
Community Expert
August 18, 2017

missface,

Is there a good reason for you to outline the strokes of the paths (which is what happens (depending on your Expand settings)?

You can do many things just as well, or better, with stroked paths.

Outlining strokes will always lead to many more Anchor Points.

Eternal Warrior
Inspiring
August 18, 2017

I don't think so... I think his video had just as many path points but you are worrying only because you had the direct selection tool in use rather than the selection tool.

The path points aren't a major thing - the more you have generally the more complex the shape or the more texture appearance there is.

Best,

EW

missfaceAuthor
Known Participant
August 18, 2017

@Eternal Warrior: The problem is when I go to erase the lines that need to be erased it doesn't work like his does in the video. It erases whole parts of the link instead of just the parts that should be in the back.

missfaceAuthor
Known Participant
August 18, 2017

line not link*

Mohammad.Harb
Community Expert
Community Expert
August 18, 2017

The paths show that you may use stroke width tool,

When you expand the shape, you will get loads points:

you may try to simplify the path from:

object -> path -> simplify

but this could change the appearance of curves.

or i would suggest using a third party plugin from Astute graphics and use "point removal" .

check the link VectorScribe v3 - Astute Graphics

missfaceAuthor
Known Participant
August 18, 2017

I don't remember selecting the stroke width tool. I used the pen and then changed the shape in the brushes panel ( I used his cartoon brushes). I tried object - path - simplify and it duplicated all my lines and changed the curves (as you said).

I followed his tutorial step by step. I wish I could figure out what I've done wrong. He even says in the tutorial "Oh it all worked out great this time, sometimes it can be a mess". I wish he explained what he meant by that and how to fix it if you do end up wit a 'mess' like I did!

Thanks though. 

missfaceAuthor
Known Participant
August 18, 2017

missface  wrote

He even says in the tutorial "Oh it all worked out great this time, sometimes it can be a mess". I wish he explained what he meant by that and how to fix it if you do end up wit a 'mess' like I did!

Thanks though. 

missface - What you need to understand is that when you expand etc.. you are asking (for example) the computer to work out and calculate what your strokes etc should look like if they were a path or shape.

Even when following instructions it is easy to end up with something that looks (to the eye) similar to what was intended... but in actual fact is not identical (to the computer).

Therefore he means that sometimes the computer - depending on all the various variables - will make something that is only 95% similar to the intended result rather than 99%....

Are you following?

I don't personally see anything to worry about.

Perhaps - because of your lack of experience with Illustrator - you are getting slightly lost in what is actually a minute detail - the Bear looks like the one in the tutorial - So well done!!


Yes it's definitely my lack of experience. I'm good with photoshop but this is a whole new ball game. I think I'll have to learn work arounds if there is no 'wrong' way. I wasn't even sure of the purpose of 'expand appearance'. I just did it because that's what he did in the tutorial but when I researched what expand appearance does I had trouble understanding.

Thanks for all the advice I really appreciate it.