Copy link to clipboard
Copied
Hello,
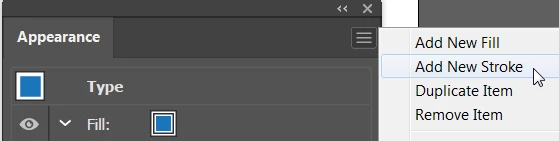
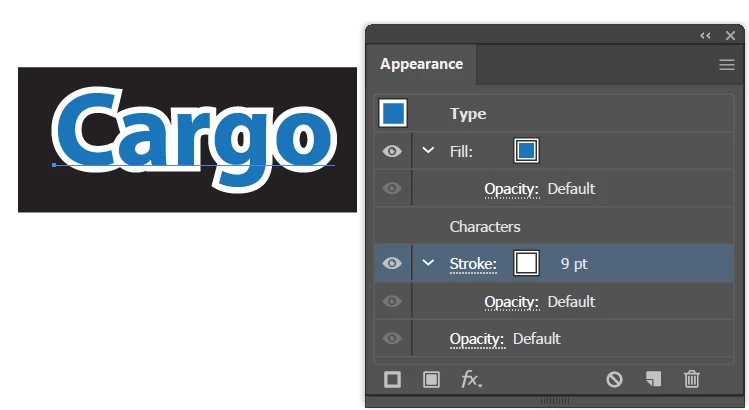
I would love if someone could teach me on how to make my logo like the one below. I'm using Adobe Illustrator.
As you can see this logo has a white background and I love how it goes with the form of the letters. Even the middle design has it. How can I achieve this? The logo I'm working on is similar to this, it has letters and a fuel drop design.
Thanks for your help, and have a nice day.
Type the text and draw the shapes as you normally would. Select with the black arrow Selection tool.
In the Appearance panel menu, add a new stroke.
Make the stroke color white and thick. Drag the stroke underneath the fill in the Appearance panel.
Draw white shapes over the open areas. You don't need to be very precise.
Select the white shapes and cut them (not delete).
Select the text and choose Edit > Paste in Back.
When you're ready to finalize the design you could choose Type > Create
...Copy link to clipboard
Copied
There are a few ways you can do what you want. 1.) set your text and then ( copy the file ) convert to outlines. Select all of your text and artwork and do a Move 0x and 0y > Copy. Either on the original artwork or the copy apply a 12pt stroke ( White ) > Convert: Object > Stroke to Outline. Send the White to the back. You will probably want to manipulate the outlines to conform to your specific look and feel. 2.) In the same way, you could use Object: Offset Path on a copy of the text and art. Making a copy leaves you with the original text and art intact.
Copy link to clipboard
Copied
Type the text and draw the shapes as you normally would. Select with the black arrow Selection tool.
In the Appearance panel menu, add a new stroke.
Make the stroke color white and thick. Drag the stroke underneath the fill in the Appearance panel.
Draw white shapes over the open areas. You don't need to be very precise.
Select the white shapes and cut them (not delete).
Select the text and choose Edit > Paste in Back.
When you're ready to finalize the design you could choose Type > Create Outlines, and Object > Expand appearance. You may need to expand twice. Then you could combine all of the white shapes into a single shape using the Pathfinder panel -- select one of the white shapes and choose Select > Same > Fill Color. In the Pathfinder panel click the first icon to combine all of the white shapes into a single shape.
Copy link to clipboard
Copied
It depends on when you want to create the white part.
if it's a final step, select all the elements, use Object > Path > Offset Path with the needed value, fill the new shape with white and remove holes using Direct Selection tool (white Arrow).
if you want to be able to edit image after adding the white background, follow Barbara's instructions to be more free in your actions 🙂
Find more inspiration, events, and resources on the new Adobe Community
Explore Now