

- Home
- Illustrator
- Discussions
- How can I create multiple shapes / fills and then ...
- How can I create multiple shapes / fills and then ...

Copy link to clipboard
Copied
Hi there
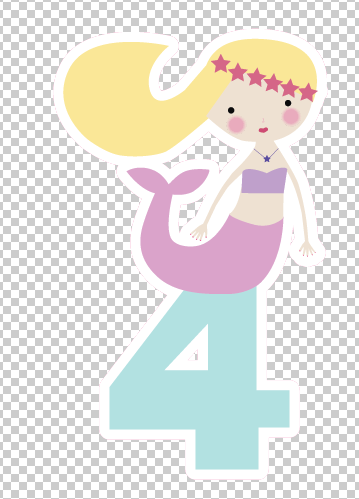
I have created a lovely mermaid illustration (plenty of different colours and shapes inc some text) I want to transfer it over to my cutting machine so that it prints and then cuts it with an outline. There is only one 'punch-out' shape to be cut. The rest of my design is to have a white bleed around it and I'd like the machine to cut around the shape.
I have followed several online tutorials and I managed to create and cut a basic shape (the letter 'A' with stars punched out of it - this was by creating a compound shape. I have turned text into a cutting shape by creating outlines and then making a compound shape. All files are saved as SVG for the Cricut cutting machine I use.
I have also worked out how to add an offset path and apply a cut line around some basic shapes. However, I have no clue about how to apply these technique to my more complex mermaid image. Do I need to make each shape/colour within in the image it's own compound path? Or, is there any other way to do this?
Many thanks
Luisa


 1 Correct answer
Hi Monika - thought I'd let you know that I found a solution - if you export the file as a PNG it works perfectly. Thought I'd share in case it comes up again.
Sent from my iPhone
Explore related tutorials & articles
 17
Replies
17
17
Replies
17

Copy link to clipboard
Copied
Select all the shapes that belong to your mermaid
Copy them to the clipboard: Edit > Copy
Lock all the shapes on the artboard
Edit > Paste in place
Now with the copied and pasted shapes selected, open the pathfinder panel and click on the top left button: Unite
Move to the back of the existing shapes
From then on you can work with it like you have already practiced.
Unlock the other shapes if needed, Offset path, etc.
Copy link to clipboard
Copied
Thank you Monika. I'll give it a try later and let you know how I get on!
Copy link to clipboard
Copied
Hi Monika - it's not working I'm afraid. I have tried with basic shapes and it worked perfectly. I then tried to make some shapes with the pen tool and apply the same method and it's not working. It seems to bring the shapes in as separate objects and also doesn't seem to want to recognise different colours. It grouped all the objects as the same colour. Any ideas? The mermaid image also has a transparency appearance on the body of the mermaid and when I create the united shape behind the colour shows through and this is also imported into cricut!
Copy link to clipboard
Copied
Please show screenshots.
We need:
- your artwork as preview and in outline view
- the layers panel (opened, so that objects are visible)
- the result after pathfinder
Copy link to clipboard
Copied
Many thanks - I have taken screen shots - how do I upload here?
Copy link to clipboard
Copied
Via the web interface.
There's a button with an image upload icon.
Copy link to clipboard
Copied
Hi Monika - there is a further issue that I have encountered. On the cheeks of the mermaid (an ellipse) I have added a blur effect. I have just used your technique with a fresh set of shapes, which included an ellipse with a fill and blur effect. I copy the objects, lock the layer and then paste on top - all okay - but when I hit unite to create the background template you suggest the blur effect is added to the whole shape. Just thought I'd share this as these are the type of issues I am facing. Many thanks. Luisa
Copy link to clipboard
Copied
You can easily delete the blur effect using the appearance panel.
Copy link to clipboard
Copied
Hi Monika
Still struggling with this - the image uploads okay, but then when I bring into the programme it says it cannot bring in this file. However, it did bring in the more basic shapes that I worked upon. Probably being stupid, but cannot see the image upload icon? Where is it please?
Copy link to clipboard
Copied
Please use the forum's web interface and click this button to upload images to the forum:

Copy link to clipboard
Copied
On 19 September 2017 at 21:43, Monika Gause <forums_noreply@adobe.com>
Copy link to clipboard
Copied
Copy link to clipboard
Copied

Copy link to clipboard
Copied
Looks like the white undercoat somehow didn't make it into the outline view. You might need to expand it in case you made it with an effect or with a stroke.
As for the color: you will need to read the laser cutter's manual on how to get the file correctly into the machine. Or ask the company that made it. This is the Illustrator forum and although some people know something about some peripherals, we don't know everything about any peripheral.
Copy link to clipboard
Copied
Thanks Monika. I really appreciate your advice. I'll do what you say and
see if Cricut can offer any advice.
Many thanks
Luisa
On 19 September 2017 at 22:14, Monika Gause <forums_noreply@adobe.com>
Copy link to clipboard
Copied
Hi Monika - thought I'd let you know that I found a solution - if you export the file as a PNG it works perfectly. Thought I'd share in case it comes up again.
Sent from my iPhone
Copy link to clipboard
Copied
Not sure I can provide image of the layers easily as there's lots going on - I can upload the ai file though?

Find more inspiration, events, and resources on the new Adobe Community
Explore Now
 AdChoices