Exit
  • Global community
    • Language:
      • Deutsch
      • English
      • Español
      • Français
      • Português
  • 日本語コミュニティ
  • 한국 커뮤니티
0

how do i connect these lines to create one object

Community Beginner ,
Sep 23, 2018 Sep 23, 2018

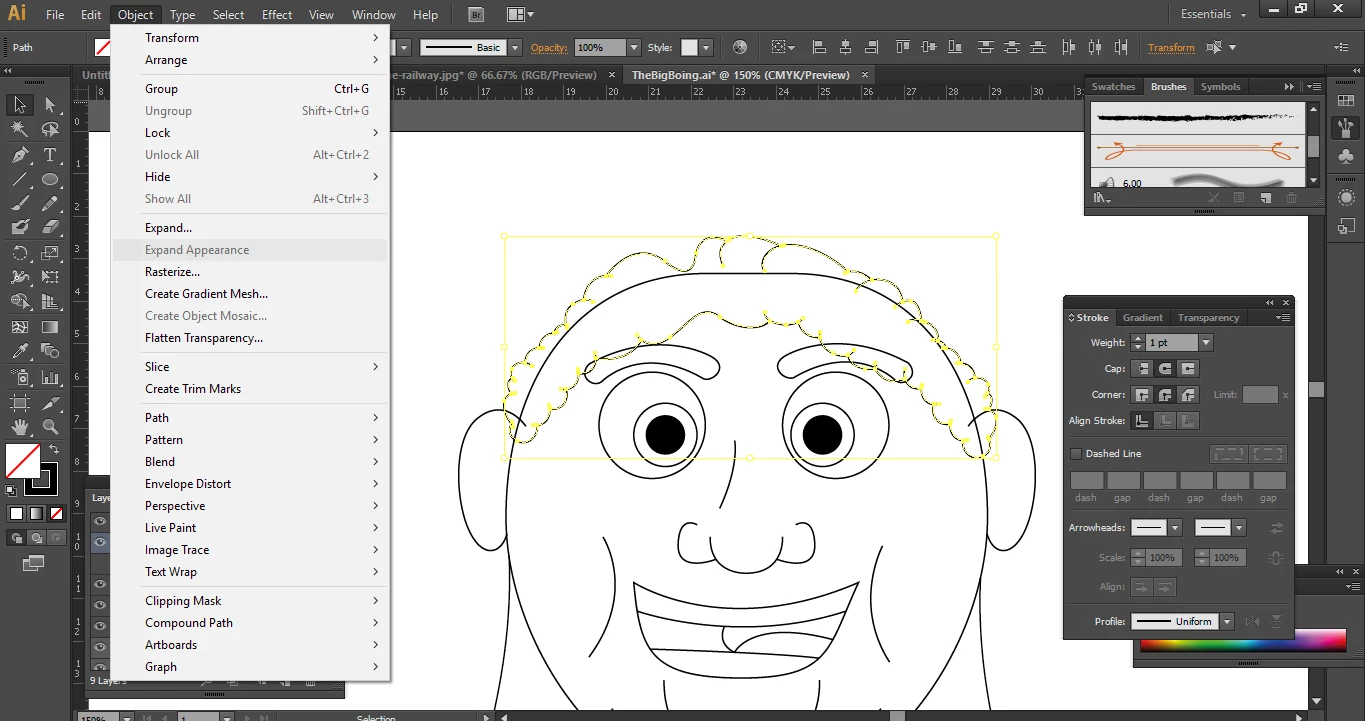
I'm trying to create one object so that I can paint withing the lines etc, I've watched online tutorials and they state i need to expand appearance, however this option isn't available to me (see picture). Any help on how to make this selected area into one object would be greatly appreciated. I'd like to be able colour in my character, thank you

Windows 10 - CS6
boing.png

2.2K
Translate
Report
Community guidelines
Be kind and respectful, give credit to the original source of content, and search for duplicates before posting. Learn more
community guidelines

correct answers 1 Correct answer

Guide , Sep 23, 2018 Sep 23, 2018

ok, then select all the hair lines and use Object > Live Paint > Make, fill the internal area with needed color and then choose Object > Live Paint > Expand. You will have the filled object and the lines as separate details.

Translate
Adobe
Guide ,
Sep 23, 2018 Sep 23, 2018

Now you don't have anthing to expand. You have the simple lines with basic appearance (basic stroke form, flat stroke color and no fill), it doesn't need to be expanded. Show pls the example of what you want to get finally, it helps to say something more.

Translate
Report
Community guidelines
Be kind and respectful, give credit to the original source of content, and search for duplicates before posting. Learn more
community guidelines
Community Beginner ,
Sep 23, 2018 Sep 23, 2018

I'm just wanting to color in my character like this without having to move it over to photoshop, don't know how else to explain really, i'm very new to illustrator after using photoshop for most of my life.


boing3.png

Translate
Report
Community guidelines
Be kind and respectful, give credit to the original source of content, and search for duplicates before posting. Learn more
community guidelines
Guide ,
Sep 23, 2018 Sep 23, 2018

ok, then select all the hair lines and use Object > Live Paint > Make, fill the internal area with needed color and then choose Object > Live Paint > Expand. You will have the filled object and the lines as separate details.

Translate
Report
Community guidelines
Be kind and respectful, give credit to the original source of content, and search for duplicates before posting. Learn more
community guidelines
Community Expert ,
Sep 23, 2018 Sep 23, 2018

Kirk,

If your just using Live Paint to colour the hairy area (which can be done without joining the paths) is out of the question, and if you really wish to have everything (joined) as one path without losing any parts, how about Object>Path>Outline Stroke followed by Pathfinder>Unite (to create one filled path)?

Translate
Report
Community guidelines
Be kind and respectful, give credit to the original source of content, and search for duplicates before posting. Learn more
community guidelines
Community Beginner ,
Sep 23, 2018 Sep 23, 2018

i'll give that a try.. thanks

Translate
Report
Community guidelines
Be kind and respectful, give credit to the original source of content, and search for duplicates before posting. Learn more
community guidelines
Community Beginner ,
Sep 23, 2018 Sep 23, 2018

Thank you to you both, I've now got the desired look i wanted using both of your help, Thank you

Translate
Report
Community guidelines
Be kind and respectful, give credit to the original source of content, and search for duplicates before posting. Learn more
community guidelines
Guide ,
Sep 23, 2018 Sep 23, 2018

Hard to say without knowing how its created, maybe you have already expanded the single line

if you cannot give it a fill, use the Shape Builder tool- click, and drag if necessary .

Next

Select it with the Selection Tool

Object >  Compound path > Make

Switch to Draw inside mode  (at the bottom of the tools bar)

Select the Brush

and paint away

Image result for draw inside mode adobe  illustrator

Translate
Report
Community guidelines
Be kind and respectful, give credit to the original source of content, and search for duplicates before posting. Learn more
community guidelines
Community Expert ,
Sep 23, 2018 Sep 23, 2018
LATEST

I actually do Expand my lines when creating characters.  The reason I do this is because I use Live Paint to give the character its base color.  Since I have various line styles and shapes... expanding them keeps them all looking the way I want.  Originally I did not do this and line would revert to a standard style.... which was not what I wanted.  Plus when I expand the lines, I can play with them or tweak them more.

My Layers Panel is in this order....

Top Layer: Line Art (not colored in)

Next Layer: Highlights

Next Layer: Shadows

Bottom Layer: Line Art that I colored in using Live Paint

Now granted the above layer order is just an example as I usually have 100s of layers to create an image.

The reason for the 'Top Line Art Layer' is so that I can draw or paint below it without messing up the outlines.  But my top layer and bottom layers are as what they are in the list.  The middle layers are where I add the details.  If that makes sense.  If not I can explain it or show an example of my layer system.

If you want you can view my portfolio.  I would say 100% of my newer stuff is created in Illustrator.

Kenneth Shinabery - Digital Artwork & Character Design

NOTE: When working in Illustrator try thinking like a graffiti artist when working with layers.  I found that to be helpful. 

a25d521c-2b47-4f43-9cc1-8fccca714d7c_rw_1920.jpg

Translate
Report
Community guidelines
Be kind and respectful, give credit to the original source of content, and search for duplicates before posting. Learn more
community guidelines