- Home
- Illustrator
- Discussions
- How do I get a dissolved edge in Illustrator?
- How do I get a dissolved edge in Illustrator?
Copy link to clipboard
Copied
I'm trying to create an image with a dissolved edge in Illustrator but I can't seem to figure it out. I wanted to use something similar to a halftone effect instead of blocks.
I apologize if I'm not using the proper terminology. I'm a newbie with Illustrator.
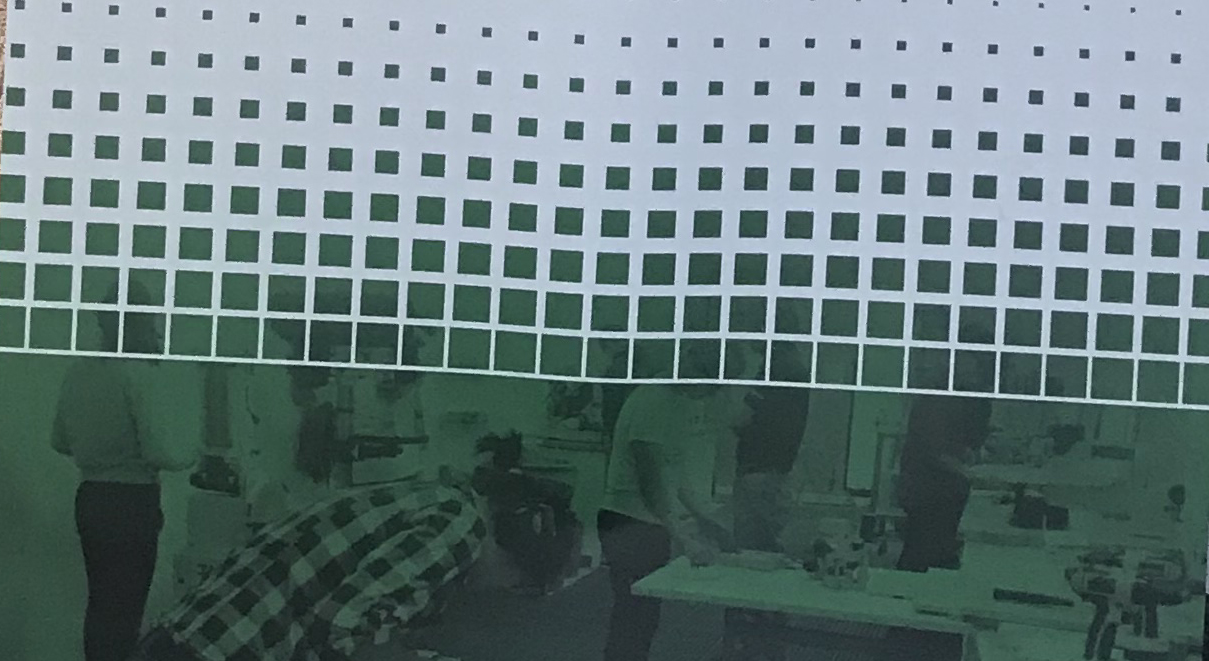
Below is an example of what I'm talking about.

 1 Correct answer
Another way
make a blend of 2 squares like Barbara has done above
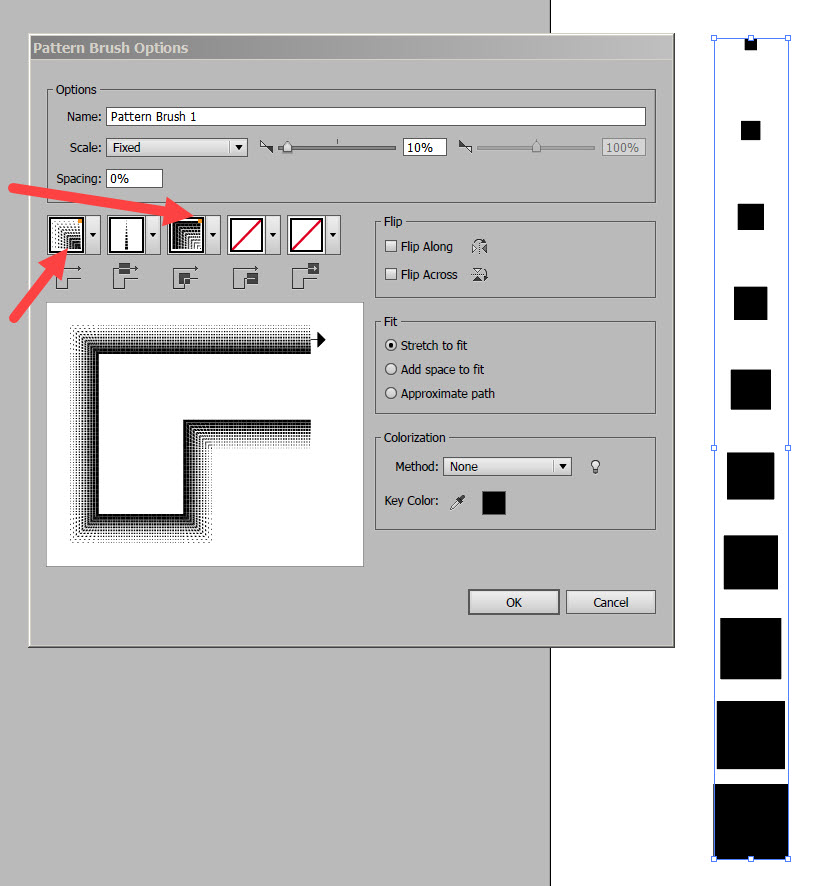
drag the single column into the brushes panel
In New brush choose Pattern brush option
set corners (red pointers) to Auto Between
scale, maybe to 10
OK

1 Draw a line (the length of the image etc) with a stroke no fill
2 In Brushes click to apply new brush to stroke
3 Add a rectangle below black fill no stroke fill
4 move rectangle up up to cover the lower black line
select both the line and the rectangle Object > Group

Add photo , make
...Explore related tutorials & articles
Copy link to clipboard
Copied
You could try blends or brushes (this kind of effect only on straight lines).
It gets easier with the plugin Phantasm. It's not free, but can create vector halftone effects.
Copy link to clipboard
Copied
Halftones usually progress from square dots to round dots. However, your example is made completely of squares. This is a way that you could create the squares --
Draw a small square and a large square for the beginning and ending shapes.

Choose Object > Blend > Blend Options. Specify the number of intermediate shapes that you want.

With the shapes selected, choose Object > Blend > Make.

Hold down Option (Mac) Alt (WIndows) and start dragging to make a duplicate. Add the Shift key before releasing the mouse to constrain the movement.

Choose Object > Transform > Transform Again or Ctrl-D (windows) Command-D (mac). Continue the Transform Again command until you have the number of columns you need.

When done you may want to group all the columns to make it easier to transform them.
Copy link to clipboard
Copied
Another way
make a blend of 2 squares like Barbara has done above
drag the single column into the brushes panel
In New brush choose Pattern brush option
set corners (red pointers) to Auto Between
scale, maybe to 10
OK

1 Draw a line (the length of the image etc) with a stroke no fill
2 In Brushes click to apply new brush to stroke
3 Add a rectangle below black fill no stroke fill
4 move rectangle up up to cover the lower black line
select both the line and the rectangle Object > Group

Add photo , make sure its below Black pattern
Select
Object > Arrange >Send to back
Select both image and pattern
open Transparently panel
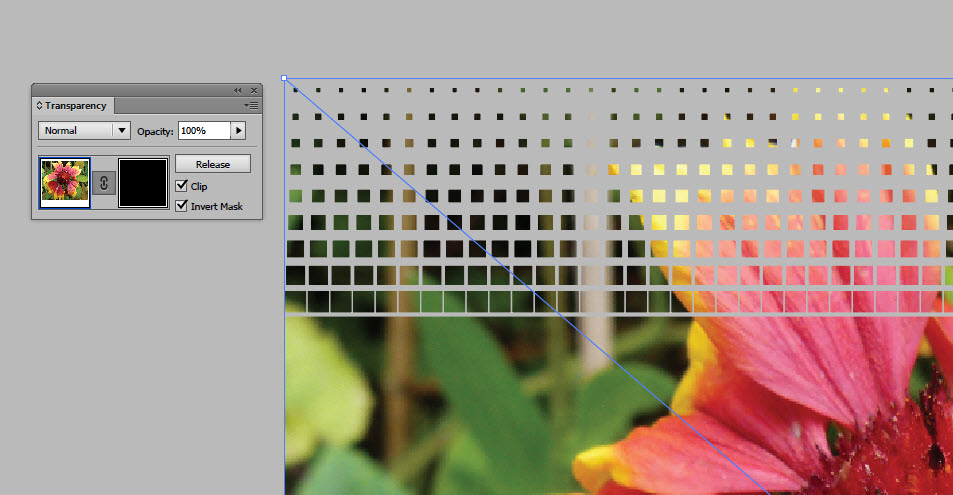
Click make mask

toggle between clip and invert mask settings until it looks right

I understand you are just learning and there's many steps, but sadly that's often the case in Illustrator with no one touch button
Copy link to clipboard
Copied
really nice approach to issue.
Copy link to clipboard
Copied
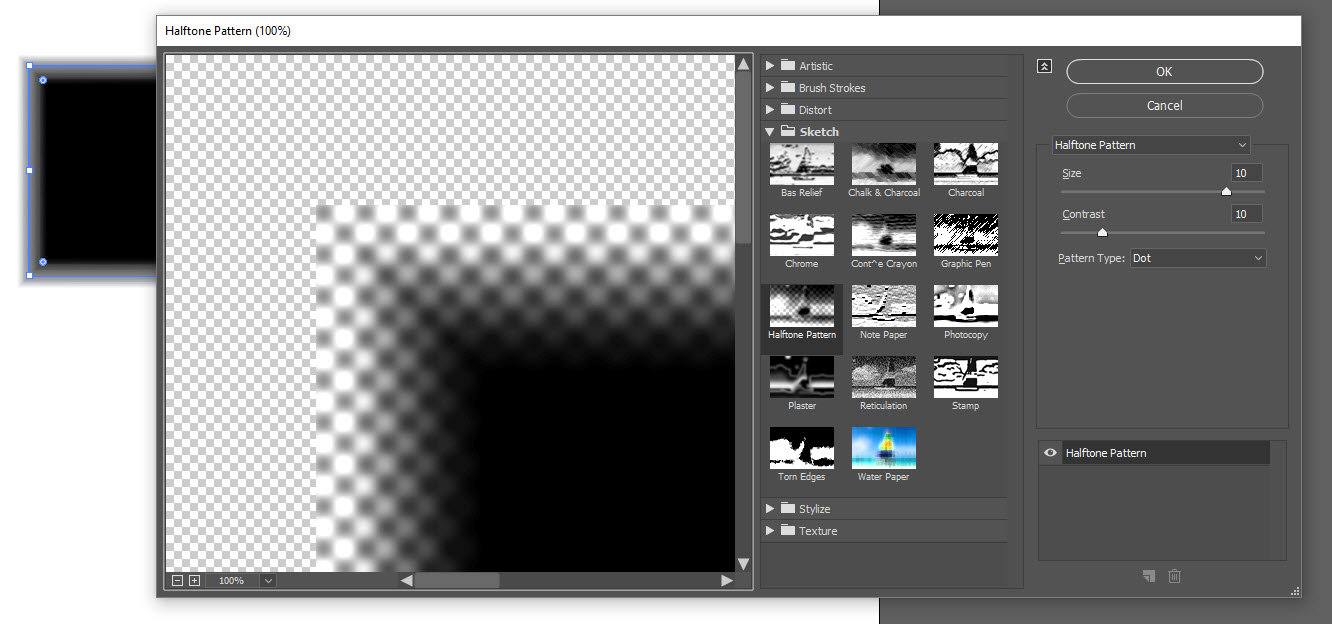
You can apply a halftone pattern to a rectangle then use a mask like Ray suggests.
1. Make a rectangle (the same size as your image) with a black fill and a gradient that is applied across the stroke.
2. Go to Effect > Sketch > Halftone Pattern and adjust the size and contrast.

It is a live effect, which means that if you want to make adjustments to your gradient stroke, the effect will update accordingly.
3. Align the rectangle and image, then go to the Transparency panel and make the mask.


