Here are the steps I did to achieve this...
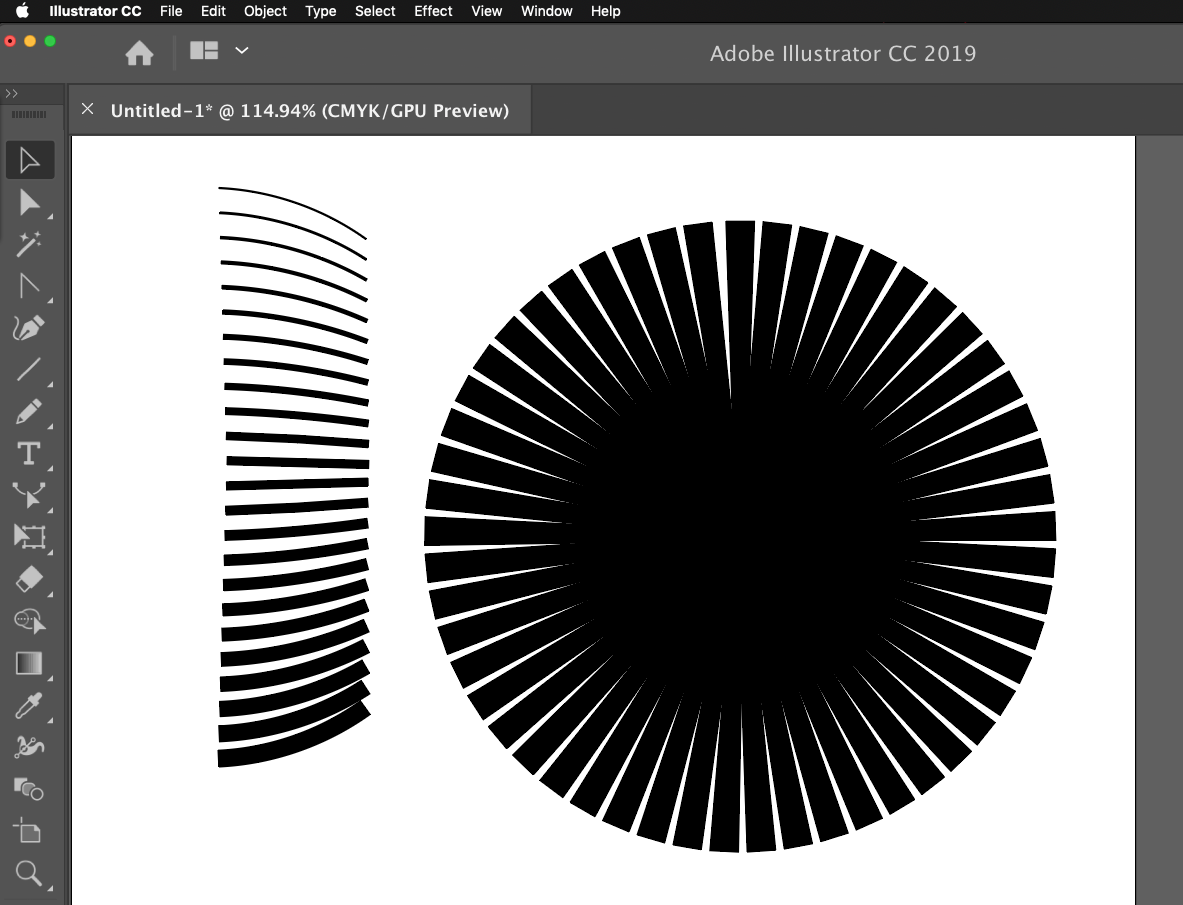
The first part, I drew 2 curved lines with the pencil tool, the top line and a middle line (not so curved). I made the top line 1pt, bottom one 5pts. I used the blend tool set to 10 steps. For some reason it wouldn't work on the bottom part, that is why I only did a top. I duplicated the blend, flipped and rotated, then changed the original line weight of the now bottom line to 10pts.
Second part, I drew a line with the line tool, used the width tool to reshape it. Using the rotate tool, place the reference point at the pointy end, duplicate while rotating and use the "do it again" command - cntrl / cmd + d
Melissa Piccone | Adobe Trainer | Online Courses Author | Fine Artist


 2
Replies
2
Replies


 AdChoices