coye
Known Participant
November 6, 2021
Answered

How to add a auto-sized rectangle around text box?

  • November 6, 2021
  • 1 reply
  • 4257 views

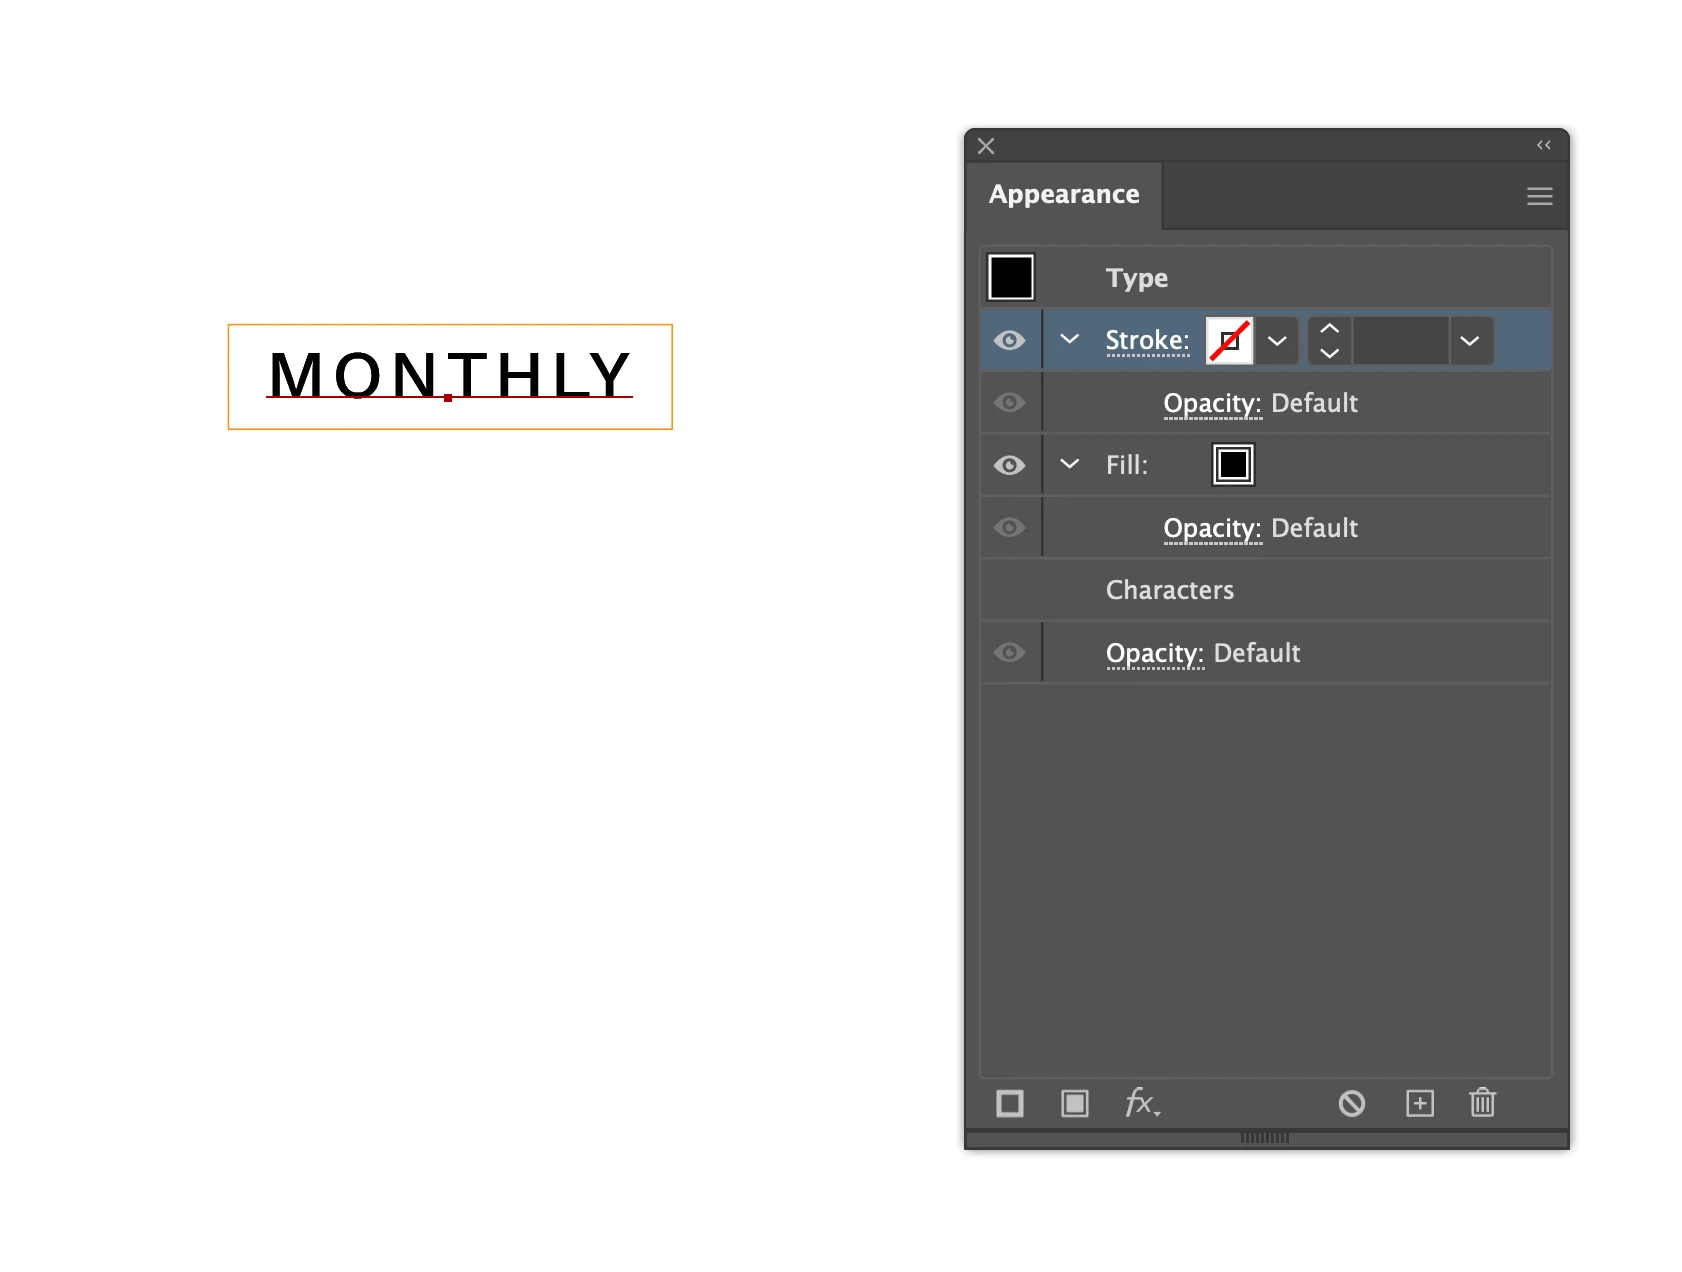
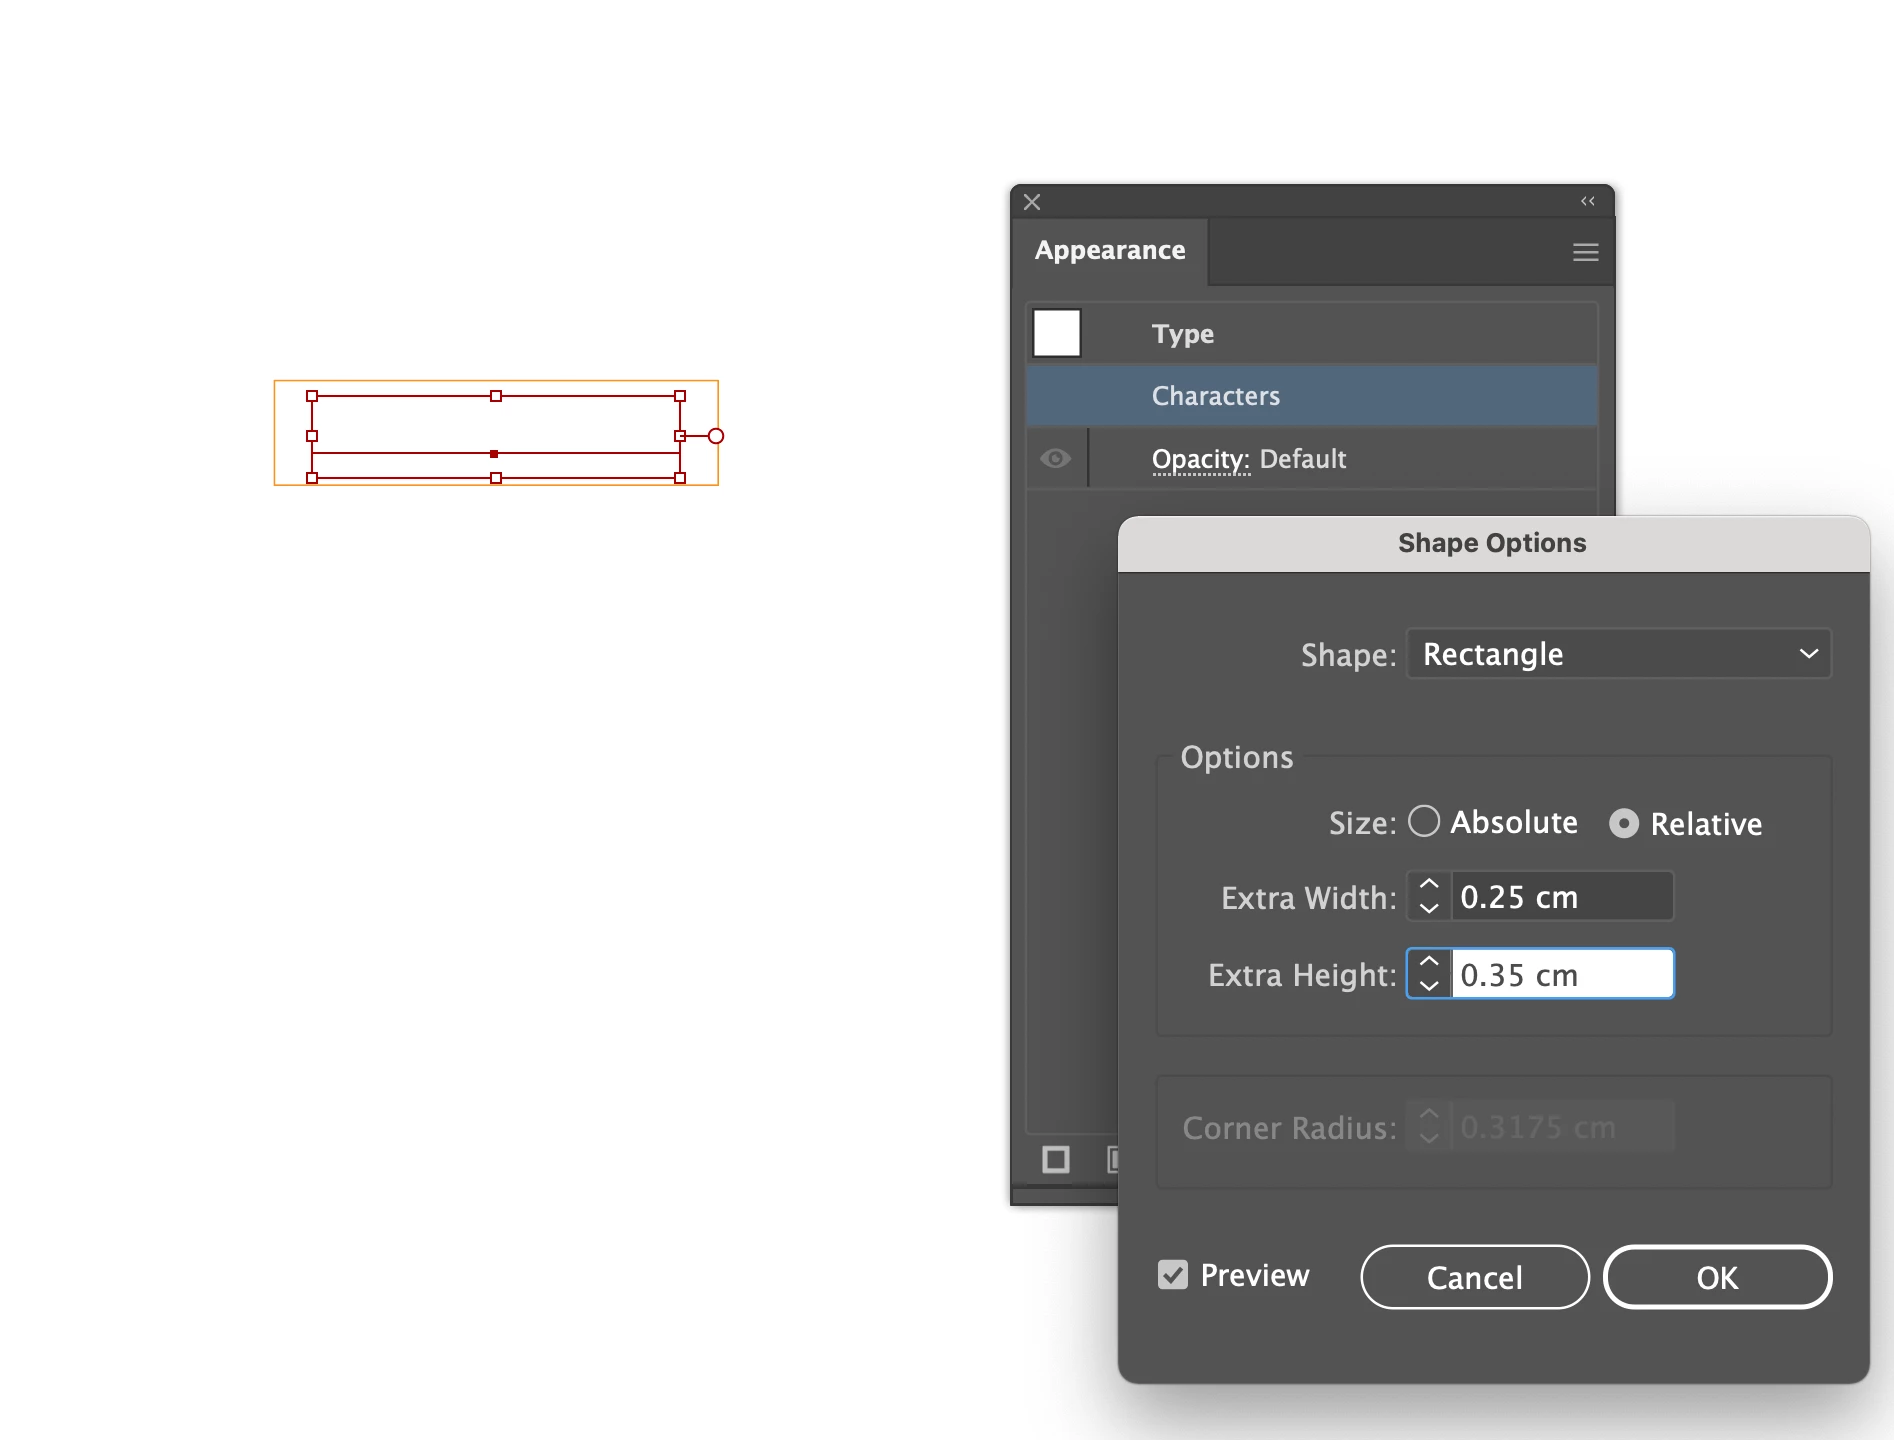
The orange box is a cut line. I initially add the box around the text manually and but it took me so much time to change the size of the box if I want to increase the font size. I followed the steps from this post (https://graphicdesign.stackexchange.com/questions/19824/illustrator-auto-sized-text-box-with-shaded-background), but the text became transparent when I selected Effect > Convert to shape > Rectangle. I don't know how to keep the text in black with the orange box around at the same time. I would like to keep the height in 0.35cm and the width should be the length of the text + 0.25cm. Does anyone know how to create an auto-sized rectangle around the text box :(?

Correct answer Jacob Bugge

coye,


Whatever is described, you can:


1) With the normal Type Tool create the text as live Type; you may wish to choose Align Center in the Window>Paragraph palette (bundled with the Character palette where you set the font and size);
2) In the Window>Appearance panel click Add New Fill, then drag that fill down below Characters and click it to have it selected; it will be highlighted;
3) Set the desired background colour, you may use the Window>Color palette or something else;
4) Effect>Convert to Shape>Rectangle (or Rounded Rectangle), then Click Relative and set the width and height to be added to the live Type; you may try different values in Preview to see how it works.

This will give you the text as live Type so you can edit it (you may add text, even more lines, hence the Paragraph choice), and it will stay centred on the background, and the background will adapt to the text.


Edit: I just had a closer look at your screenshot, and it seems that the crucial part is to perform step 2) in full.

1 reply

Jacob Bugge
Community Expert
Jacob BuggeCommunity ExpertCorrect answer
Community Expert
November 6, 2021

coye,


Whatever is described, you can:


1) With the normal Type Tool create the text as live Type; you may wish to choose Align Center in the Window>Paragraph palette (bundled with the Character palette where you set the font and size);
2) In the Window>Appearance panel click Add New Fill, then drag that fill down below Characters and click it to have it selected; it will be highlighted;
3) Set the desired background colour, you may use the Window>Color palette or something else;
4) Effect>Convert to Shape>Rectangle (or Rounded Rectangle), then Click Relative and set the width and height to be added to the live Type; you may try different values in Preview to see how it works.

This will give you the text as live Type so you can edit it (you may add text, even more lines, hence the Paragraph choice), and it will stay centred on the background, and the background will adapt to the text.


Edit: I just had a closer look at your screenshot, and it seems that the crucial part is to perform step 2) in full.

Participant
October 2, 2024

Reviving this thread with a follow-up question:


When I do this, the text is not perfectly aligned to the rectangle, due to it aligning to the em box instead of the glyph bounds, even if I select the glyph bounds options in the Alignment panel.


Any help? Thanks!

Ton Frederiks
Community Expert
Community Expert
October 2, 2024

Thank you so much for the quick reply!


Regarding step 5, is there a reason not to just keep Use Preview Bounds turned on?


Use Preview Bounds can be helpful when you want to know the size of an object including attributes and effects.

But it is easily forgotten and can give problematic results when changing the size in the Transform panel.

It would be nice to have it selectively applied to some objects, but maybe that will add to the confusion.

To add to Jaobs suggestions, you can also add an Effect > Path > Outline Object effect to the type without needing the "Use Preview Bounds" option.