oh okay. Yes, I needed a Stroke brush around them. I learned a lot from you. Thank you so much for your kind help.
My pleasure. I'm glad I can help you.
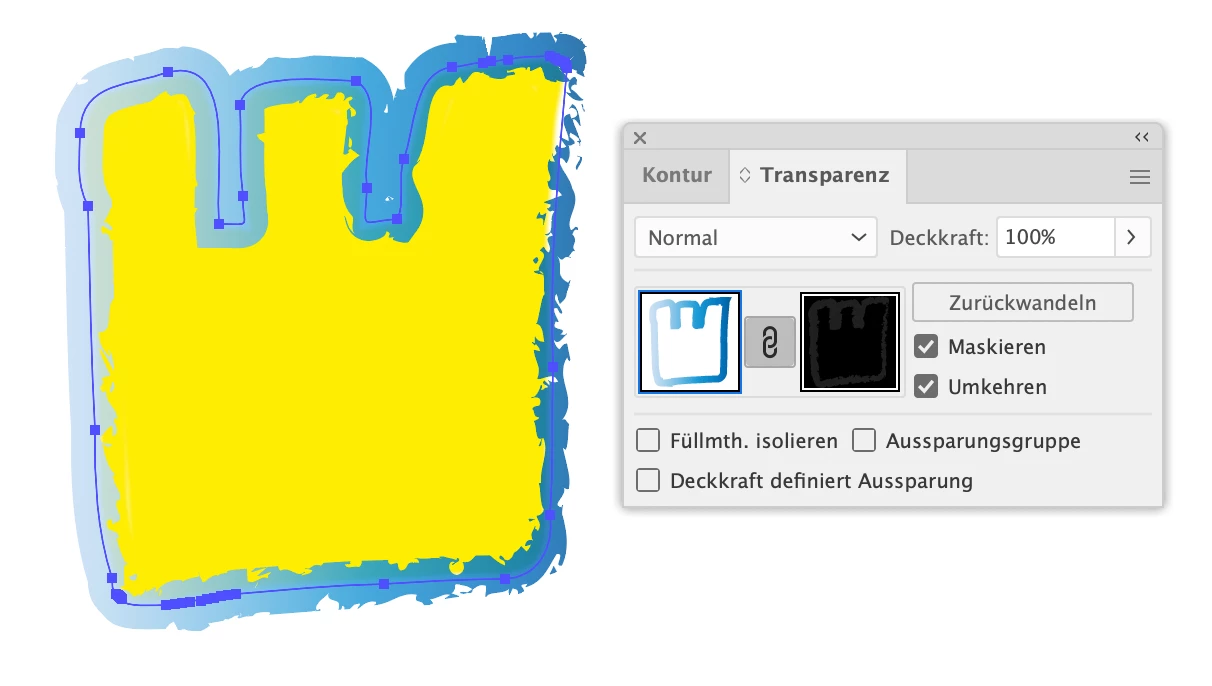
So in order to get the gradient into the stroke, what I would do:
1. Make this a basic troke: take away the brush and the gradient in the Appearance panel. So this is just a basic stroke (click on Basic in the brushes panel)
2. Object > Expand Appearance. This gives you a group that contains the stroke(s) and the pixel image.
3. Ungroup those.
4. Maybe you want to check your trokes, there might be a lot of points in the paths. You could Object > Path > Simplify
5. Make a copy of the paths with the strokes (you can use Edit > Copy and then Edit > Paste in front.
6. Apply the brush to all those top objects
7. Apply a gradient to all those bottom objects

8. select all those paths with brushes and group them. You can select one and then use Select > Same > Appearance (if they all have the same brush and color and troke thickness
9. Select all the paths with gradients and all the group with the brush paths and then open the Transparency panel and click on "Make Mask". Check "Invert"