Exit
  • Global community
    • Language:
      • Deutsch
      • English
      • Español
      • Français
      • Português
  • 日本語コミュニティ
  • 한국 커뮤니티
0

How to align different objects in a pattern to a spiral increasing in size?

New Here ,
Jan 11, 2017 Jan 11, 2017

Hey everyone, I'm sorry if this has been answered before and I just missed it. But I am trying to create a spiral with a pattern running along it that increases in size, similar to those Grateful Dead tie dye shirts

Grateful Example.jpeg

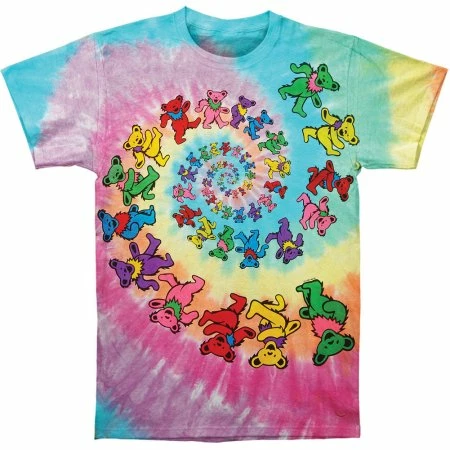
However, my objects are different so I don't think using the blend tool helps me. When I line up the figures and make either a pattern or art brush, the objects are distorted. Would really appreciate your input on the best possible solution!

Thanks

2.1K
Translate
Report
Community guidelines
Be kind and respectful, give credit to the original source of content, and search for duplicates before posting. Learn more
community guidelines
Adobe
Community Expert ,
Jan 11, 2017 Jan 11, 2017

You could create the pattern with pattern brushes and the change in size with a width profile.

But the pattern brush will distort the pattern slightly.

You could also try a blend, but this only works when all the pattern shapes are identical.

Translate
Report
Community guidelines
Be kind and respectful, give credit to the original source of content, and search for duplicates before posting. Learn more
community guidelines
New Here ,
Jan 11, 2017 Jan 11, 2017

Thanks M! The blend tool will not work for me, since as you mentioned the shapes must be identical. I did also try using the width tool but any way I came up with got distorted imaged at the center. =\

I also tried making a actual shape of the spiral and using an envelope with my objects but I ended up getting a huge mess that would make Pollock proud.

Translate
Report
Community guidelines
Be kind and respectful, give credit to the original source of content, and search for duplicates before posting. Learn more
community guidelines
Community Expert ,
Jan 11, 2017 Jan 11, 2017

Maybe you need to create this using a dummy first.

You could draw a rectangle that has the size of your objects, then make a symbol out of it. Then create the spiral with the blend method. Then exchange the symbols.

Translate
Report
Community guidelines
Be kind and respectful, give credit to the original source of content, and search for duplicates before posting. Learn more
community guidelines
Community Expert ,
Jan 12, 2017 Jan 12, 2017
LATEST

Roxanne,

I believe this is one of the obvious uses of the 1 step blend fake:

When you wish to have undistorted objects distributed along (part of) a circle (or another curved path which may be done similarly) and you know the number of objects, you may use the 1 step fake blend (for each set of objects if you have more sets to be distributed), with some preparation to make things fit together:

1) First place the objects on a straight horizontal line as they would be on a straight path, with a copy of the first object as the last object (only) if you have a closed path and wish to have the objects go all the way round;

2) With the centre Reference Point selected in the Transform palette use the X values of the first and last objects to establish the total width (which must be measured centre to centre) for the next steps;

3) Create the curved path, copy it in front of itself if you wish to retain the actual curved path behind the objects then lock/hide the original and work with the copy, then cut the path (if not ending there already) where you want the centre of the first/last object and establish the total path length, you should be able to see it in the Document Info palette; for a full circle just cut at the start/stop (coinciding), for a partial circle or similar curved path cut in two places;

4) Adapt the size of the objects 1) or the circle 3) so that the width and the path length become identical; you may use the Transform palette and multiply/divide the value in the W or H box by the quotient of the two lengths (just add * or / and then the number) and press Ctrl/CmdEnter to retain proportions;

5) Object>Blend>Options>Specified steps, set the value to 1 and set Orientation to Align to Path;

6) Select all the objects and Object>Blend>Make, create a copy just in case (now you have some distorted shapes between the objects, but not for long);

7) Select the Blend from 6) and the circle from 3) and Object>Blend>Replace Spine;

8) Object>Blend>Release, and you may also delete the last object on top of first object if you have the objects going all the way round a closed path;

9) Enjoy.

You can see a screenshot from a somewhat different use in post #8 in this recent thread:

How to wrap a bar chart around a circle?

Translate
Report
Community guidelines
Be kind and respectful, give credit to the original source of content, and search for duplicates before posting. Learn more
community guidelines