Copy link to clipboard
Copied
Hi,
I need to make a grid where each square is 2x2cm and a spacer inbetween squares is 1mm.
can anyone tell me how to do that?
Thabk you!!
Daniel
 1 Correct answer
Daniel,
Based on the IMG shared (please use the Insert Photos button at the top of the Reply box, looks like moon over mountains, rather than the conspicuous Attach option which requires everyone to open separately to see), how about the following way (shown below)?
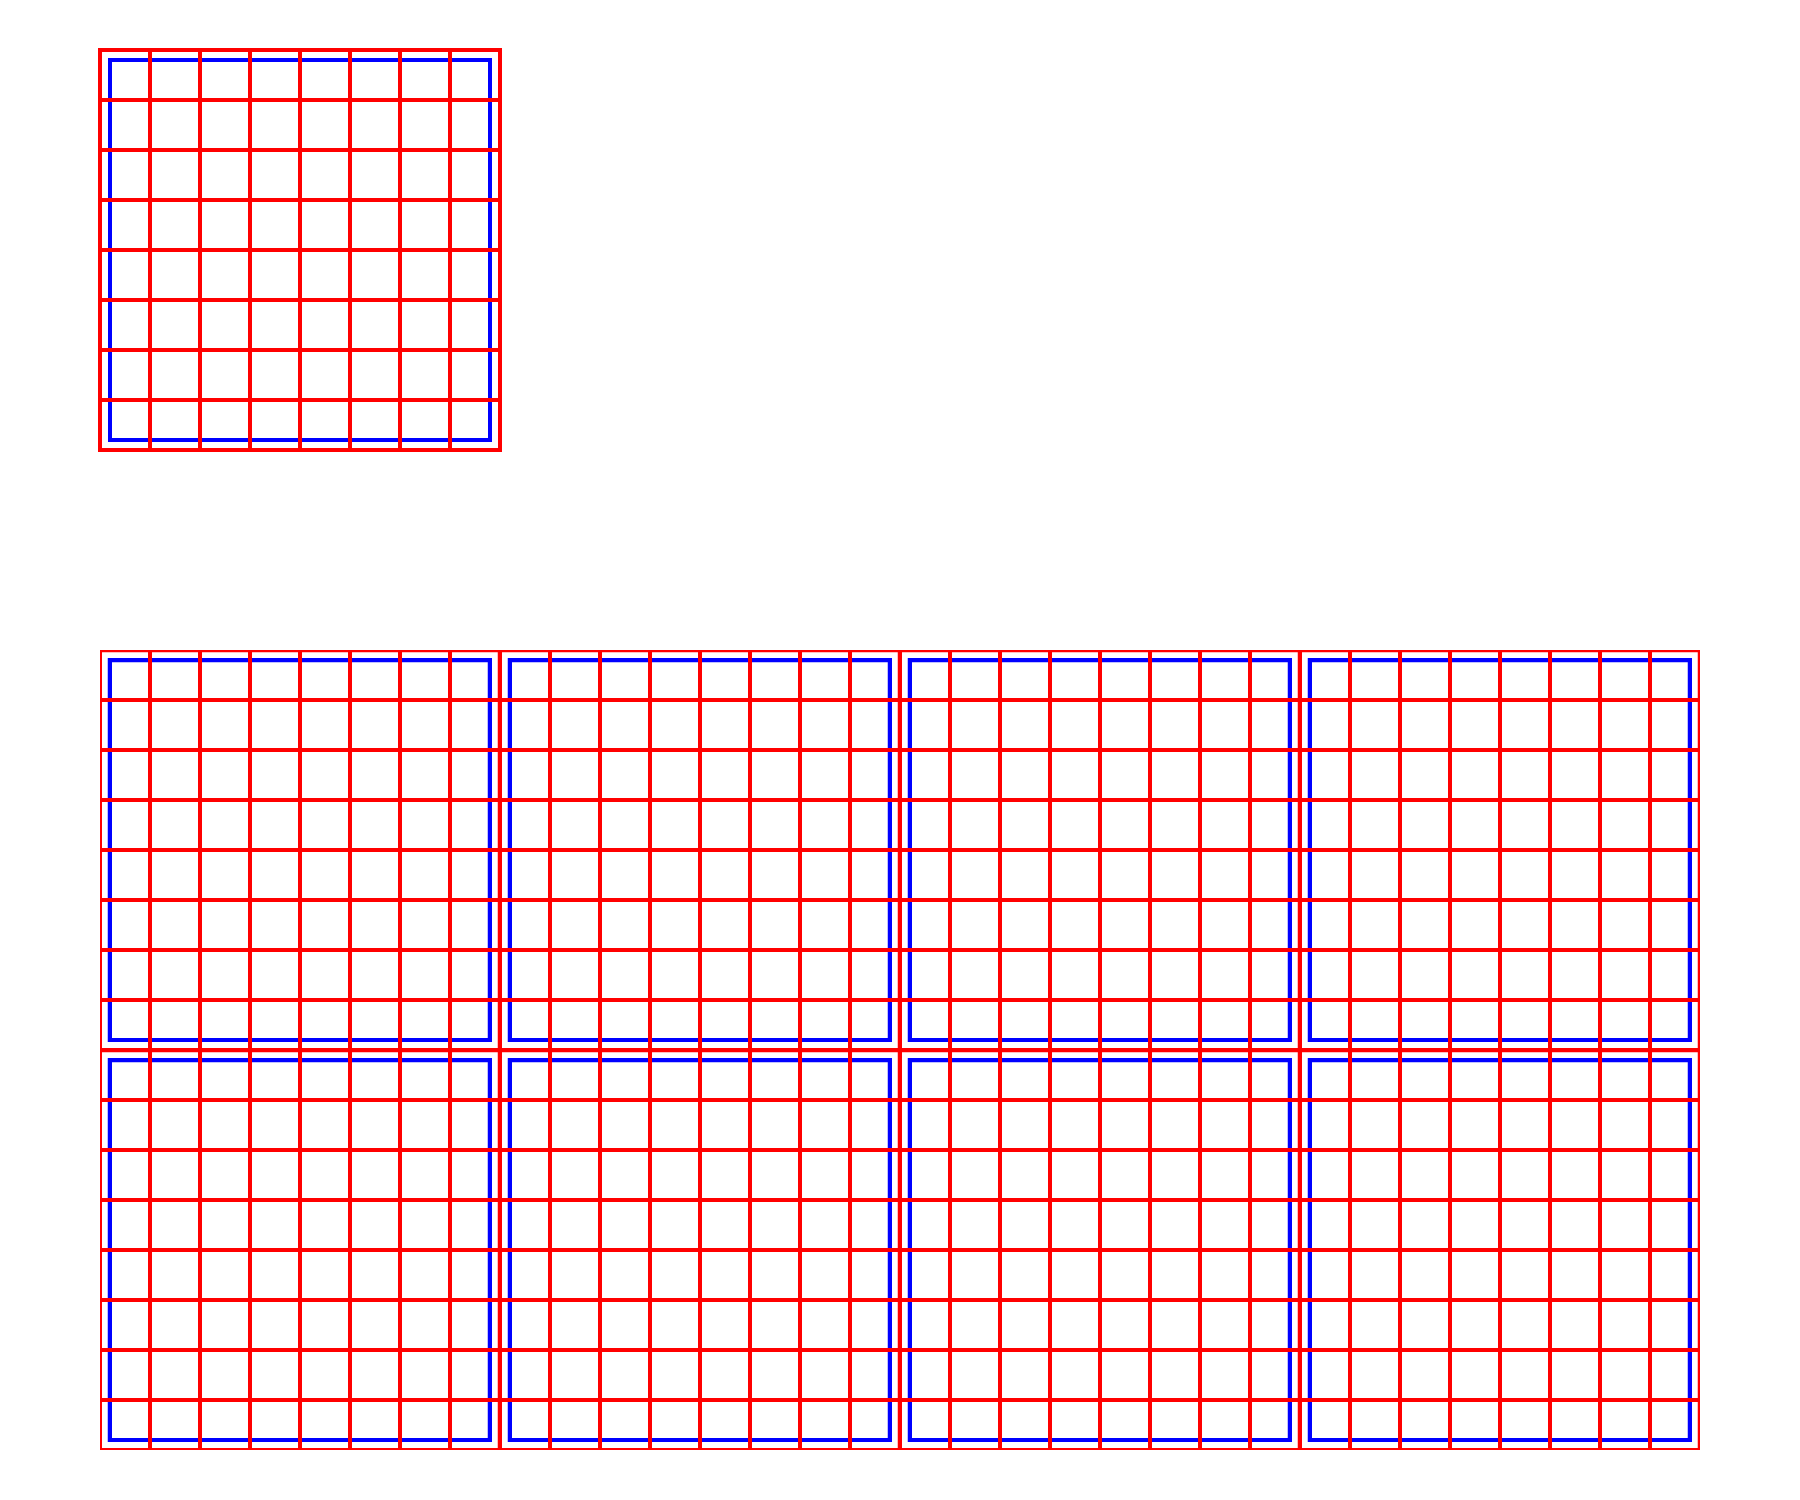
1) With the Polar Grid Tool create a grid of the desired size (shown at 200 x 200 pt in red) with the desired number of dividers (7 both ways corresponding to the grid in your image), and position the grid to start at X = Y = 0;
...Explore related tutorials & articles
Copy link to clipboard
Copied
Exactly what is causing you issues?
And how do you want to use this grid? As the document grid? Template objects?
Copy link to clipboard
Copied
It’s gonna be for a template that I’ll print out and build a mosaic on top of.
Copy link to clipboard
Copied
You could use what Kurt Gold posted.
Draw a dark rectangle in the background, possible lock it and then put a white square on top. Or apply dark strokes to the square. Make sure to use the numeric input for the repeat, because it doesn't snap.
You can input everything in mm in Illustrator. Just select the unit together with the value and then input mm
Copy link to clipboard
Copied
Sounds as if Object menu > Repeat > Grid may help.
Copy link to clipboard
Copied
Daniel,
Based on the IMG shared (please use the Insert Photos button at the top of the Reply box, looks like moon over mountains, rather than the conspicuous Attach option which requires everyone to open separately to see), how about the following way (shown below)?
1) With the Polar Grid Tool create a grid of the desired size (shown at 200 x 200 pt in red) with the desired number of dividers (7 both ways corresponding to the grid in your image), and position the grid to start at X = Y = 0;
2) With the Direct Selection Tool select the outer square and use Object>Path Offset Path with a negative offset to create an inner path behind the grid (shown in blue for an offset of -5 pt);
3) With the Direct Selection Tool select the outer square again and hold Ctrl/Cmd while pressing C then B then X then B to bring the copy behind everything else, then set the Stroke to None in the Tool panel; this bottommost path is invisible but crucial to the following:
4) Select everything, and Group (optionally), then turn it into a Pattern Swatch.
The above is shown in the top image.
5) Now you can draw a rectangle of any size and apply the swatch to fill it with (repetitions of) the basic grid.
This is shown in the bottom image.
As you can see, the offset paths in blue beneath the red paths correspond to the grey paths beneath the white paths in your image.
Click to get closer, Click again to get closer still


