Copy link to clipboard
Copied
Hi all,
I'm not familiar with Illustrator (as I mostly use InDesign and sometimes Photoshop), so I'd be grateful for any help you can offer.
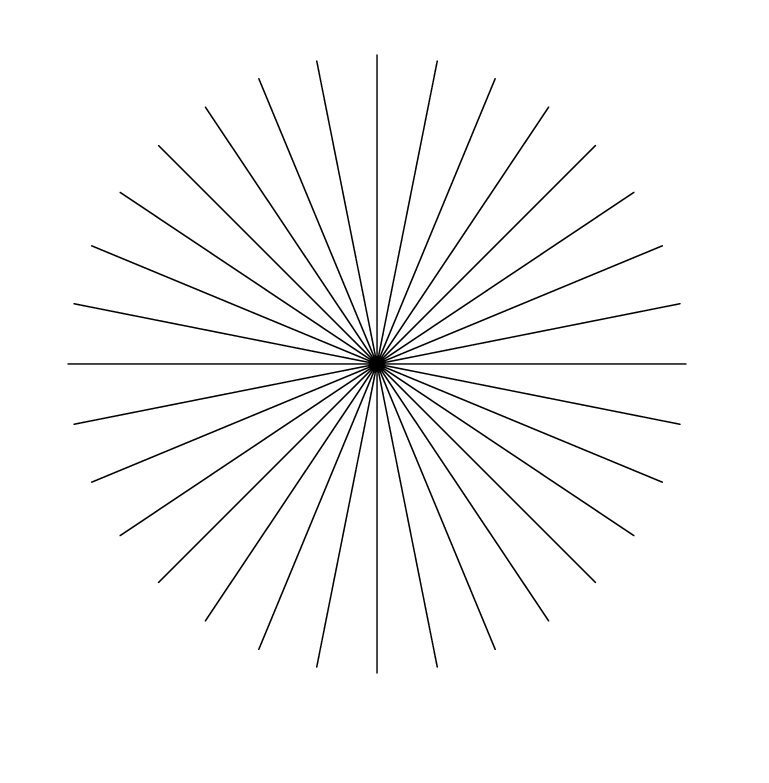
I need to create a vector graphic of straight lines radiating out from a single point — 32 lines, evenly spaced at 11.25 degrees.
I'm working with Illustrator CS5. Can anyone suggest an easy, straightforward way to do this, please?
I've searched the manual, knowledgebase and community help. "Radiant" only seems to return references to "gradient". As always, the art of a search is in knowing what terms to use, but I can't think how else to describe what I'm trying to achieve.
Thanks for your help, folks.
 1 Correct answer
Don't use the star tool.
Use the radial grid tool.
Ungroup
Select the lower half by drawing a selection rectangle with the select tool and hit delete.
Explore related tutorials & articles
Copy link to clipboard
Copied
MacEachaidh,
You may use the Polar Grid Tool (bundled with the Line Tool) with 32 Radial Dividers and 0 Concentric Dividers, then Direct Select the circle and delete it (after deselecting the Group, you can just click an empty spot on the Artboard). You may also Ungroup.
There are other ways, such as rotating 15 copies of one set of opposite lines, possible through Effect>Distort&Transform>Transform, or Object>Transform>Rotate.
Copy link to clipboard
Copied
Draw a horizontal line with the pen tool. Use the rotate tool (R is the keyboard shortcut)and Option(Alt)-click on the left anchor point of the line. In the dialog that comes up enter the amount that you want for the rotation. Click copy. Use the Cmd(Ctrl)-D keyboard shortcut to repeate as many times as necessary. Or use Object-Transform in the same way.
Copy link to clipboard
Copied
Jacob, Larry,
Many thanks for your suggestions.
Tried them both, both got it done, and I've learnt new things. Great! ![]()
Copy link to clipboard
Copied
You are welcome, MacEachaidh.
Us.
Copy link to clipboard
Copied
As we say in Illustrator there's more than one way to skin a canary.
Copy link to clipboard
Copied
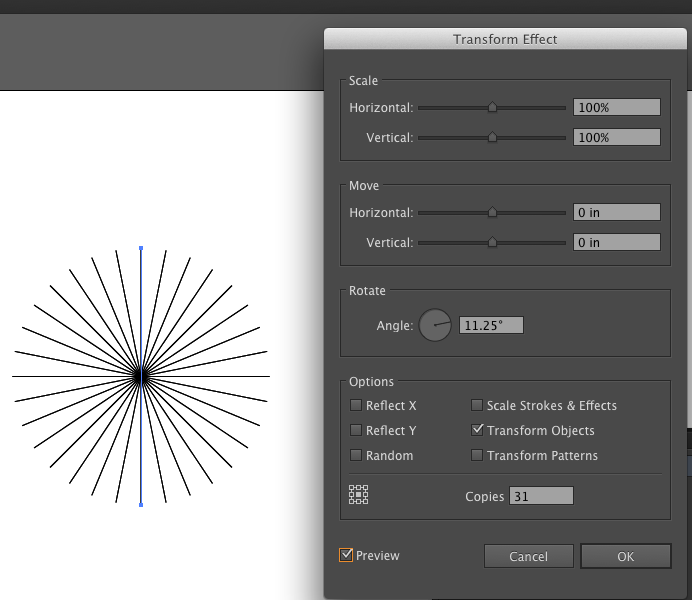
To prove larry's point probably the easiest way of doing this is to draw the line Vertically. got to Effects>Distort and Transform>Transform and simply input the angle and the number of copies which is one less than the toal since you have one already and click OK.

If you need the lines selectable you go to Object>Expand Appearance.
If you think you will need or want to change the number of lines keep it as an Efect and you can always chgange it in the future.
Also if you wanted and it is not the best way you can make a pie chart but tht is kind of messy.
Copy link to clipboard
Copied
More than one post here seem to prove that no one reads the first post (in full).
Copy link to clipboard
Copied
Edit.
I did read that wrong this time the first time I read it correctluy as you cn see from the screen shot I used one line and 31 copies at the desired angle. I have no idea why one would make a pair of lines going in opposite directions?
I thin I used the same effect but in a very different and simpler way. And thgat is why I think it is the easiest way. One Line 31 copiesat desired angle. Very different from a pair of lines going in opposite directions.
Copy link to clipboard
Copied
I have no idea why one would make a pair of lines going in opposite directions?
That would just be one line at twice the length with its centre at the centre of the Effect/Transform, giving half the number of lines in total.
Copy link to clipboard
Copied
Yes, I have to apologize I am actually showing what you wrote it is a duplicateand I made a mistake about how many copies there should have been 15 would be the right number not 31 so I made two mistakes.
Copy link to clipboard
Copied
I meant to do this the reason is the with one line orient at the bottom center in the position proxy when you expand the appeareance you will have 32 actual lines radiating out of the center. That was a msitake I made and I actually showed exactly whaat Jacob wrote, my error.
Copy link to clipboard
Copied
No need to apologize, Wade.
My post #7 (about no one reading the first post) was just playing on the OP statement about the 3+2 = 5 suggestions in the first two posts: Tried them both, ... and your referring to the canary skinning when the first post comtained There are other ways, such as ...
Your suggestions were different, not duplicates. I chose to only mention the double length basis, maybe a bit abstrusely.
But obviously, we are far from exhausting the possibilities. Among the sillier ways (in this case) are Blends and Brushes applied to a circle.
Copy link to clipboard
Copied
Here's an alternate method: Use the Star tool (click and hold the rectangle tool and select the star). Click and drag to make a star, then click in the star to edit the inner and outer radius and number of points. Make the inner radius 0. Use the stroke panel to change the width of the lines and round the ends, if desired.

Copy link to clipboard
Copied
It should be noted however, that using the Star Tool to do this will actualy produce lines over lines, not just single lines as it appears. Move them using the direct selection tool and you will see that that's the case. Just wanted to mention that in case that's an issue for anyone, thats all.
Copy link to clipboard
Copied
Copy link to clipboard
Copied
Don't use the star tool.
Use the radial grid tool.
Ungroup
Select the lower half by drawing a selection rectangle with the select tool and hit delete.
Get ready! An upgraded Adobe Community experience is coming in January.
Learn more

