

- Home
- Illustrator
- Discussions
- How to delete everything in a shape/outline
- How to delete everything in a shape/outline

Copy link to clipboard
Copied

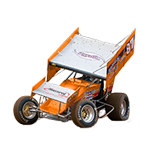
I'm not sure how to best explain what I'm asking, but i have a drawing similar to the image attached that has a lot of design inside a thick outline. I'm trying to remove everything inside the outline but can't seem to do so "cleanly". I tried to use the eraser but can't get a smooth line. I thought maybe I could remove all of the thinner lines but don't know if that's possible? There are so many paths and anchors that it's too tedious to delete them one at a time. I'm too new to AI and I feel that the answer must be easier than this. Please help, thank you!


 1 Correct answer
That worked! I copied the layer and hid the original, select all, group, pathfinder divide, and then unite. That gave me one outline and turned the shape black, so I changed the color to transparent and my path outline to black and increased the stroke. Thank you all!
Explore related tutorials & articles
 13
Replies
13
13
Replies
13

Copy link to clipboard
Copied
Start by checking your layers panel to figure out which layers/ groups actually make up the outline and which ones are the inside content. Deleting a huge chunk of those layers may already get you halfway there. for anything beyond that we would need screenshots of said layer panle's structure and the artwork with paths selected to get at least an idea how it may be structured.
Mylenium
Copy link to clipboard
Copied

Copy link to clipboard
Copied
First of all Duplicate the Layer containing the artwork as a backup and turn of it's visability, so only one Layer is visable.
Next select all (Ctrl/Cmd +A).
Right click and select Group.
Then go Object Expand.
Now all your stokes and paths will be editable with the Eraser.
I would use the Pen Tool to draw one shape to subtract the unwanted areas with the Pathfinder's Minus Front button.
I hope this helps!
Sim
Copy link to clipboard
Copied
I followed these steps and started erasing the midsection, but as as I started getting close to the edges I tried selecting Minus Front and the entire drawing deleted
Copy link to clipboard
Copied
"I thought maybe I could remove all of the thinner lines but don't know if that's possible?"
If the "thinner" lines are actually stroked paths, you could select one, then choose Select > Same > Stroke Weight to select all the paths with that same weight assigned and then Delete. BUT, it's impossible for us to know whether you've got stroked paths or filled paths, or a mix of both, without seeing the artwork.
"I'm too new to AI and I feel that the answer must be easier than this."
It may or may not be. Most clipart that looks like your example is distributed as one big black-filled compound path; really not meant for the kind of editing you're attempting. Post a screenshot of your artwork, selected.
Copy link to clipboard
Copied
Here's a screenshot of everything selected, it looks like what you said about one big compound path


Copy link to clipboard
Copied
Have you tried Unite in the Patherfinder Pallet?
Copy link to clipboard
Copied
I tried and the details went away but so did the outline, so I was left with one solid black shape. This is closer to what I was hoping for! but I just want an outline of the shape.
Copy link to clipboard
Copied
Okay, so at that stage, try this:
Click the swap arrow in the Tools panel Stroke/Fill proxy

Is that the result you want?
Copy link to clipboard
Copied
That worked! I copied the layer and hid the original, select all, group, pathfinder divide, and then unite. That gave me one outline and turned the shape black, so I changed the color to transparent and my path outline to black and increased the stroke. Thank you all!

Copy link to clipboard
Copied
localnative,
You may try this on a copy, after locking/hiding the original artwork:
1) Ctrl/Cmd+A to select everything, then Alt/Option+Shift+Ctrl/Cmd+8 to Release Compound Paths and Shift+Ctrl/Cmd+G to Ungroup, maybe a number of times of either/both (with the purpose of having only individual paths (you can have a look in the Layers palette);
2) Pathfinder>Unite.
Or you can use the Shape Builder, with a bit of manual merging.
https://helpx.adobe.com/illustrator/using/creating-shapes-shape-builder-tool.html
https://helpx.adobe.com/illustrator/atv/cs5-tutorials/creating-complex-art-with-the-shape-builder-to...
Edit: Hi Susan, there seems to be a rift in the space time continuum.

Copy link to clipboard
Copied
Thank you! I was trying to Expand and use the Shape Builder, but I hadn't released it from a Compound Path. Thank you!
Copy link to clipboard
Copied
You are welcome, Amylouise, and thank you for sharing.

Find more inspiration, events, and resources on the new Adobe Community
Explore Now
 AdChoices