It is because you have the SVG in what appears to be a standard letter-sized document (8.5"W x 11"H).
The x1, y1, x2, and y2 coordinates provided by the script are for the overall shape object (pageItem) the gradient is applied to and relative to the Ai document/artboard. The coordinates in your SVG are relative to the SVG canvas.
An SVG canvas is typically defined in the SVG tag, as shown below (learn more).
<svg width="100" height="100">…</svg>
As you'll notice in your SVG code from above, the width and height are not set so the coordinates are relative to the viewbox that is specified. As you can see in your SVG code, the viewbox is set to the exact size of your rectangle so essentially in Ai the document artboard would be the exact size of the selected shape.
If I save your SVG independently and open it directly in Ai so that the document size matches the SVG size, the script produces a "similar" output to the SVG code.
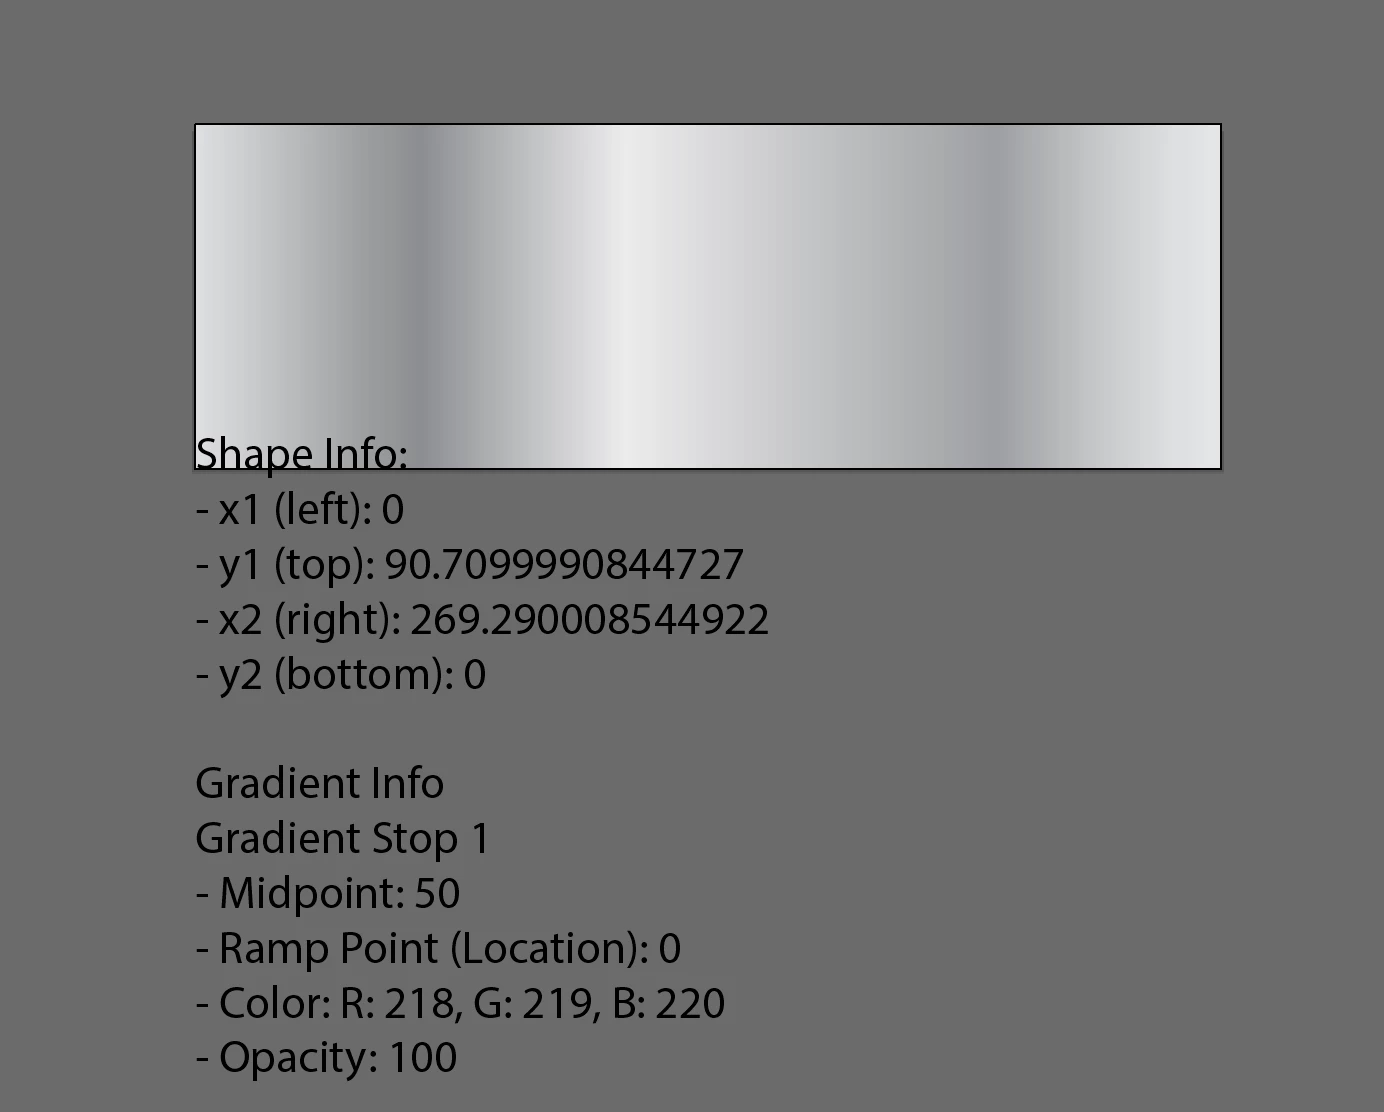
As I am sure you notice the y1 and y2 values are different from the SVG code. In SVG code, if the x1 and x2 or y1 and y2 values are different that adjusts the angle of the gradient. So in your SVG example, the gradient is drawn in a linear form from left to right (0, 269.292...). And since the y values are the same (and exactly in the middle of the shape `height of 90.71/2=45.35`), the gradient angle is 0 and the y values don't really matter since they are the same. You can access the gradient angle in Ai using the code below.
// get shape info
var shape = sel[0];

// get gradient fill angle
alert(shape.fillColor.angle)
Unfortunately, you can't easily set the angle in Ai using JS. If that is something that you need to do then I recommend reading more here, here, here, or here.
If you need to calculate the angle to get your values to match that of the SVG code here is an updated version of the script. The first set of info is for the actual shape selected. The second set of info is for the actual gradient. y1 is the midpoint of the shape, and y2 is calculated using the y1 (midpoint) and x2 points.
function calcYCoord(angle, y1, x2) {
  // convert the angle from degrees to radians
  var angleInRadians = angle * (Math.PI / 180);

  // calculate the y-coordinate using the tangent of the angle
  var y2 = y1 + x2 * Math.tan(angleInRadians);

  return y2;
}

var doc = app.activeDocument;
var sel = doc.selection;

// create a string to hold info
var s = "Shape Info:\n";

// get shape info
var shape = sel[0];
var x1 = shape.geometricBounds[0]; // left
var y1 = shape.geometricBounds[1]; // top - note ai page position (will probably be negative)
var x2 = shape.geometricBounds[2]; // right
var y2 = shape.geometricBounds[3]; // bottom - note ai page position (will probably be negative)
s += "- x1 (left): " + x1 + "\n";
s += "- y1 (top): " + y1 + "\n";
s += "- x2 (right): " + x2 + "\n";
s += "- y2 (bottom): " + y2 + "\n";

// get gradient info
s += "\nGradient Info:\n";
s += "- Angle: " + shape.fillColor.angle + "\n";
s += "- x1: " + 0 + "\n";
s += "- y1: " + (y1 - y2) / 2 + "\n";
s += "- x2: " + (x2 - x1) + "\n";
s += "- y2 (calc): " + calcYCoord(shape.fillColor.angle, (y1 - y2) / 2, x2) + "\n";

// get the gradient stop info for the selected object
s += "\nGradient Stops:\n";
var gc = shape.fillColor.gradient;
var midPoint, rampPoint, r, g, b, opacity;
for (var i = 0; i < gc.gradientStops.length; i++) {
  midPoint = gc.gradientStops[i].midPoint;
  rampPoint = gc.gradientStops[i].rampPoint;
  r = gc.gradientStops[i].color.red;
  g = gc.gradientStops[i].color.green;
  b = gc.gradientStops[i].color.blue;
  opacity = gc.gradientStops[i].opacity;
  s += "Stop " + (i + 1) + "\n";
  s += "- Midpoint: " + midPoint + "\n";
  s += "- Ramp Point (Location): " + rampPoint + "\n";
  s += "- Color: R: " + r + ", G: " + g + ", B: " + b + "\n";
  s += "- Opacity: " + opacity + "\n\n";
}

// write the info to the artboard
var tf = doc.textFrames.add();
tf.contents = s;
Please note, that this ONLY works with linear gradients. Also note, that I'm sure there are many instances where this script will break, but at least this gets you headed in the right direction.