

- Home
- Illustrator
- Discussions
- Re: How to make intersecting lines disappear
- Re: How to make intersecting lines disappear
How to make intersecting lines disappear

Copy link to clipboard
Copied
For a print, I need to convert our logo to one color. The current logo is seven shapes that overlap. Each shape is semi-transparent. This means that when you view the logo, it's made up of lots of colors where the shapes are overlapping each other. Attached is an example which looks nothing like the logo. But it shows that there are 7 shapes which intersect each other.
.png)
For the one-color print job, what I've done is convert each shape to white. Kinda boring. So I want to set it up so that the borders which intersect are "cut out" (AKA transparent). This way the logo will maintain its unique design with each smaller overlapping area being preserved. It's all in white though. Does this make sense?

There are no strokes on the shapes. They're laid out precisely with no overlap, so even if they had strokes, deleting the stroke wouldn't give me the result I seek. I've also tried selecting all seven shapes, grouping them, and then using all the pathfinder tools to achieve the result. All I get is the whole thing disappearing except a small portion. So I then tried only selecting two shapes and then using all the pathfinder options. Nothing. The logo is all on one-layer.
Any other suggestions? This is driving me absolutely batty.
(accidentally posted in another forum earlier, so reposting to the correct one)


Explore related tutorials & articles
 11
Replies
11
11
Replies
11

Copy link to clipboard
Copied
Try this workaround:
1. Add a stroke on each shape
2. Expand all objects (keep fill and stroke checked)
3. Ungroup all objects
4. Select the stroke of above object and the below object
5. Use pathfinder > Minus front
6. Repeat the last two steps for other objects
7. Delete unnecessary parts
Possibly, reassemble the shapes using pathfinder
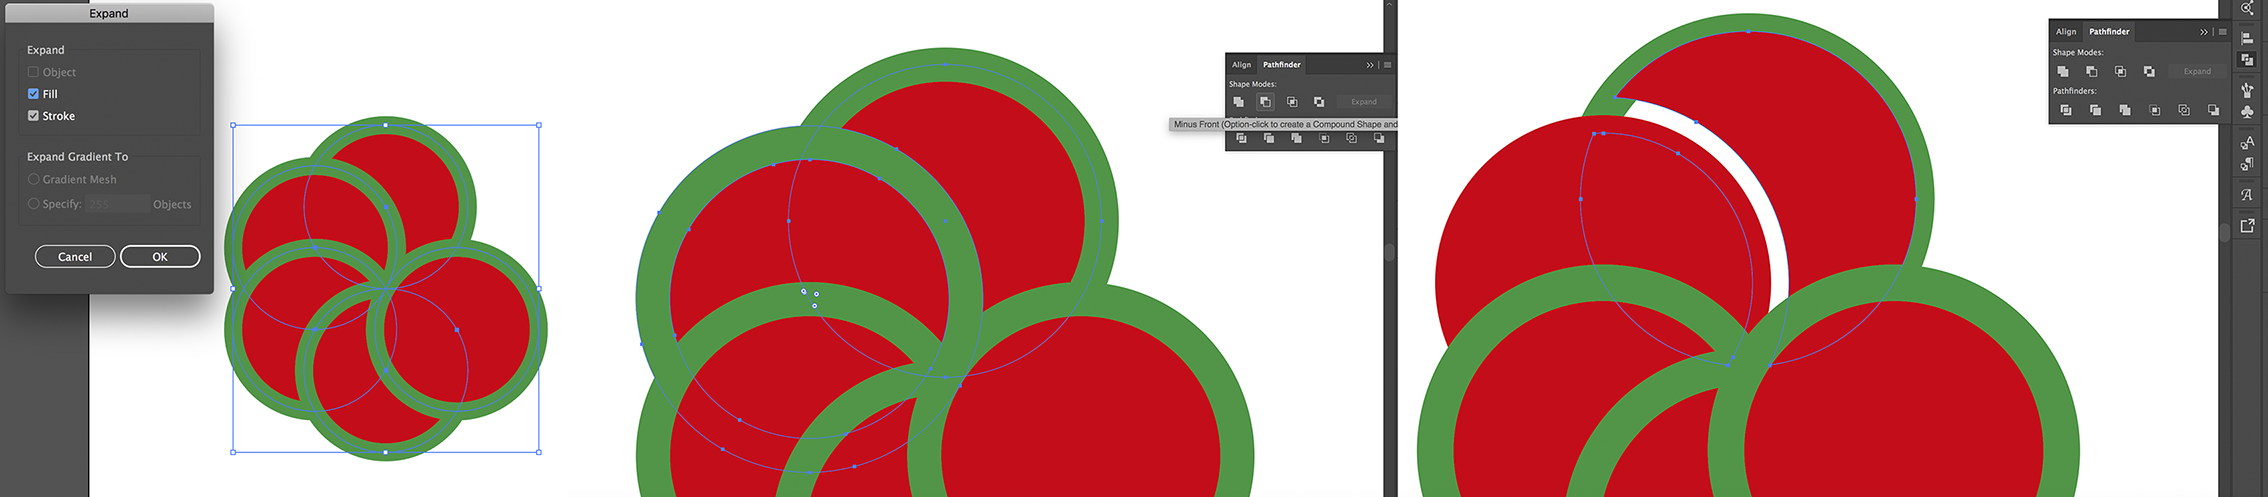
Alternatively, you can use the Live Paint Bucket (after expanding the objects) on the stroke portions to apply none swatch.
Copy link to clipboard
Copied
Thank you for your help. When I ungroup the items, I lose the new color areas which are only visible because the layers are semi-transparent. I.e. blue and yellow circles' overlap is green. Now that green area is just blue. Thanks to the way the seven shapes overlap, there are about 20 inner areas which are only visible thanks to the transparent overlapping.

Copy link to clipboard
Copied
To be frank:
Your issue is really the fact that you are using colours generated by transparency effects in a programme designed to work with paths...
In other words you are simulating colours with transparency blend effects that you haven't made the path remember - The colour doesn't exist in the paths code... It's just two colours overlapped [EDIT] (Think of it like a preview!! Not the actual colour).
This is personally something that I would hate because your leaving the colour interpretation open to so many factors and you leave flaws in your design so that others can't modify it properly if ever required.
- For example: Monitors display colours differently which means the intersecting colour could be saved/previewed differently from computer to computer.
What you should really do is ditch this idea of "colour effects" and turn the overlaps into actual fills.
The quick way to do this would be to select all the objects and then go to Object > Flatten transparency...
However - this is quick and dirty and may not choose the precise desired hue of green, blue etc etc...
Your best way would be to ditch the transparency, decide the precise hex or % mix for each colour (record it somewhere for posterity) and then add these colours back in once you have created your intended design....
Then add transparency/gradients if this is necessary.
Copy link to clipboard
Copied
Oh, I agree! This logo was designed years before I was hired, so I'm just using what I'm given.
Copy link to clipboard
Copied
Could you try explaining the problem in more detail or giving more examples so that we can try and help with the correct answer then please?
Copy link to clipboard
Copied
Based upon the scope of the project, it looks like this isn't something that can be done in Illustrator. We're dropping it and doing something else. Thank you for your help.

Copy link to clipboard
Copied
72732799,
Did you try the Live Paint suggestion?
Copy link to clipboard
Copied
I did! I was able to color all the individual color sections, but then I couldn't figure out how to remove the newly added stroke lines. That's a neat feature.
Copy link to clipboard
Copied
No it doesn't make a 100% sense to me I'm afraid..
Also its hard to understand when we only have a rough drawing and your saying conflicting statements...
You say that you want to delete the intersecting areas but at the same time you say that they have no overlap? - Then how can they intersect?
Can you show a better example of what you want to achieve roughly and what the problem is?
Logically you would want to use Pathfinder divide with all the layers actively selected to get the result you want and then simply ungroup and delete the intersecting areas > then re-group.
Have you tried getting rid of any transparency or other effects, and either using a one colour fill/stroke (Either OR not both) before trying to use pathfinder options?
Just trying to help.
Best,
EW
Copy link to clipboard
Copied
72732799,
As I (mis)understand it, how about Live Paint,
https://helpx.adobe.com/illustrator/using/live-paint-groups.html
https://helpx.adobe.com/illustrator/how-to/illustrator-live-paint.html
or Shape Builder?
https://helpx.adobe.com/illustrator/using/creating-shapes-shape-builder-tool.html
https://helpx.adobe.com/illustrator/how-to/shape-builder-easy.html

Copy link to clipboard
Copied
72732799 wrote:
For a print, I need to convert our logo to one color.
To convert the logo to one color, select it and choose: Edit > Edit Colors > Recolor Artwork
And choose: Preset > 1 color job...

Find more inspiration, events, and resources on the new Adobe Community
Explore Now
 AdChoices