Answered
How to make multiple stripes with a logo in the middle?
How to make multiple stripes with a logo in the middle?
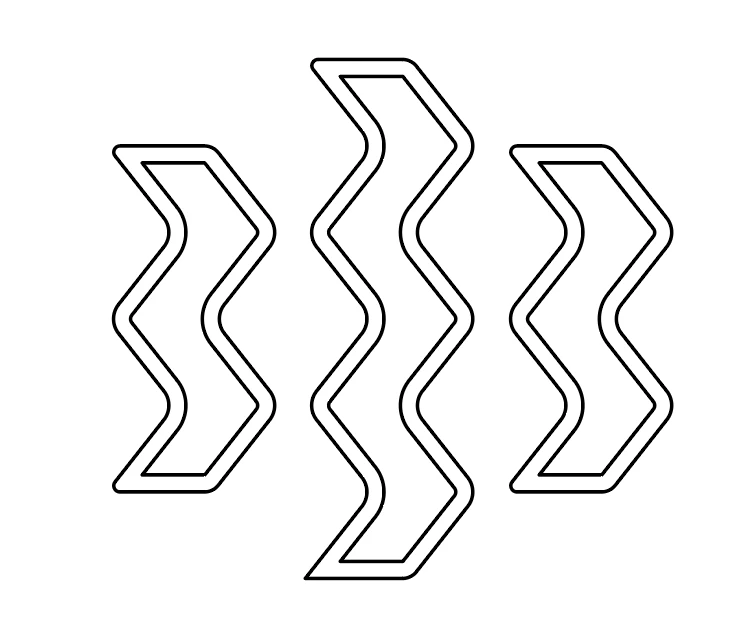
This is the logo:

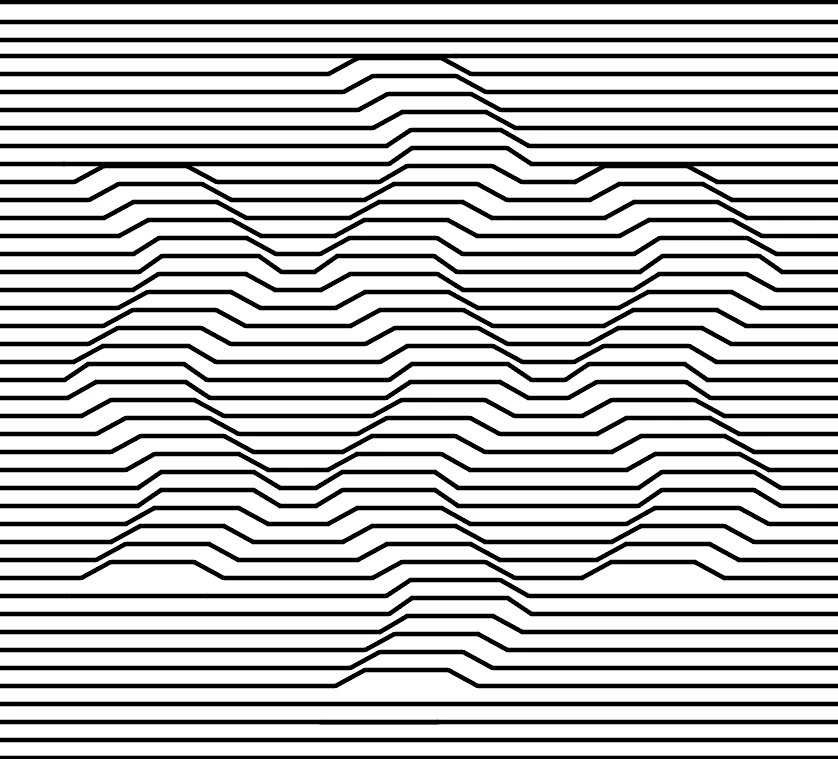
And these are the stripes that are in the form of the logo:

Sorry for my English

How to make multiple stripes with a logo in the middle?
This is the logo:
And these are the stripes that are in the form of the logo:
Sorry for my English
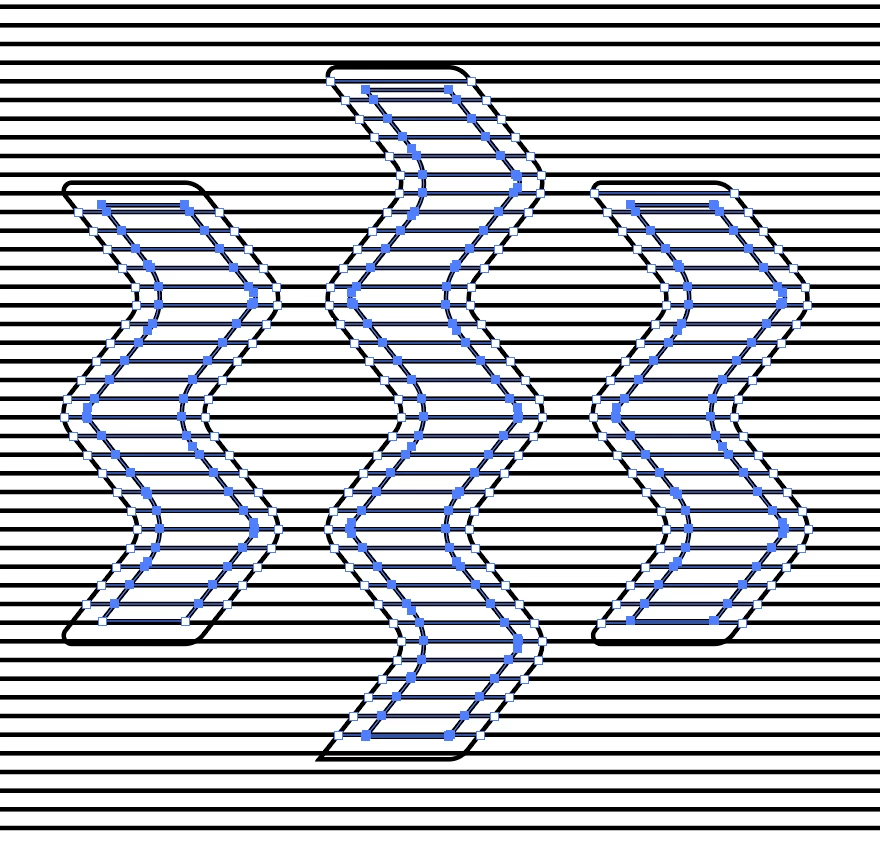
This was quite painstaking, but didn't take especially long. First you need an inner stroke to your shape to create the two 'levels'. Use Offset Path with a negative value:
Draw your repeating lines however you like, then select the lot and use Pathfinder panel > Outline. This will slice your shapes into individual paths wherever they intersect. It'll also remove the strokes, so apply them again.
Then comes the tricky bit. Using the lasso tool, draw around just the inner shapes to leave just those selected. It's like the game with the hoop and the electric buzzer:
Once that's done, nudge or drag those parts upwards to create your embossing:
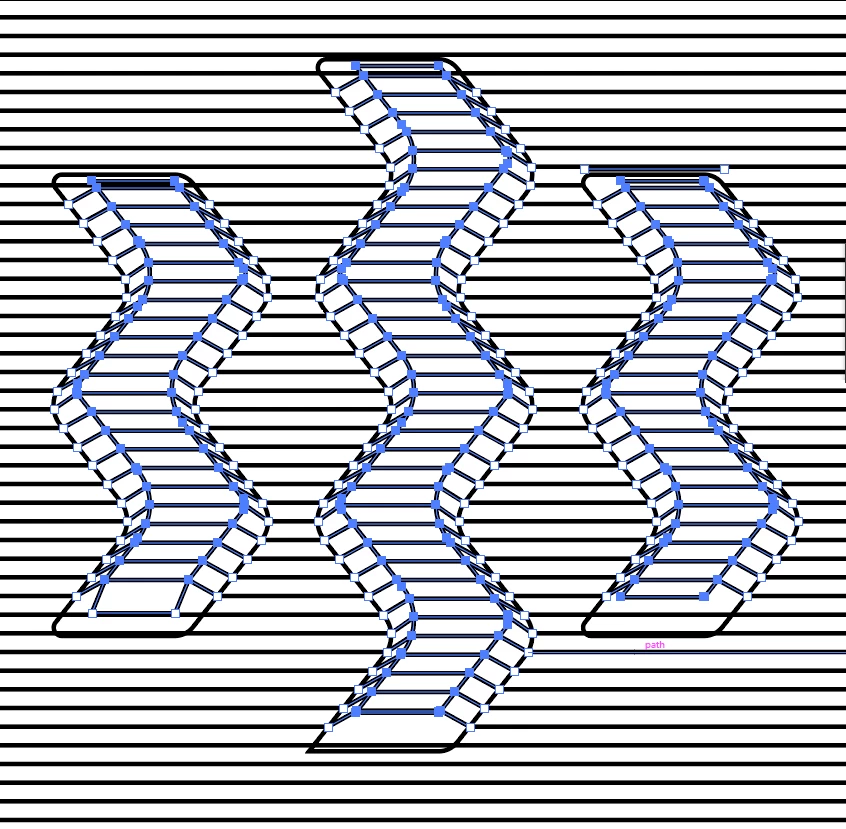
Then the painstaking part -- delete the lines of the original shapes. Since they're all now split into bits, this takes a while:
There's probable a shorter way, but it didn't quite come to me this morning.
Already have an account? Login
Enter your E-mail address. We'll send you an e-mail with instructions to reset your password.