Ken Nielsen
Legend
March 14, 2019
Answered

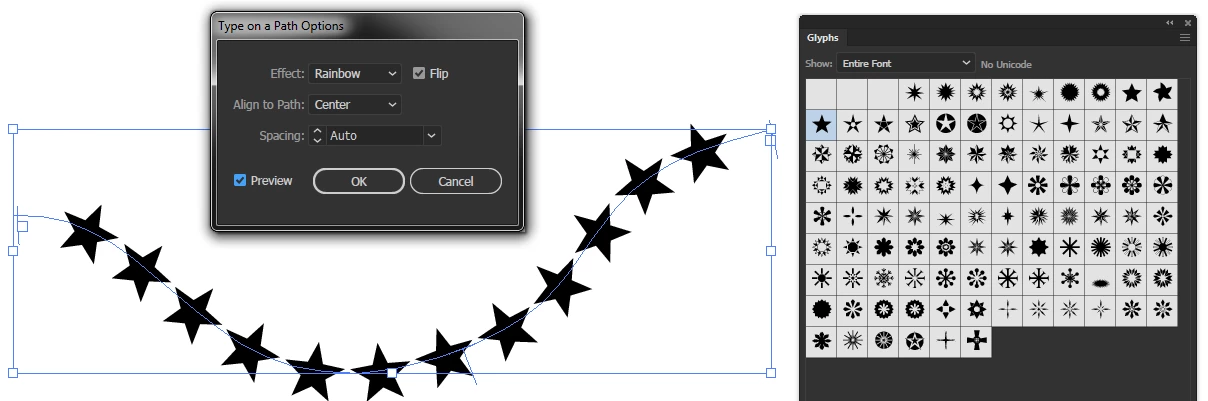
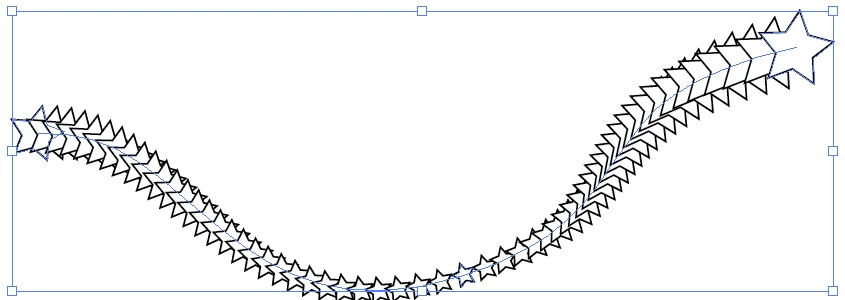
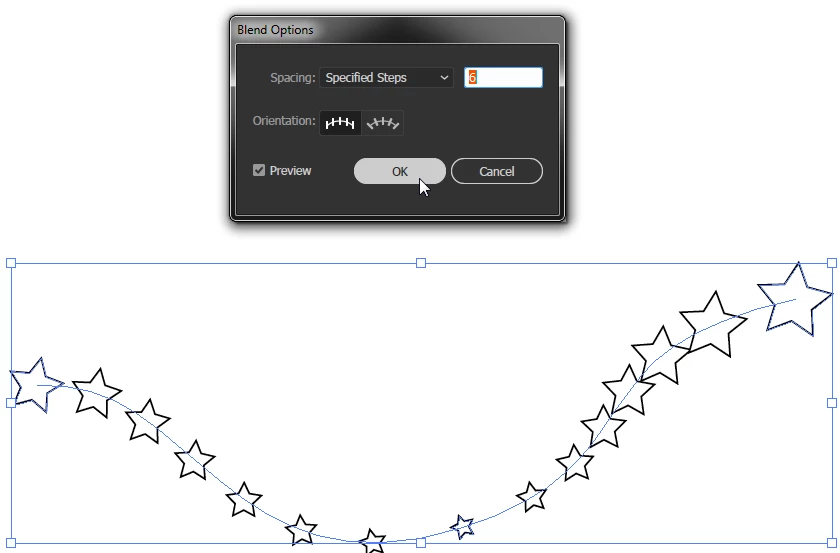
How would I do 'Stars' vector art on a path?

  • March 14, 2019
  • 4 replies
  • 4646 views

- (like type on a path) - I tried typing in symbols from a type face but only get a box that shows the special character is there... I need better control and to be able to see. To start, I have a star made as a path, and I'd like to attach several of those vector 'stars' to a path so I can treat the result as I would be able to do with type on a path... Might be asking for too much here but would also like to have the stars uniformly respond to modification in size or spacing between... acting like type on a path, if that is possible, and if not, simply having the ability to attach several of these stars to a path would be very helpful in itself. How should I go about this? tia, Ken...

    This topic has been closed for replies.
    Correct answer John Mensinger

    I'm not sure why you weren't able to make Type on a Path work for this. Granted it can be a bit fiddly, but it works:

    But as Tony suggested, a Blend could also be useful:

    3 stars drawn:

    Object > Blend > Make

    Draw a path:

    Select All, then Object > Blend > Replace Spine:

    Object > Blend > Blend Options:

    4 replies

    tonyharmer
    Community Expert
    Community Expert
    March 14, 2019

    Also Ken, if you're seeing the glyph box, it means that the currently used font does not contain that glyph—and graphic ones are usually from the "special use area" inside a font file, so it can be like the Wild West for glyphs.

    Just do a quick housekeeping check to make sure that you are actually using the correct font and glyphs on your path. If it's from the colour SVG fonts, then it may be that you need to properly clear the placeholder text, first.

    Hope that helps

    Participant
    March 5, 2023

    What font should one use in order for the various star glyphs to appear as pictured above? I've tried various fonts, but am unable to find one that works. Seems backwards to have to select a font first, rather than have the ability to insert any special character / glyph... ✯☆★✮✵✸✹❊✫✪✩❀✿❁

    Monika Gause
    Community Expert
    Community Expert
    March 5, 2023

    Screenshots in this thread show a blend, not text on a path.

    John Mensinger
    Community Expert
    John MensingerCommunity ExpertCorrect answer
    Community Expert
    March 14, 2019

    I'm not sure why you weren't able to make Type on a Path work for this. Granted it can be a bit fiddly, but it works:

    But as Tony suggested, a Blend could also be useful:

    3 stars drawn:

    Object > Blend > Make

    Draw a path:

    Select All, then Object > Blend > Replace Spine:

    Object > Blend > Blend Options:

    Ken Nielsen
    Legend
    March 14, 2019

    EVERY reply here is helpful and also inspiring to working with Adobe Illustrator. Indeed Illustrator is capable, but in the right hands... and now each of you have made it possible for me to now complete a logo project I am working on...

    MY LAST QUESTION... on this, is I want to use a path that previously had type on a path attached to it, but now want to delete the type and see it is not as simple as deleting the type, BLEND does not want to use this path as a path to attache the blend to. I think there is a way to 'release' type on a path from this path? Do any of you know about this? I need to know how to release the type so the path will then be available for attaching the 'stars' blended artwork onto...

    Thanks Again All,

    Ken

    tonyharmer
    Community Expert
    Community Expert
    March 14, 2019

    Go into Outline View, get the Group Selection Tool, click the path and copy it, then paste it wherever you want.

    tonyharmer
    Community Expert
    Community Expert
    March 14, 2019

    Hey Ken

    Have you tried using a blend for this?

    1. Create the path you'd like the stars to follow
    2. Position a star at each end
    3. Select only the stars and choose Object > Blend > Make or select the Blend Tool (W) and click on each star in turn
    4. Select the resulting blend and your path, then choose Object > Blend > Replace Spine
    5. Double-click on the Blend Tool in the Toolbox, or go to Object > Blend > Blend Options…
    6. Change the Spacing to Specified Steps and tune as required

    Hope that helps!

    Doug A Roberts
    Community Expert
    Community Expert
    March 14, 2019

    Not exactly like type on a path, but drag your star to the brushes panel and choose to create a scatter brush. See if the options there work for you.