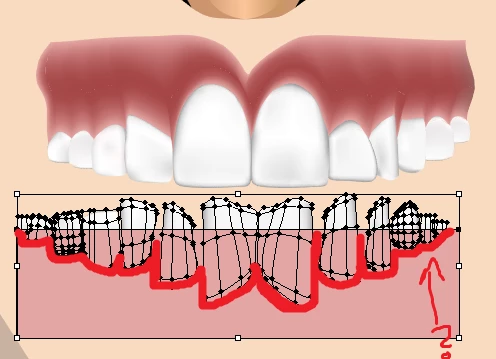
The first step is to have a simplified shape of the teeth without the mesh shading. If you don't have the original shape for the teeth the quickest way to get a new shape for your teeth is to select the teeth and then: Object > Path > Offset Path... (Set this value to 0)
The step/trick above will ensure you have a new simple shape that you can remove from your pink-ish rectangle for the gums. Alternatively if you have a copy of your original teeth shape(s) you can use that to knockout the shape. To do this you simply need to use the pathfinder with the shape(s) for the teeth and subtract the teeth from the pink gums. Just make sure the new simple teeth shape is on top of the pink gum rectangle, and then use the second option in the Pathfinder called, "Minus Front".
If you haven't used the pathfinder before I would always recommend saving your work first and work with a copy of both the teeth and gums shape so you preserve the originals. If you make later adjustments to your teeth you'll want to be able to repeat the process again instead of trying to independently adjusting the teeth with the latest contoured gum shape you just made.