- Home
- Illustrator
- Discussions
- Re: Importing image from Photoshop - need help
- Re: Importing image from Photoshop - need help
Copy link to clipboard
Copied
Hello,
I need your help, please. I was requested to provide an .Ai file for a kids book illustration (And they want me to provide the image with 600 DPI or above). I colored in a photo of my drawing in Photoshop. The size of the image in Photoshop is 2264 pixels by 2032 pixels, resolution 72 pixels per inch. When I try to import the ps file into AI, or change the Ps file to a Tiff, or screenshot and place in AI, it gets pixelated. Can you please advise how I can bring the picture into Ai and let it be smooth?
 1 Correct answer
Open the file in Photoshop
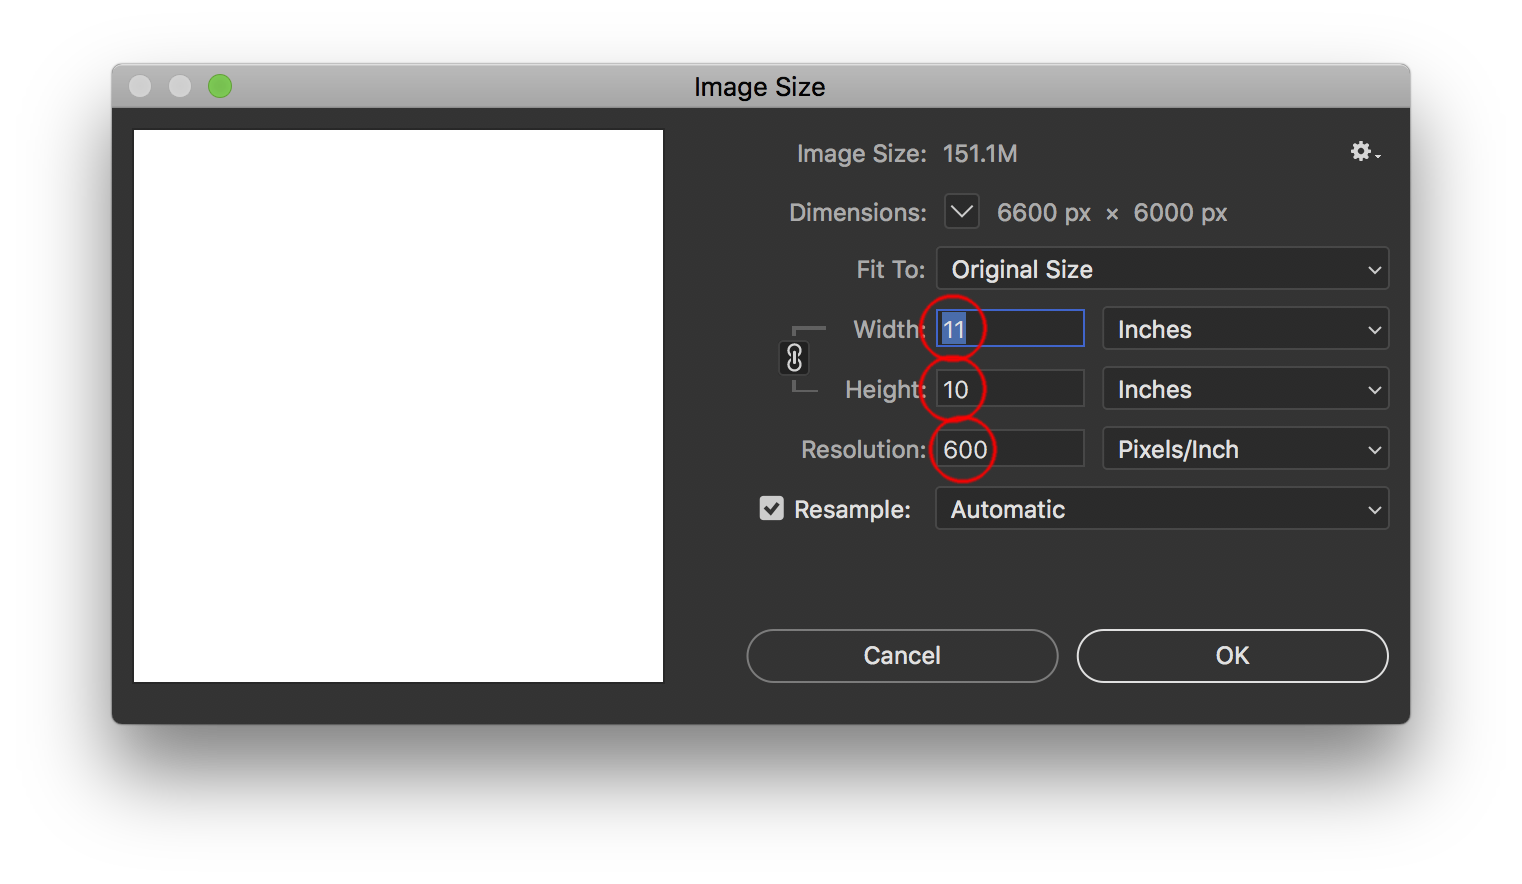
Hit Ctrl + Alt + i (or go to Image > image Size)
Uncheck the Resample checkbox at the bottom so Width, Height and Resolution are all linked by lines
Bump the Resolution from 72 to 600 Pixels/Inch
This will greatly reduce the print size by essentially cramming 8 times the number of pixels into an inch of your print
You'll notice your image going from over 31" x 28" @ 72 to just 3.7" x 3.3" @ 600
Save As (high res print version of your image)
When you bring the image
...Explore related tutorials & articles
Copy link to clipboard
Copied
1. What size in inches does the image need to be?
2. How are you deciding that it is pixelated? Please explain in detail because the word “pixelated” is used for many different things.
Copy link to clipboard
Copied
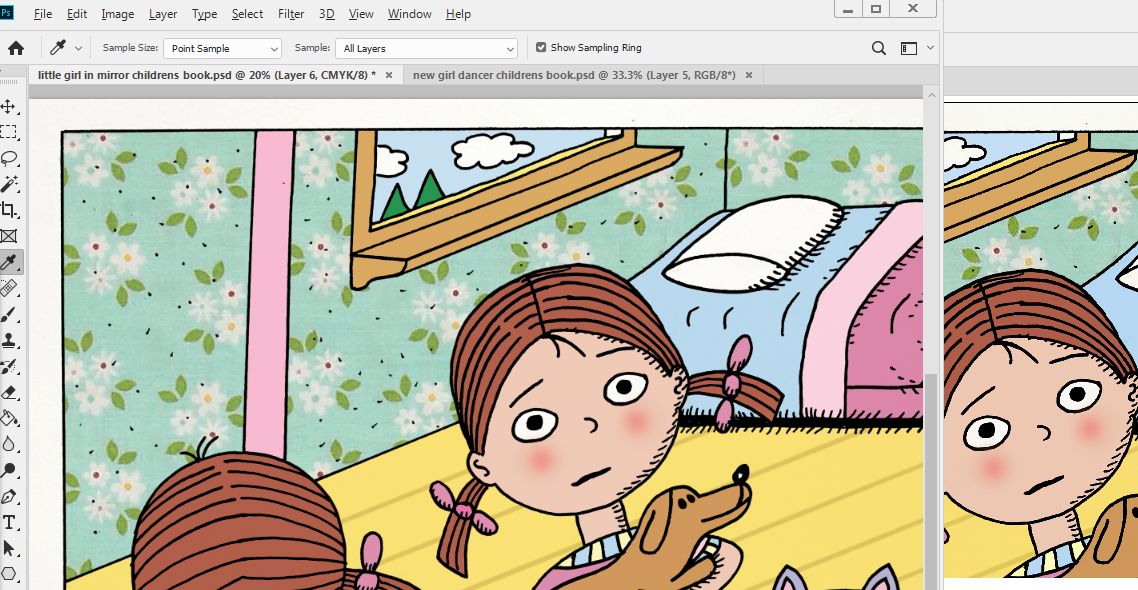
The picture on the left is in Photoshop at 20% and the right is in Illustrator at 43%.
1. As this picture is a tester for a possible childrens book case, the did not give an exact size, so I want it to be clear at around 8" by 7" or 11" by 10" range.
2. By pixelated I mean when I place the Ps file into Ai, it looks clear at 100% (but it is a big file). When I decrease the magnification view the image starts to get little jagged pixelated edges to the lines at around 66.66% to 50%, at 33% to 25% those jagged edges look terrible. If I toggle back to the same size (on screen) in Ps the picture looks very clear. I am just worried these people who want the picture will see my image smaller than 100% and it looks bad like that.
Copy link to clipboard
Copied
It seems to me that your Photoshop file is alright. It has a definite amount of pixels, and at 300 DPI that's more than enough for a color image of appr. 18 by 17 cm. Is that what's needed ? For print-media, only pure black and white bitmaps would benefit from a DPI higher than 300. So tell your publisher or printer to get their act together – they're providing you with absurd requirements ! The fact that they state both requirements together (an Illustrator file of at least 600 dpi) gives me the idea that they're probably clueless about their part of the workflow...
To be sure of the rest of your workflow and advice you about possible problems, it would be nice to get a visual sample.
And refrain from using screenshots, and placing them into Illustrator. These confusing detours are not making it any better.
Copy link to clipboard
Copied
You may be right about them being clueless. I want the picture to be clear at around 8" by 7" or 11" by 10" range.
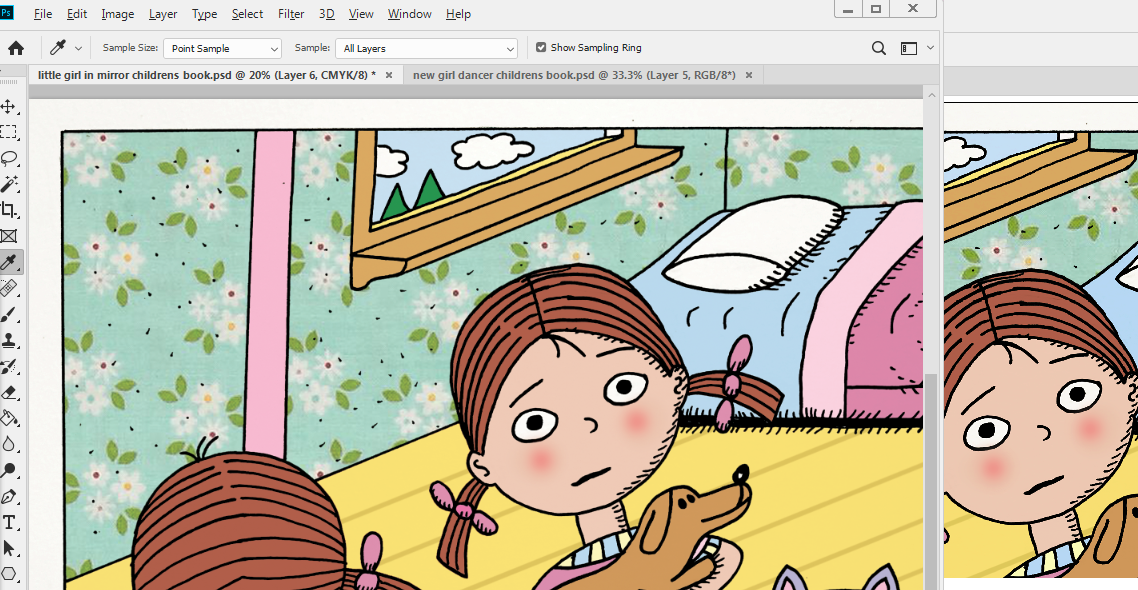
A few steps I took trying to get in the right direction were to modify the image size in Ps to 8 by 7.18 inches, changing the 72 ppi to 600 ppi. Then I placed this file into an Ai file, and went to effects tab / document raster effects settings, and changed the ppi to 600. As I mentioned in the reply to Test Screen Name above, when I place the Ps file into Ai, it looks clear at 100%. But when I decrease the magnification view the image starts to get little jagged pixelated edges to the lines at around 66.66% to 50%, at 33% to 25% those jagged edges look terrible. If I toggle back to the same size (on screen) in Ps the picture looks very clear. I am just worried these people who want the picture will see my image smaller than 100% and it looks bad like that.
Here's a comparison photo with the Ps file (view at 20%) on the left and the Ai file (43%) on the right.
Copy link to clipboard
Copied
In Photoshop 100% means that one Pixel in the file is presented on one Pixel of the screen.
In Illustrator 100% means that it gets calculated based on the desired resolution and in absolute measurements (mm, inches, whatever)
So basically you are comparing apples to oranges.
Will your design get printed or will it be viewed on screen?
Copy link to clipboard
Copied
Ultimately they will print out the image (it is for a childrens book) but this one I inserted into the message here is a "tester" so I think they will view it on the screen, and they asked for an .ai file at 600 DPI or above.
Copy link to clipboard
Copied
Did you make anything in Illustrator or is this a PSD inserted into an Illustrator file? The latter would make no sense at all and there would definitely be something you need to discuss with them.
Copy link to clipboard
Copied
Open the file in Photoshop
Hit Ctrl + Alt + i (or go to Image > image Size)
Uncheck the Resample checkbox at the bottom so Width, Height and Resolution are all linked by lines
Bump the Resolution from 72 to 600 Pixels/Inch
This will greatly reduce the print size by essentially cramming 8 times the number of pixels into an inch of your print
You'll notice your image going from over 31" x 28" @ 72 to just 3.7" x 3.3" @ 600
Save As (high res print version of your image)
When you bring the image into AI, the pixelation you were noticing should be gone.
Copy link to clipboard
Copied
It sounds like the publisher is making a very common mistake of terminology. Image resolution is PPI ( pixels per inch ). Output resolution is DPI ( dots per inch ). When they say 600dpi, I think they are referring to output resolution. You have to nail down the exact size of the document and set the image resolution appropriately. Most books are printed using 300ppi image resolution, 5080dpi output resolution.
Copy link to clipboard
Copied
Thanks for the tip. I got a lot of suggestions for a better and improved workflow which I can use next time I'm working with this client but your answer was the most straight forward solution to the problem. The view of the Ps doc in Ai still seemed to pixelate a little at varying magnifications but looked pretty good when viewed in "Presentation Mode."
Copy link to clipboard
Copied
You may have heard 300 dpi is industry standard for images. This is true for contone CT (photographs) images output at 150 lpi. You have linework LW, and for example we used to do LW logos at 2540 to meet the maximum quality of the film output (Res 12).
Your printer is asking for 600 dpi whcih is fine as the file gets so large at 2540 they are hard to work with, and childrens drawings do no need as much quality as a company logo scanned from RC paper.
Then you need to design your files at 600 dpi for the largest files size possible. Create a new filet this size and draw in
You should avoid upsampling whenever possible, as that will nto look as good as creating your art at the proper size. there.
The art style you posted could be better drawn in Illustrator instead. You can scale Illustrator vector art, and not worry about resolution as those file print at max quality since they are defined by paths and nto pixels.
Copy link to clipboard
Copied
Thank you Mike for the suggestion, if again I need, I can create such a big file size.
Copy link to clipboard
Copied
I think your image will be just fine, using your current Photoshop file.
The kinds of colors, tints, and blends you're using might just as well remain a whole raster image in Photoshop.
Okay – granted, some publishers prefer a combination of a vector based illustration for all black lines, with a rasterised image for the subtle colouring underneath. Overlaying them in Illustrator indeed offers the best result: the vector-based blacks will be super-crisp (at the printer's resolution which might range from 600 to 3600 dpi), against the ordinarily screened color rasters at max 300 dpi.
See your example below.
This might be (a scan of) your original ink drawing.
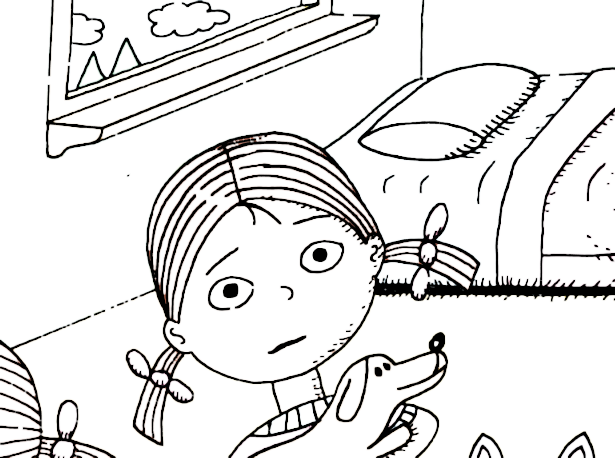
This might be the underlying coloured fills.
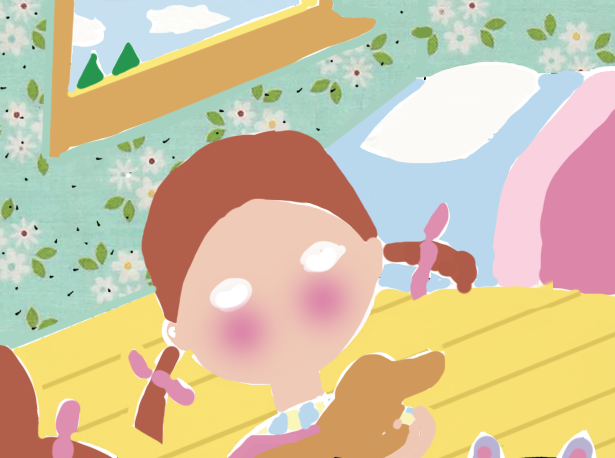
So these two images (layered) are created separately and combined in Illustrator.
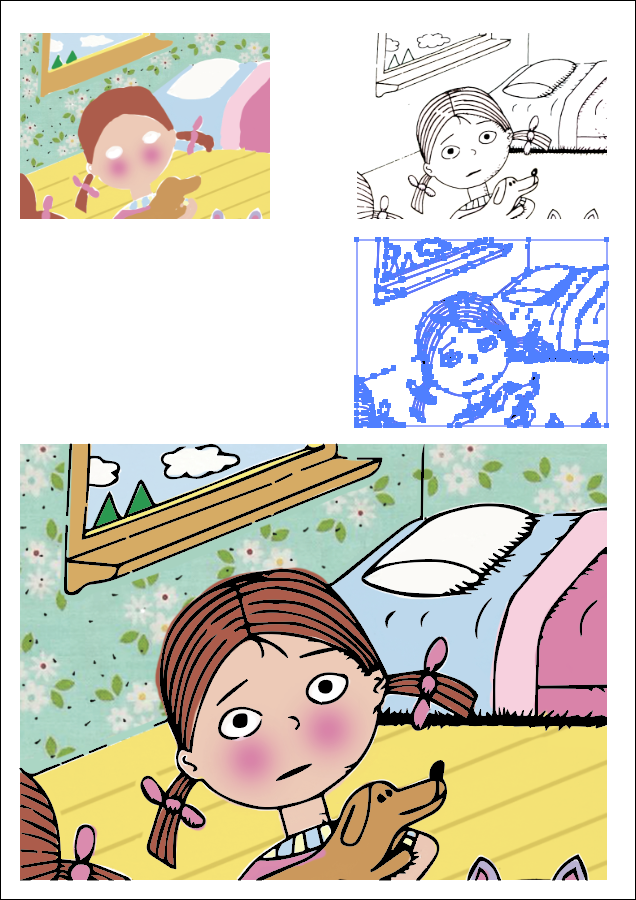
The result is razor sharp (vector-based) black line drawing, on top of the (pixelated) colors.
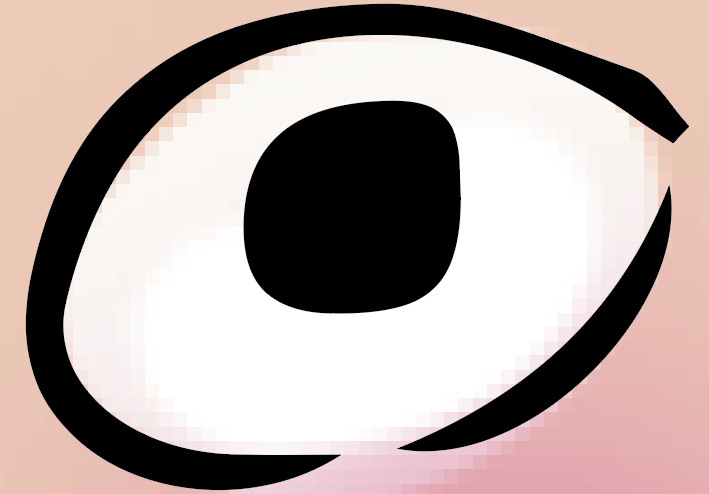
This 'double whammy' workflow takes much more steps to prepare and process, every time !
But of course, everything can become an efficient and effective routine after some practice.
In case you're willing and eager to give it a try, here are some thoughts on how to achieve it.
Is the original and purely black-and-white drawing a hand-drawn sketch, or did it start in Illustrator already ?
If it is hand-made, scan, then scan it and let Illustrator trace the image into (sheer black and white) shapes.
Try several options for accuracy in the Trace's Advanced Settings panel, to find the right style and precision.
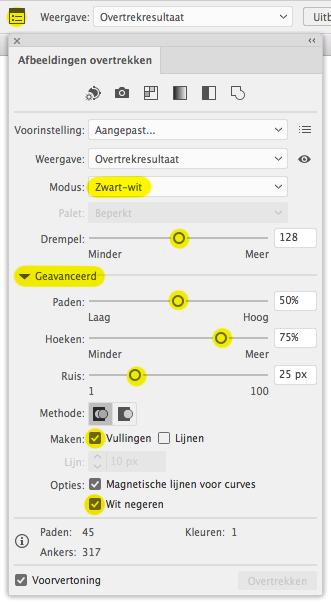
Either leave it as a Trace Object (for tweaking settings later on) or Expand the whole enchilada into real paths.
Select this bunch of lines/paths/shapes and keep it safe on its own layer (you might as well lock it). Save the file.
Copy/Paste or Place the paths/file into Photoshop and color and fill all the parts below the black drawing layer.
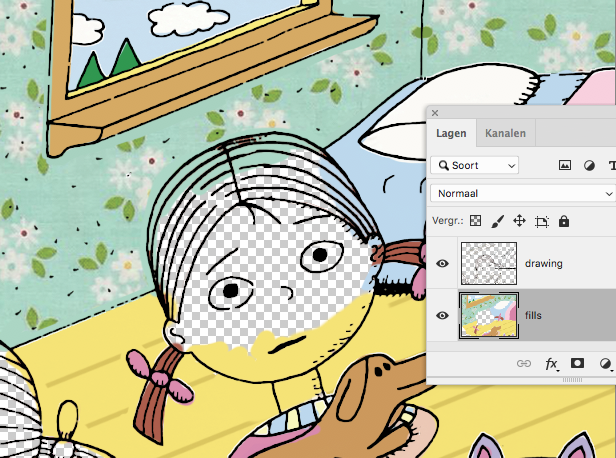
Depending on your preferred workflow, you can now choose to delete or hide the black layer in Photoshop and place this Photoshop file back into Illustrator, below the original black layer. (Simply hiding the black layer in Photoshop will add a lot of extraneous data to the subsequent files, which isn't dangerous but might become a nuisance.) Or supply both images to the publisher, and let them do the combining. Maybe they prefer to tweak the color settings of the raster image, if they take pride in their work...
For your own use, you can also keep the pasted/placed black vector-based layer in Photoshop (it probably became a Smart Object layer), and finalise the whole illustration by saving it as a Photoshop PDF. The vector based laters will be retained ! But whatever you do, don't bring this file into InDesign, because then the whole file will become pixelated, losing its benefit.
Copy link to clipboard
Copied
I really enjoyed reading your detailed post, thank you very much sir! For the quick deadline I unchecked the image resample in image size in Ps and changed the PPI for a simple somewhat effective fix, but I think in the future I will also be dabbling in your suggested ways of combining the two programs. After I image traced the scanned line drawing I tried various ways to fill in "under" the ai imported vector line work in Ps, but found that step very time consuming. Do you have any suggestion? (i.e. when I magic wand inside the shape and fill in the space there is always a little bit unpainted that i need to go back in to touch up.)
Copy link to clipboard
Copied
I agree. I like to supply embedded images at 400dpi (just for some leeway) and fonts, if rasterized, should be at 1200dpi, so it sounds like the client is confused.
Find more inspiration, events, and resources on the new Adobe Community
Explore Now