 Adobe Community
- Home
- Illustrator
- Discussions
- Re: It's been awhile, but I'm back with a new prob...
- Re: It's been awhile, but I'm back with a new prob...

Copy link to clipboard
Copied
Hello guys, it's been quite some time since I've been stumped and needed to resort to the best resource on the net... You Guys! lol anyway, here is an image of what I need to create and I've been trying to do this using line segment or pen, but my problem with line segment is the blunt ends and the pen does not allow me to change the stroke width to reflect the wider lines. I'm still a newbie and probably always will be, so easy to understand instructions are as always, greatly appreciated.
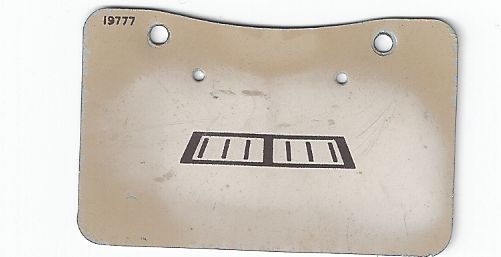
The "Dial" is actually this wierd rectangle shape with the odd dip at the top, but all I need is the black artwork inside the dial. You can see that the side lines are a different width then the top and the sides slant inward a bit. What would be the easiest way to re-create this and keep the stroke width correct?
Thanks guys!


 1 Correct answer

Jber,
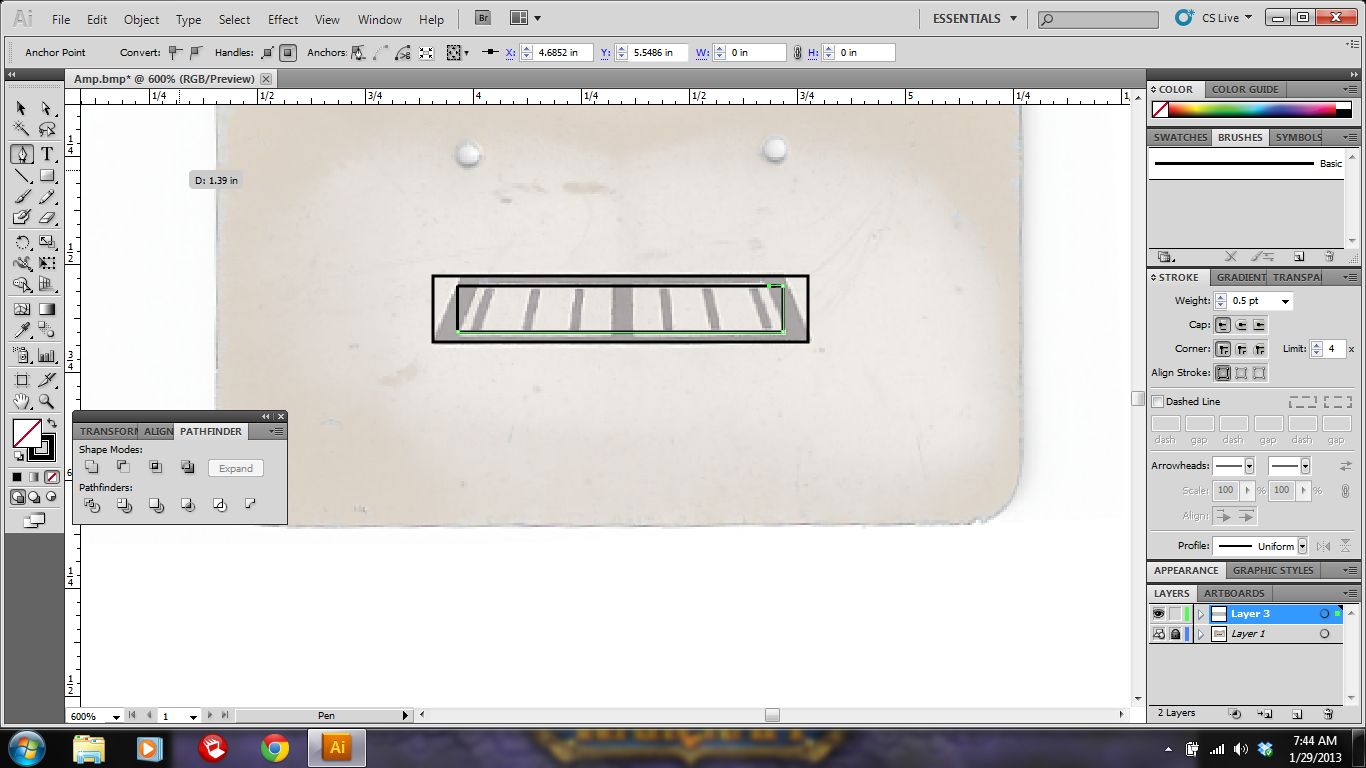
In your screenshots in post #12, nothing is selected, which makes it difficult to guess. Are the three (more or less) vertical paths and the two horizontal ones all outlined to be filled closed paths with no strokes?
Explore related tutorials & articles
 14
Replies
14
14
Replies
14
Copy link to clipboard
Copied
.
Don't draw thinking "stroke", draw thinking "shape".
Use the Pen tool to trace the outer and inner edges of the shapes. Then make them compound paths.
I, personally, would not think "strokes" to recreate that artwork.
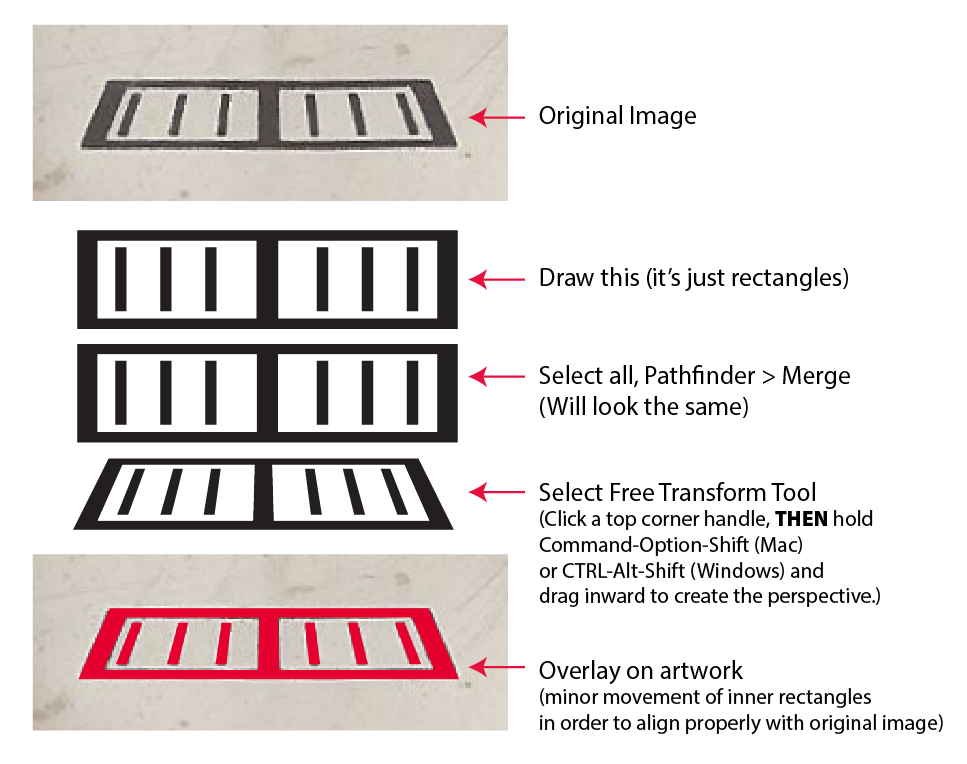
(I did use Photoshop to straighten your image first)
Copy link to clipboard
Copied
Thank you very much, I'm going to try this method after I work out Jacob's method. Very cool.
Copy link to clipboard
Copied
Scott,
I sometimes have a strange issue which hides uploaded images; they may suddenly appear when I Reload current page in the browser or when I enter the thread anew, as it happened just now with yours (starting late today at almost 1PM).
Now I can (fully) enjoy your post, as I always do, and I can see that you had already demonstrated the Free Transform perspective when I posted yesterday.
Copy link to clipboard
Copied
Jber,
Or, starting over you may get both the slanting and the constant widths and horizontal top/bottom ends if you:
1) Create vertical straight stroke/nofill paths with the same widths as the original (one width for the three long ones that are to form part of the Compound Path and one width for the six short ones within) and distances as the (almost) vertical ones measured at the bottom, you may make them all full length (top to bottom) and maybe a bit to bite off;
2) Select all and Distort with the Free Transform Tool, dragging (inwards) by the top left corner while holding Ctrl+Alt+Shift/Cmd+Option+Shift until you have the right slanting/perspective;
3) Object>Path>Outline Stroke;
4) Lock/hide the three wide paths;
5) Create horizontal paths where you want to cut the six shorter/thinner ones, and Object>Path>Divide Objects below, and remove the unwanted parts;
6) Unlock/unhide the three wide paths;
7) Create horizontal paths at top and bottom with the desired width (same as the original) as Stroke Weight and Object>Path>Outline Stroke;
7) Select 5) and 6), Pathfinder>Divide, and remove the unwanted parts;
8) Pathfinder>Merge and delete the empty paths inside the Compound Path.
Copy link to clipboard
Copied
Thanks Jacob;
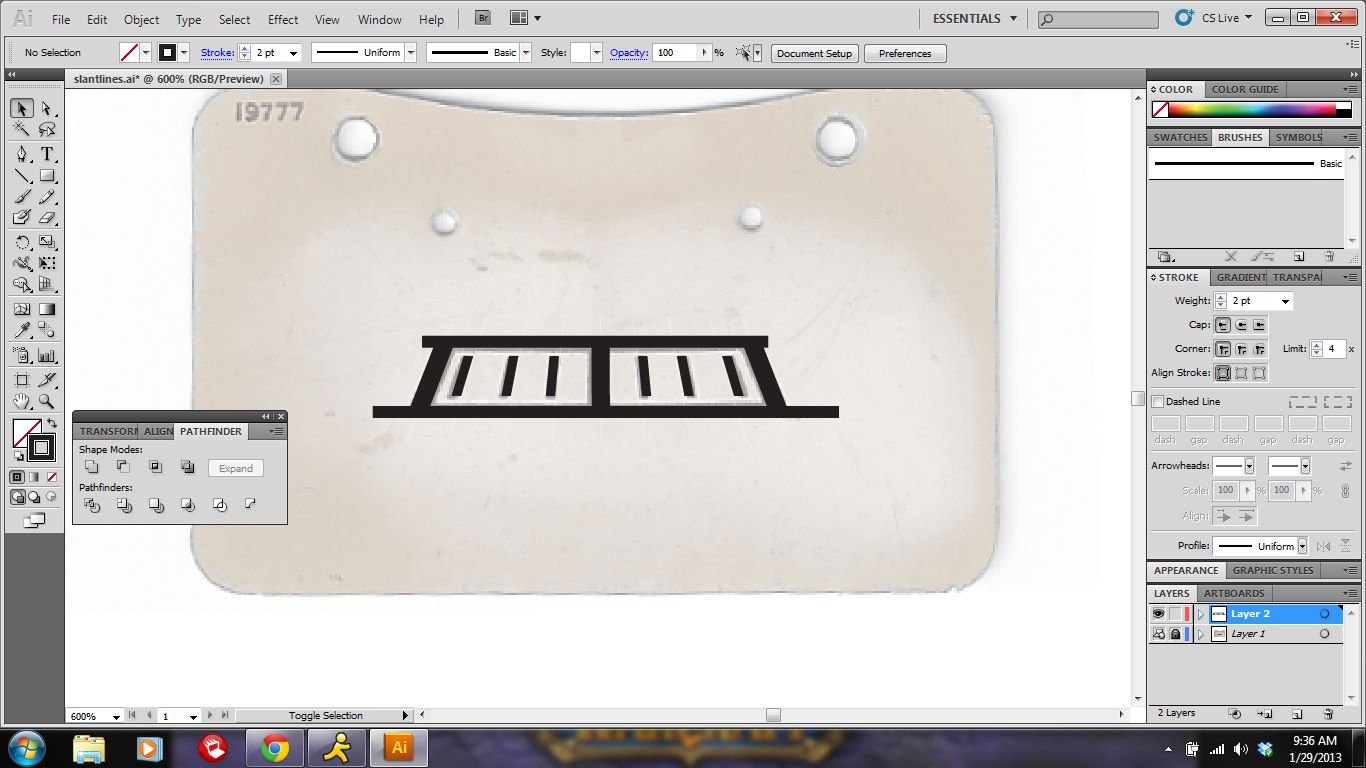
I manage to follow along with everything ok except at the very end. I wasn't sure how to handle the top and bottom horizontal lines so that they get to where they need to be. Here is what I have.
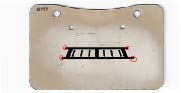
where the red circles are is where I'm lost at.
Thanks.
Copy link to clipboard
Copied
Jber,
I had the item numbers messed up (dividing one item into two and failing to complete the changing), I apologize for the sloppy posting, done in too much haste at 1AM.
From the second item 7 on, it should read:
8) Select 6) and 7), Pathfinder>Divide, Ungroup, and remove the unwanted parts;
9) Pathfinder>Merge and delete the empty paths inside the Compound Path.
If the unloked/unhidden three wide paths 6) as well as the horizontal top and bottom paths 7) with the ends marked with red have been changed into closed paths by Object>Path>Outline Stroke (see 3) and 7)), the use of Pathfinder>Divide (and the Ungroup that I forgot to mention) in 8) should create separate independent paths which may be deleted before mergging in 9).
Copy link to clipboard
Copied
Actually Jacob.. I edited after you posted I believe. I was creating the iamge while you were posting, so you wouldn't have seen it 
Copy link to clipboard
Copied
I too was wondering about the image because I didn't see it till later either lol, thank you very much that was helpful but I don't know if I'm being dense or what because I just don't get how you drew the rectangles. I tried to trace the outer edges using the pen on no fill and stroke at .5 then I did the same and drew the inner rectangle (have not done anything with the small interior lines) and I was stumped at that part. I just don't get how you were able to draw the rectangles, have them filled in and at different widths.
Copy link to clipboard
Copied
Ah, Scott.
You really got me there. As I said, I hurried off at 1AM yesterday and only opened the thread today.
Copy link to clipboard
Copied
Thanks Jacob, that did help, I was able to get to the first half of step 9 Pathfinder>merge then I was lost on delete empty paths inside the compound path. I tried to select what looks like stray ancho points but things started getting really wierd when I tried that. How do you accomplish your deletions?
Copy link to clipboard
Copied
Jber,
Yesterday, I made a quick sketch while posting (playing it before saying it) to increase the likelihood of including all the details, and that resulted in two nofill/nostroke paths corresponding to the counters/holes in the Compound Path to delete.
But that may be version dependent so you may not get them at all.
If you just have the Compound Path with the double triplets of paths inside, you are done.
Copy link to clipboard
Copied
Jacob, thank you so much for your help I really really appreciate but I'm so stuck and confused. I have now done this 5 times, following your steps and I still cannot manage to get the ends to close up properly. By the time I get done with step 8, I am still left with this:
I suspect that I am not getting the closed compound path that your speaking of and honestly, I don't know where Im going wrong.
I just went through the steps again and right after I do the divide on the top and bottom horizontal lines, I end up with this:
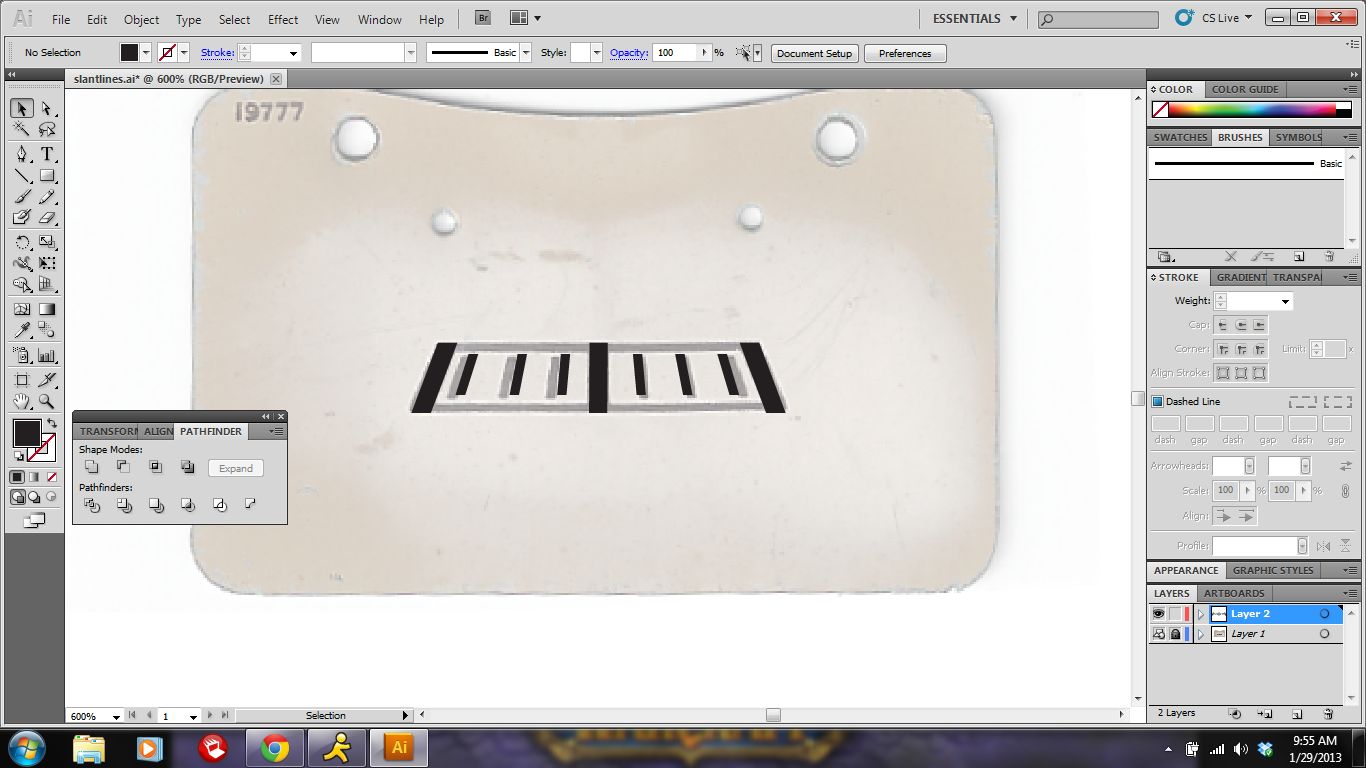
I just don't know how to get the top and bottom horizontal lines in place.
Copy link to clipboard
Copied
Thanks Scott and Jacob, between you both I somehow muddled my way through and got the dial set done.... once again I could not do it without you.
Jacob, if you have the time I would still like to know where I was going wrong in your sample. Thanks.
Copy link to clipboard
Copied
Jber,
In your screenshots in post #12, nothing is selected, which makes it difficult to guess. Are the three (more or less) vertical paths and the two horizontal ones all outlined to be filled closed paths with no strokes?

 AdChoices