 Adobe Community
- Home
- Illustrator
- Discussions
- Re: Need help inlaying one font into another
- Re: Need help inlaying one font into another

Copy link to clipboard
Copied
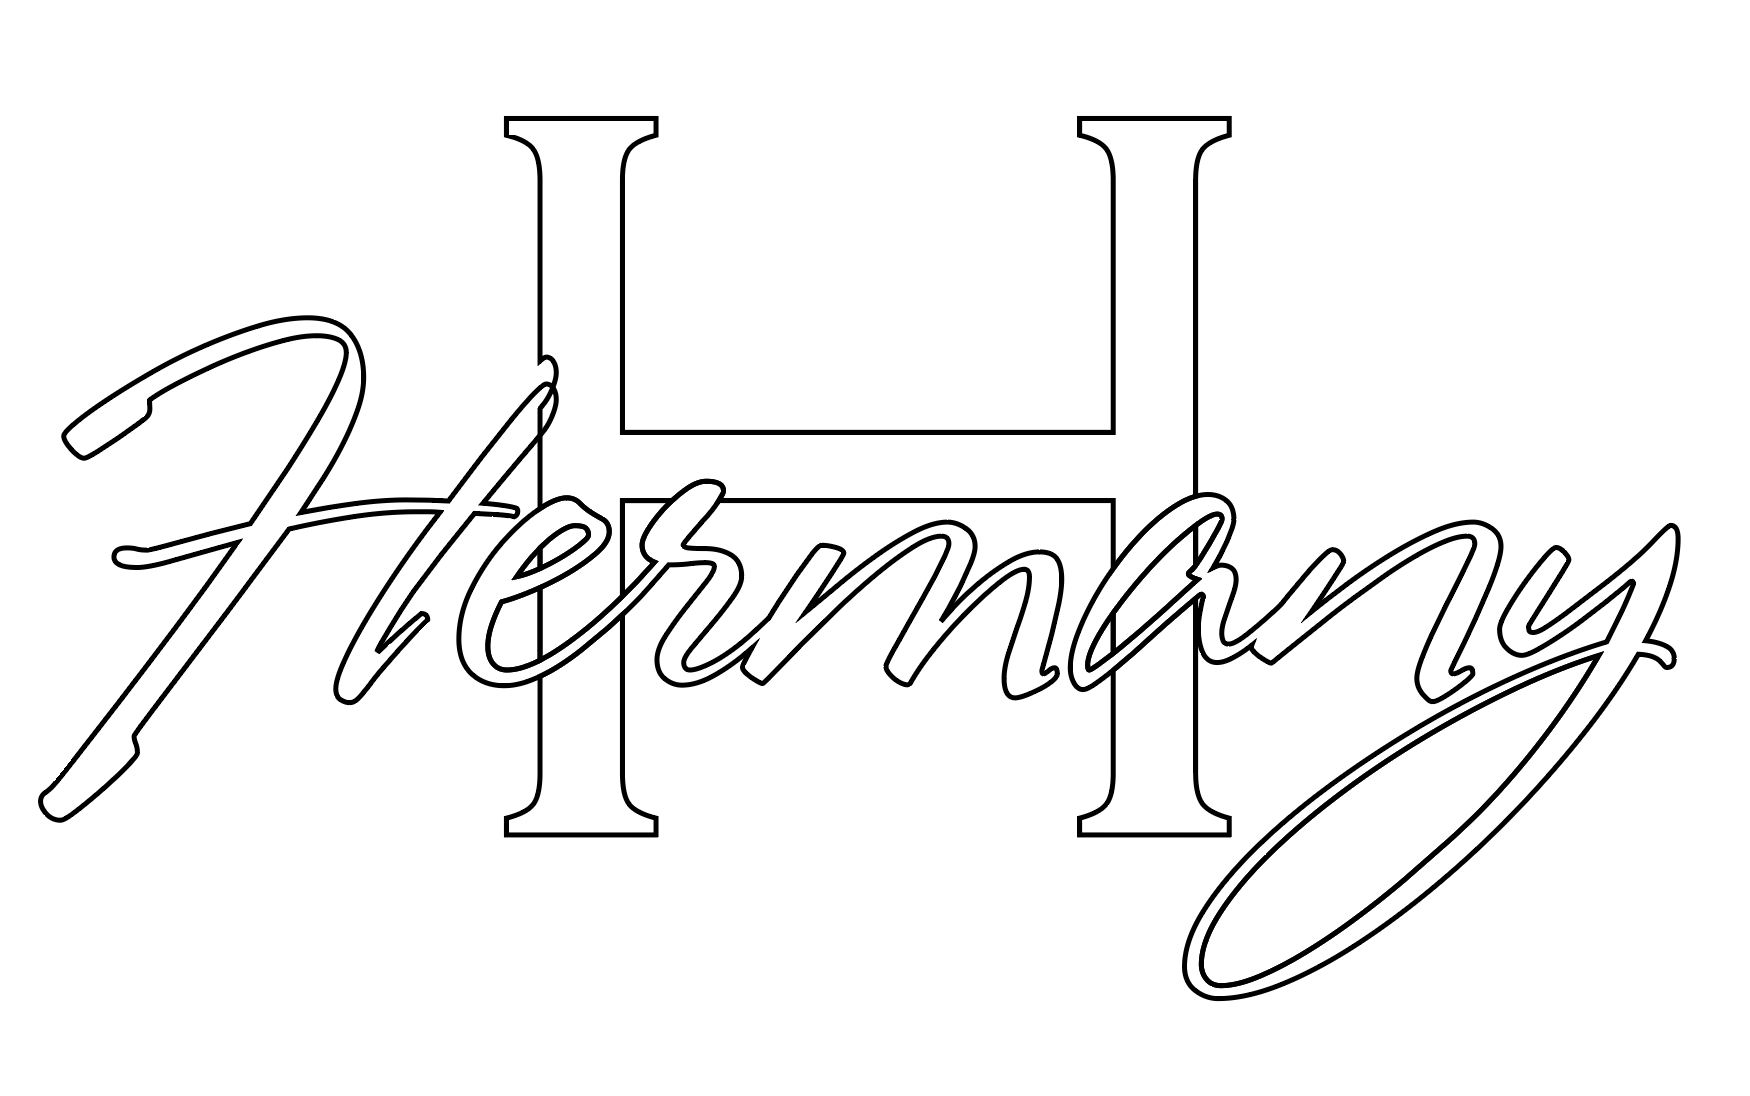
I am trying to inlay one font into another so i can laser cut it. I can create what appears to be what I'm trying to obtain by merging the two fonts together and then converting to stroke, however there is an extra stroke line under everywhere the fonts overlap. I am laser cutting the the final product so I cannot have two lines (one under the other) because then the laser will cut the same spot two times. The first image is what i want it to look like. The second image is what image looks like after i merge the two together and create strokes (that's how i want to send it to my laser cutter). The third image shows the duplicate stroke (the "H") underneath the top font ("Hermany"). I just selected the "H" and moved it down so I could show the stroke underneath it. The fourth image shows what i want to delete or avoid from the start. I apologize if it is hard to understand.


 1 Correct answer

kphotopage schrieb
Here I Outlined Type. Stroked with no Fill.
Select, Live Paint Stokes
Expand Live Paint.
No overlap or duplicate of strokes.
K
This.
I would do it like this:
1. Outline text, fill with white
2. Make live paint group
3. Select fill of none and triple click any white fill to change all the white fills to none
4. Expand
Explore related tutorials & articles
 21
Replies
21
21
Replies
21

Copy link to clipboard
Copied
go to object -> path -> outline stroke
then use the pathfinder again, you can also use the shape builder tool.
Copy link to clipboard
Copied
What do you mean use pathfinder again?

Copy link to clipboard
Copied
I recommend using the Shape Builder tool. Easy to use and practical.
Select all objects, simply drag with the mouse.

Copy link to clipboard
Copied
I don't want to combine everything though. I feel like there has to be a way to merge two fonts together and only have the stroke lines for the "top" text.

Copy link to clipboard
Copied
well, I see here 2 in-mass colored forms, each cutted separately and then glued together. Aren't they?
Copy link to clipboard
Copied
They were cut out of one piece of plywood at the same time so they fit together like a puzzle
Copy link to clipboard
Copied
Okay so after you use Pathfinder to cut the foreground text out of the monogram, you'll have to edit the monogram to get rid of all the interior paths:
Using the Direct Selection tool, marquee select anchor points and tap the Delete key:

Leave just the gaps in the original outer path:

Will this work?

Copy link to clipboard
Copied
I suggest you use the same tool again.
Press ALT and drag the mouse.
You can use this tool to remove the areas you want to remove.
This tool is very capable to combine, cut and divide very complex shapes.
Copy link to clipboard
Copied
What colors do you need finally? If 2 different like on your starting image, then 2 strokes are needed to cut letters from different film sheets, so it's all right.
If you plan to cut the whole lettering as a single shape, use Pathfinder in Add mode (first button in top line)
Copy link to clipboard
Copied
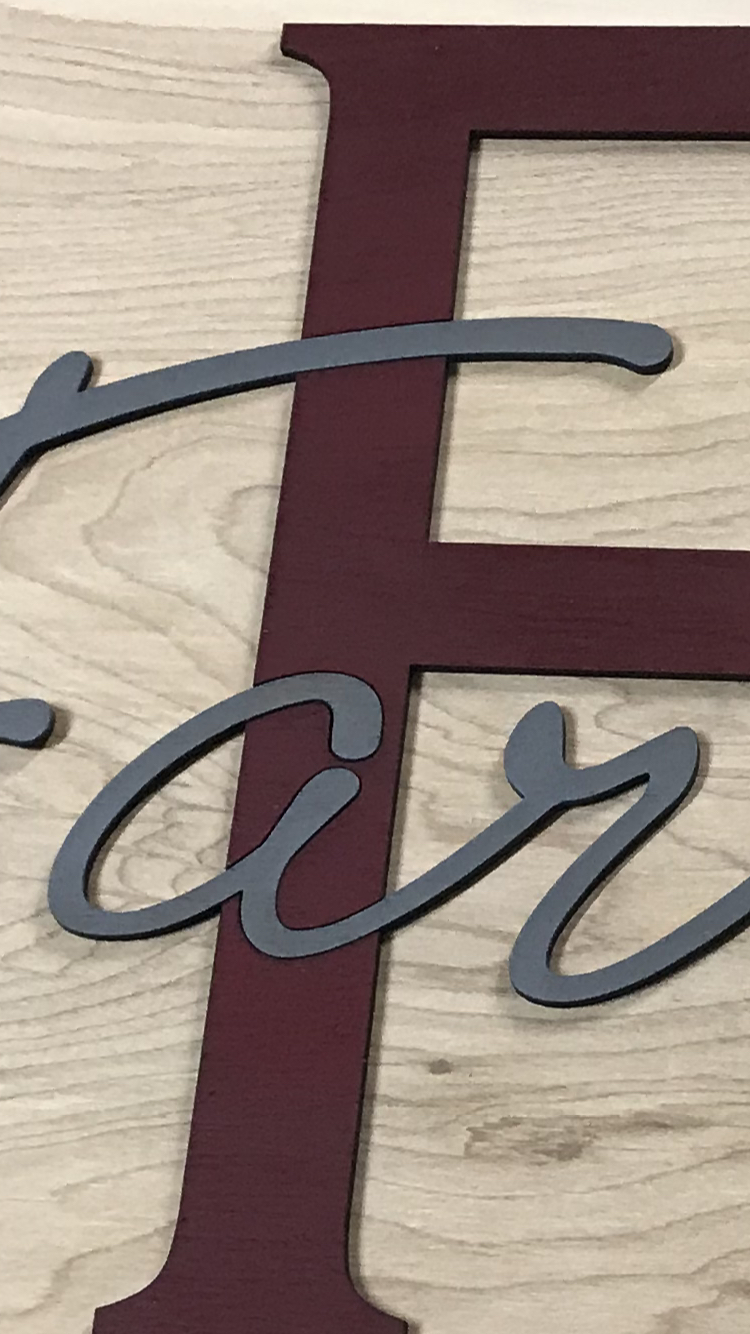
It will be cut out of one piece of plywood so I don't want to have repeat cuts. Perhaps these photos will help show you what I am trying to obtain. The F and Farrar are all from one piece of plywood and glued onto the circle. 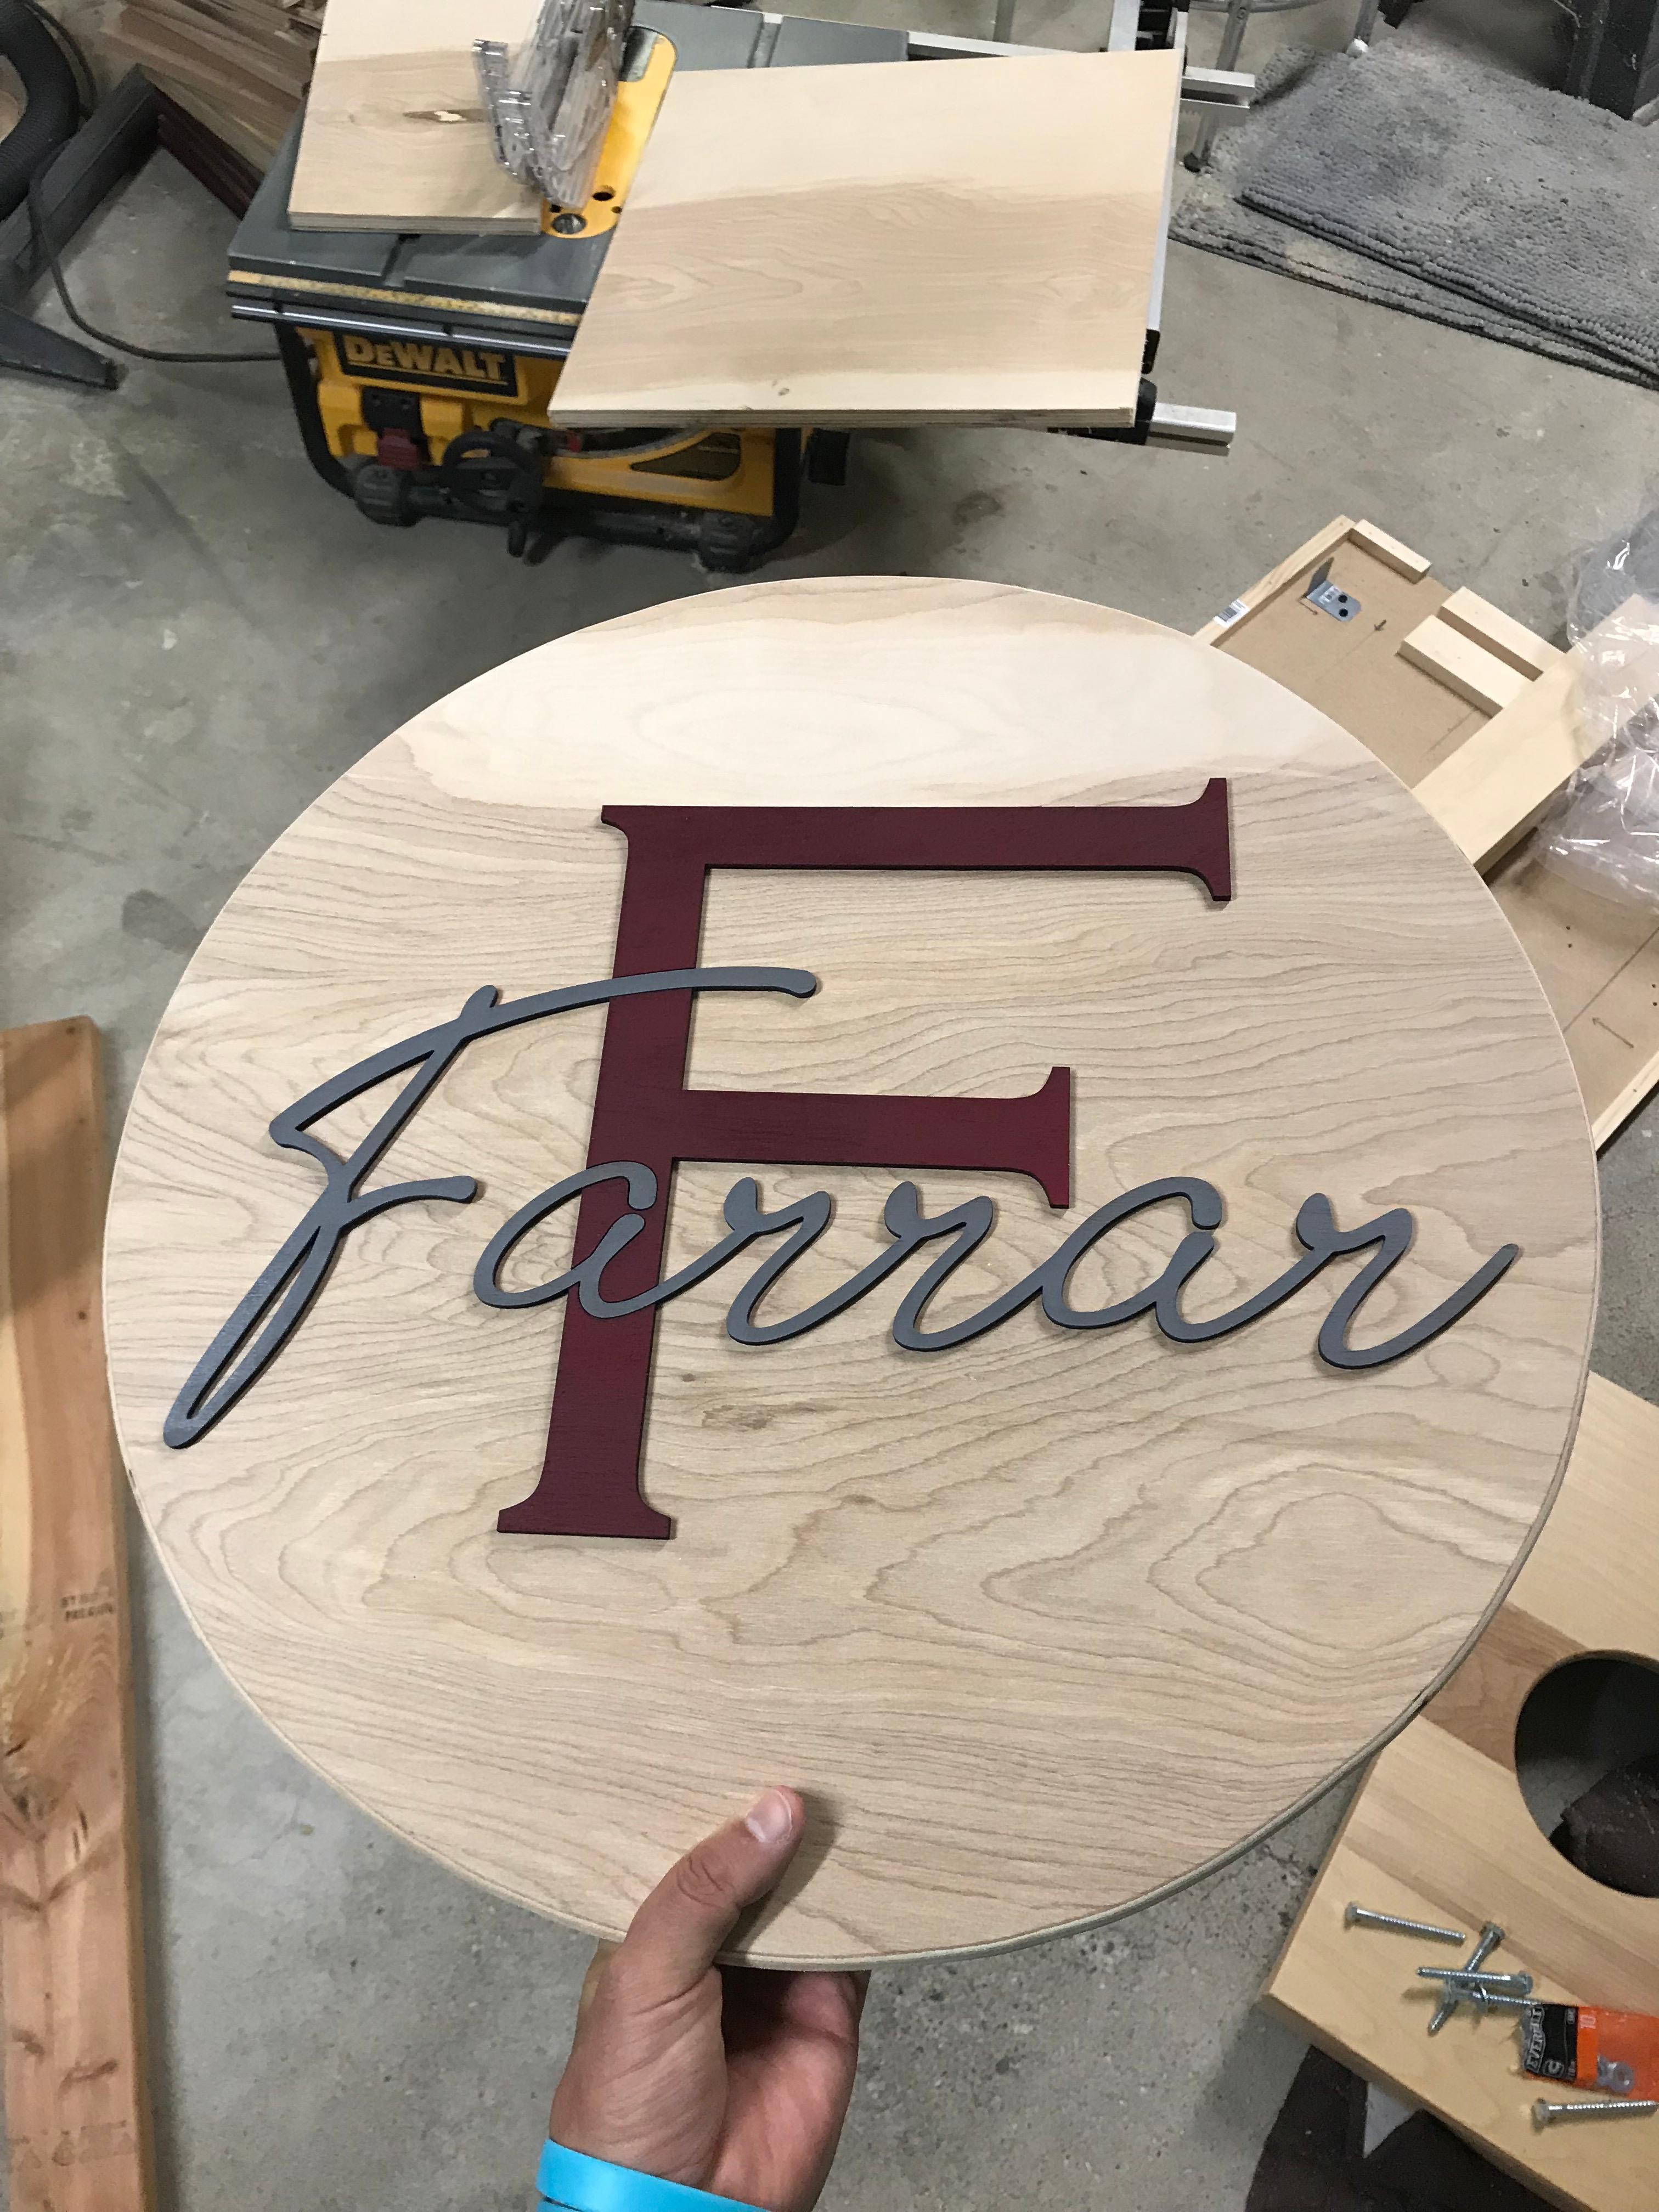

Copy link to clipboard
Copied
if you plan to cut it from 1 piece and color later, you can thy the follow workaround:
1. Convert texts to outlines
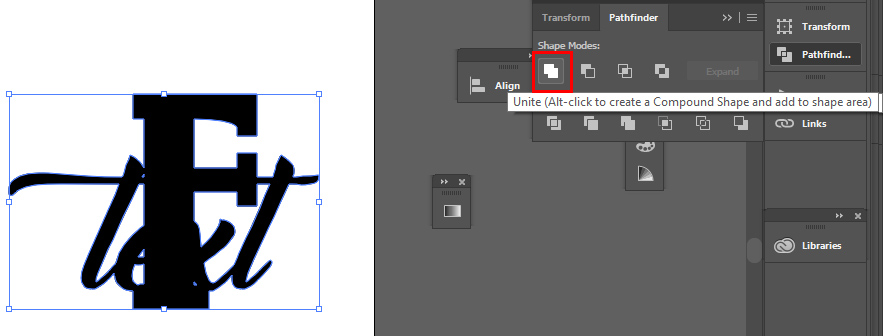
2. Unite "Red" text by Pathfinder > Unite

3. Copy the composition to Clipboard
4. Merge all elements by the same Unit button on Pathfinder panel
it's yout main outline.
5. Paste the Clipboard content in front (Ctrl/Cmd + F)
6. Use Pathfinder > Outlines
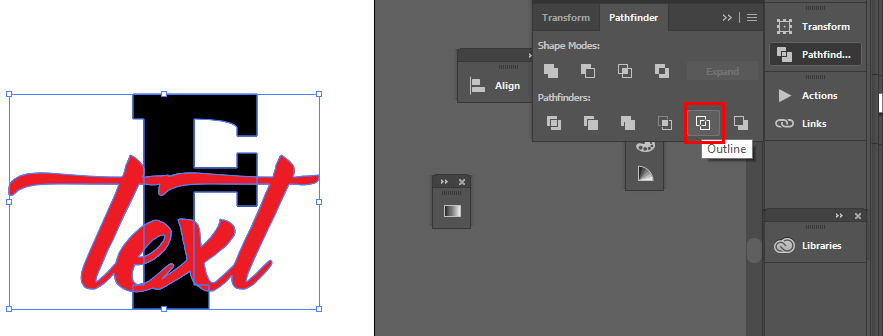
This operation will remove all fills and cut all lines in intersection points and create a group.

7. Using Isolated Mode, delete all unneeded lines

8. Now you have an outline and one-stroke internal lines.
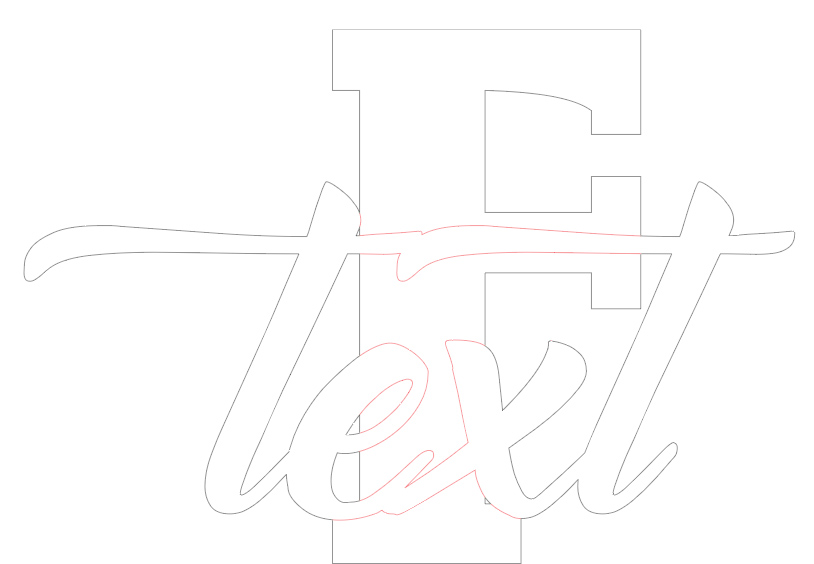
I colored the lines differently to show the parts, but you certainly don't need to change colors, cutting mashine doesn't see them 
Copy link to clipboard
Copied
I think I am getting closer . Is there an easy way to delete all of the unwanted lines? Right now I have been selecting the top layer and then moving it up, down, left, or right to see what is underneath it. Then I delete the lines that are duplicates. It just gets confusing moving stuff all around.
Copy link to clipboard
Copied
chrisf35359979 wrote
I have been selecting the top layer and then moving it up, down, left, or right to see what is underneath it.
Don't move it; just hide it. With it selected, press Ctrl/Cmd+3
Copy link to clipboard
Copied
Thank you! For me it was just "Command + 3" and then to make it reappear it was "option + command + 3"

Copy link to clipboard
Copied
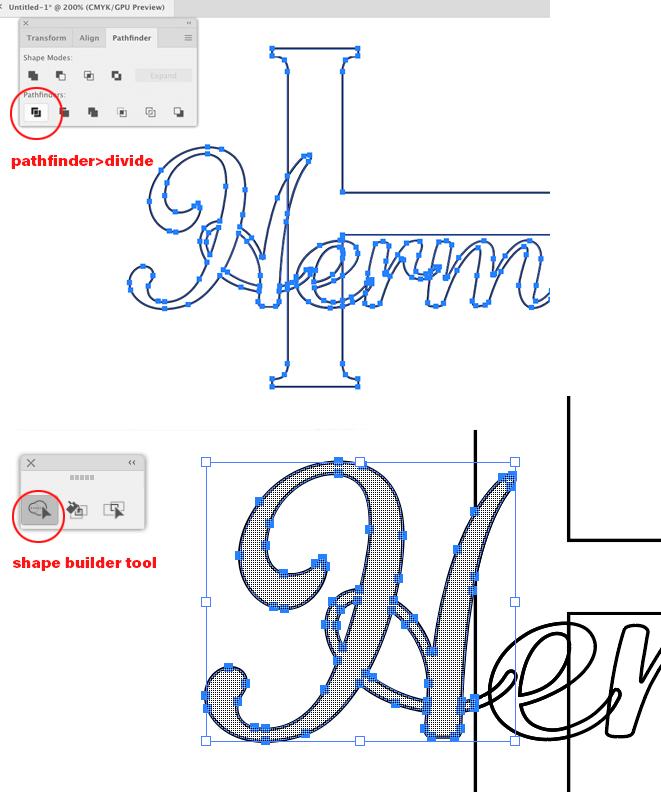
Expanding on above responses, after applying Object>Path>Outline Stroke
1. Use the pathfinder>divide
2. Select overlapping objects>apply the shape-builder tool
If you need artwork for just a black-outline, repeat your steps above use pathfinder>outline.
Tutorial on Pathfinder: Search Results
Copy link to clipboard
Copied
Thanks! What do you do after you apply the shape builder tool? It looks like it just created a grid?

Copy link to clipboard
Copied
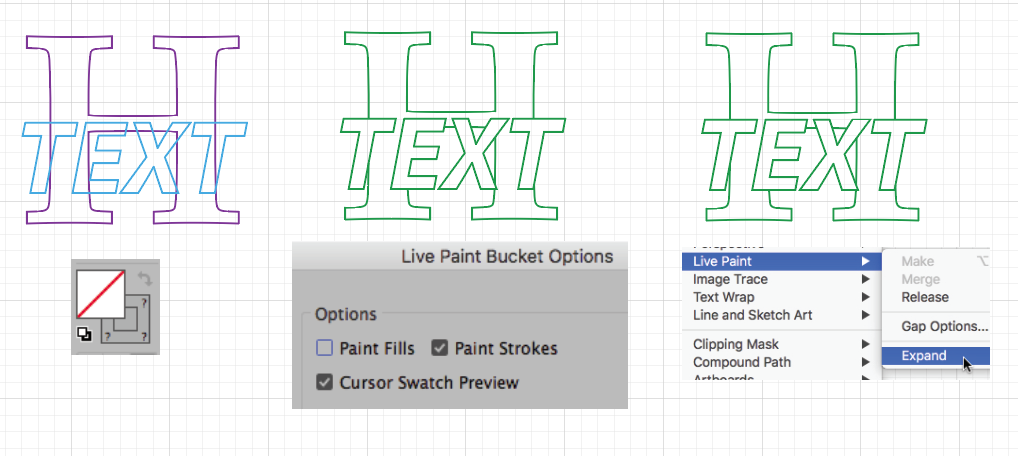
Here I Outlined Type. Stroked with no Fill.
Select, Live Paint Stokes
Expand Live Paint.
No overlap or duplicate of strokes.
K

Copy link to clipboard
Copied
kphotopage schrieb
Here I Outlined Type. Stroked with no Fill.
Select, Live Paint Stokes
Expand Live Paint.
No overlap or duplicate of strokes.
K
This.
I would do it like this:
1. Outline text, fill with white
2. Make live paint group
3. Select fill of none and triple click any white fill to change all the white fills to none
4. Expand
Copy link to clipboard
Copied
I think that might have worked!

Copy link to clipboard
Copied
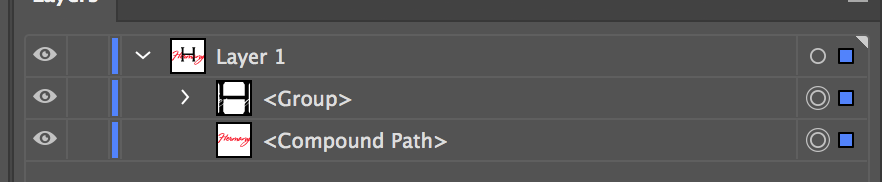
After you outline the text:

- Take the red type and ungroup it
- Take the red text then create a compound path: Object> Compound Path> Make (CTRL+8/CMD+8)
- Copy the red text: Edit> Copy (CTRL+C/CMD+C)
- Paste the red type in Front: Edit> Paste in Front (CTRL+F/CMD+F)
- While the copy of the red text is selected then also select the H
- Use the Pathfinder and Subtract the top object

- Now you have one copy of the red text and one copy of the H with the red text cut out.
Copy link to clipboard
Copied
The text can't be solid though. I have to have it as "no fill" with a stroke so I can cut it with my laser cutter.

 AdChoices