


Copy link to clipboard
Copied
Heya, I used to work with Corel before, and there was an option - contour, which simply made a contour shape of whatever art I had selected. Now since I moved to Ily, I eventually run into this problem, having the need to aquire same effect. If I have a group of objects, which contains different shapes, blends, 3d effects and what not, and I want to make a contour for the final object which I can use as a shape on it's own (can be filled, apply a drop shadow effect etc), how would you achieve this in Illustrator CS5? It is also important that the size of this contour to be exactly the same as the original art. Many thanks for your time / advices!


 1 Correct answer

Simply Group the objects then use the Appearance panel to apply strokes, fills and effects to the group.
Explore related tutorials & articles
 19
Replies
19
19
Replies
19
Copy link to clipboard
Copied
Simply Group the objects then use the Appearance panel to apply strokes, fills and effects to the group.
Copy link to clipboard
Copied
Hey Scott, thanks for your answer, but this is not really working well. For example I have a piece of art representing a video camera made from several no stroke shapes with the 3d revolve / extrude effects. If I apply a stroke to that, either to each piece or as a group, the whole design is compromised. I uploaded an image of how the art looks like in the upper part, and in the bottom what I want to achieve (I quickly draw the bottom image myself with couple shapes just to illustrate). All I am interested in is the outside part of the image, a contour like (which of course can be filled etc). Thanks again for any help 😆

Copy link to clipboard
Copied
You need to expand the group of objects, ungroup, the use the addition command in the pathfinder palette. This should create a silhoutte of the objects. Then got then go to object>path>offset path to make the outline.
Tedious process. A function like that would be super helpful though - most other design programs have had that function for years.
Copy link to clipboard
Copied
That works fine for normal shapes, I agree, but if I have an object with a 3d effect applied to it and expand it I get a mess of shapes and is very tedious to find the precise shapes that I want to outline. All this gets exponentially more difficult if there are multiple such objects with 3d effects 😆
One of the uses for such contour would be to cut the shape of the art out of another shape (like from a rectangle the side of my artboard which I use for background). Thanks everyone for your inputs, seems like is not really possible, or not in a way that wouldn't double my project time. Still if anyone else has any ideas or solutions, am eager to hear them out, thanks everyone again 😆
Copy link to clipboard
Copied
Scott! I realised what I was doing wrong trying your advice! After I apply a stroke to the group and expand appearance, I was next ungrouping it trying to find the outlines which was resulting in a hell of a mess! But earlier after doing again the group + appearance stroke + expand appearance, I went to layer menu and navigated to my group and just moved out the group containing the outlines! Now I just need to unite and delete any inside strokes and is all as it should be. Many thanks for your answer, sometimes ungrouping isn't the best aproach seems!
Copy link to clipboard
Copied
NO NO NO... Don't expand it. -- okay -- in some instances you'll need to expand the Object if you want to manipulate the stroke independently. But in many cases leaving the Appearance in tact is very, very beneficial
Simply click-drag the stroke in the Appearance Panel below the Contents item. The strokes will then fall behind the artwork. Then, with the stroke highlighted in the Appearance panel, choose Effects > Path > Offset Path

Note the white fill in the Appearance Panel has the same Offset path applied to it so it covers any parts of the stroke which overlap each other.
Copy link to clipboard
Copied
Thanks this is exactly what I needed. The reason why I was expanding was because I was needing a different entitty / object as that shape contour, with which I can work independently of the original items group. Suppose if I just copy it and then paste it in another place would have same result?

Copy link to clipboard
Copied
Thanks Scott, that was really helpful.
Copy link to clipboard
Copied
And on a separate note, is it possible to create a copy of a piece of art that was made in CMYK or RGB, into Grayscale? Am not that experienced with ilustrator, I know about recolor artwork but that seems very painfull to achieve by eye adequate results. Thanks again!

Copy link to clipboard
Copied
Select Your Artwork
Edit >> Edit Colors >> Recolor With Preset >> 1 Color Job (in next window change color to a=100% Black on bottom left)
Copy link to clipboard
Copied
Actually I use a different method for greyscale...
Select art > Edit > Edit Colors > Convert to Greyscale.
Mike's method works fine, but since there's already a dedicated menu item for greyscale, I just use that.
The reason why I was expanding was because I was needing a different [entity] / object as that shape contour, with which I can work independently of the original items group. Suppose if I just copy it and then paste it in another place would have same result?
If you simply want the contour of the grouped shape... You can copy the art to a new location, select it and choose Pathfinder > Unite. That will make a single shape of the objects with the exception of meshes or 3D objects. If you've got gradient meshes or 3D effect objects, you want to use Path > Offset Path, Set it to 0 for the ofset, then expand to get the path.
Copy link to clipboard
Copied
Awesome replies, thanks guys!
Another thing - not sure if I understood this right. I know you can make opacity or normal masks using a shape. It can be a simple shape, a compound path or compound shape correct? But can we use a group as a mask for another group / shape? As that was one of the uses for this contour you see 😆 Like in my original post, if I have a complex group - a mix of object types with different fills, strokes, mesh fills or even 3d effects, if I copy that group and place it in front of itself can I make a mask out of it without geting anything weird happening? (I actually never tried this, am sort of old school type, hence why was trying to do it similar to Corel but using Illustrator functions). Thanks again for all your inputs, much much apreciated.
Copy link to clipboard
Copied
Oh Scott, and: If you simply want the contour of the grouped shape... You can copy the art to a new location, select it and choose Pathfinder > Unite. But not all the grouped objects are overlapping, I did try that and wasn't giving the desired result. I had that problem when I was sketching a character in ilustrator using brushes or pencil tool and had several paths that did not intersect or overlap with others in the design, giving me a problem when was trying to color the artwork. Then I found a very lovely tutorial on internet (how someone designed mastermind character) and their method was: after completing the sketch, select all the paths and use merge from pathfinder, then draw a filled rectangle behind the artwork, merge again, then delete the unwanted parts. Such things / methods are not that intuitive within illustrator often leading to dead ends when trying to achieve something that seems simple at first look 😆
Copy link to clipboard
Copied
Tik77 wrote:
ut not all the grouped objects are overlapping,
In that case, offset path would probably work better. Then make a compound shape or group with the resuting paths. Everything is really dependent upon the actual art. Certain methods work best in specific circumstances.
I do a lot of product renderings which use custom brushes and pattern fills. I've found that if I need a contour line for these it's best to expand all the brush strokes and remove pattern fills (on a copy of the art) before using Pathfinder Unite or merge. (Ai chokes when merging some patterns and brushes).
Copy link to clipboard
Copied
Ok, so opacity mask works, but a normal mask would not? Am asking because for example, I have a circular filled shape on top of which I made a thin rectangle, then moved it down and duplicated until I have a column of rectangles at let's say 10 pixels vertical distance from eachother covering the oval. If I group them and try to make a mask for the round shape, when I make the mask everything is gone from artboard (visualy - the green shape does not appear through the stripes). I uploaded an image for what I am trying to achieve, thanks for any advice 😆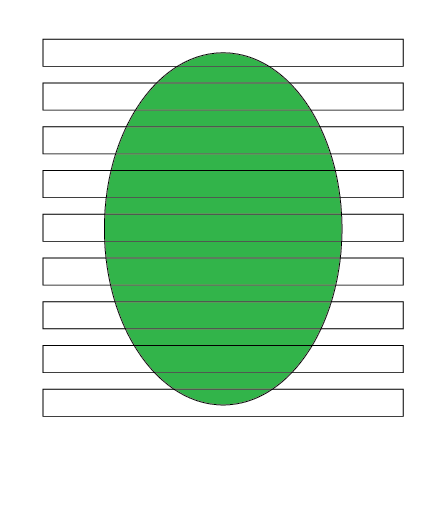
Copy link to clipboard
Copied
Select the rectangles, make a compound path.. then Clipping mask.
Clipping Masks are limited to basic shapes and compound shapes.
Copy link to clipboard
Copied
Thanks 😆
Now that you mentioned opacity mask working with about anything, now correct me if am wrong, but a 100% white fill opacity mask acts like a normal mask correct? So if I would use a group as opacity mask and fill it with white, the result would be same? That if I recall right, the opacity mask does not have to be the same shape as the object being used for transparency mask? Thanks again 😆
Copy link to clipboard
Copied
Well.. Opacity masks and Transparency masks are the same thing. So I don't really understand:
opacity mask does not have to be the same shape as the object being used for transparency mask?
No mask needs to be the same shape as what is being masked though - neither Opacity or Clipping masks require shapes to be the same as the object being masked.
Opacity Masks work just like Photoshop Masks - White = show, Black = hide.
Copy link to clipboard
Copied
You can make Opacity masks out of almost anything - shapes, meshes, groups, compound shapes, even objects with the 3D effect applied to them. Opacity masks even work with linked or embeded raster images. Best method is to try it... chances are it'll work for an Opacity Mask.

Find more inspiration, events, and resources on the new Adobe Community
Explore Now
 AdChoices