


Copy link to clipboard
Copied
I don't know if this is possible. I have two strokes and I want one stroke to overlap the other at just a specific spot. Easy to do with just copying a stroke path and deleting points, but when you have a brush style stroke it shrinks down the look of the stroke and doesn't match. Screenshots attached so you can see what I'm talking about.


 1 Correct answer

Try the following:
- Select the rope path that's in back
- Copy it (Edit > Copy)
- Deselect the back rope and select the front rope
- Paste the back rope in front (Edit > Paste in Front)
- Draw a rectangle over the part of the pasted rope that you want to be in front
- Select both the pasted rope and the top rectangle and go to Object > Clipping Mask > Make
It should work because you're Masking, not cutting the path that the rope Pattern is applied to.
Explore related tutorials & articles
 12
Replies
12
12
Replies
12
Copy link to clipboard
Copied
Try the following:
- Select the rope path that's in back
- Copy it (Edit > Copy)
- Deselect the back rope and select the front rope
- Paste the back rope in front (Edit > Paste in Front)
- Draw a rectangle over the part of the pasted rope that you want to be in front
- Select both the pasted rope and the top rectangle and go to Object > Clipping Mask > Make
It should work because you're Masking, not cutting the path that the rope Pattern is applied to.
Copy link to clipboard
Copied
That worked, thank you. Don't know why I didn't think of masks.
Copy link to clipboard
Copied
You're quite welcome GrifX! Glad to help!
Copy link to clipboard
Copied
New question, what if you just have one stroke? How do you get the stroke to overlap at a certain spot then?
Copy link to clipboard
Copied
Hi GrifX,
Similar answer. Copy the path, and paste in front. Then go to Object > Path > Reverse Path Direction. This will reverse the stacking order of the anchor points in the path as if it were drawn in the opposite direction. Then create a Mask for the overlap area only.
See example below!
Best,
Jeff

Copy link to clipboard
Copied
If I reverse the path it changes the appearance of my rope where the lines are moving the opposite direction so this doesn't work. Is there another way to make the stroke go above itself?
Copy link to clipboard
Copied
Ahh, good point. Didn't notice this issue with the Brush I was using.
Copy link to clipboard
Copied
There is a way to do this, but it involves quite a bit of work.
I had thought I had found a quick solution, "Flip Across" in the Brush Options dialog box, but it does not work. It's just another way of "Reversing the Path."
What you need to create is the exact same Brush flipped along a vertical axis.
To do this, try the following:
- Click and drag your existing Rope Brush out of the Brushes panel to alter the original vector. (Don't worry, the original Brush will remain in the Brushes panel untouched).
- You will probably see several square Pattern tiles. (Depending on the Pattern Brush, there could be up to five squares. The first is the way Outside Corners are treated, the second is for the running Sides, then Inside Corners, the Start and the End of the Brush.
- The Tiles will be Grouped together.
- With the Tiles selected, double-click on the Reflect tool (0) and flip the Tiles across a Vertical Axis.
- Go to Object Ungroup, to Ungroup the Tiles.
Now you need to make each Tile into a Pattern, so it can be part of your Flipped Rope Brush
- Select each Tile, one at a time, and go to Window > Pattern Options to open the Patten Options panel.
- Go under the Options menu of the panel and select Make Pattern and press OK.
- Then press Done (under the Control panel) to escape Pattern Editing mode and add the Pattern to the Swatches panel.
- Repeat for each Tile in the Brush.
To create a Reflected version of your Rope Brush, do the following:
- Select the Reflected Side Tile, which would be the main part of your Rope Brush, and drag it into the Brushes panel to create a new Brush.
- Make sure to select Pattern Brush in the New Brush window that opens and click OK.
- In the dialog that opens, add your newly created Patterns to the appropriate part of the Brush (Outside Corners, the running Sides which should already be there, Inside Corners, Start and End).
- Click OK to created your Reverse Rope Brush.
Then Copy your original Rope path, and paste in front. Apply your new Reverse Rope Brush and go to Object > Path > Reverse Path Direction. This will reverse the stacking order of the anchor points in the path as if it were drawn in the opposite direction. Then create a Mask for the overlap area only.
This should work! Please let me know how you make out with it.
See example below!
Copy link to clipboard
Copied
I thought this would work for sure, unfortunately it didn't. For some reason the rope still changes appearance.
Here's the brush I'm using if you want to give it a try.
Rodeo: Hand Drawn Rope Brush [Free Download] — Ray Dombroski
Copy link to clipboard
Copied

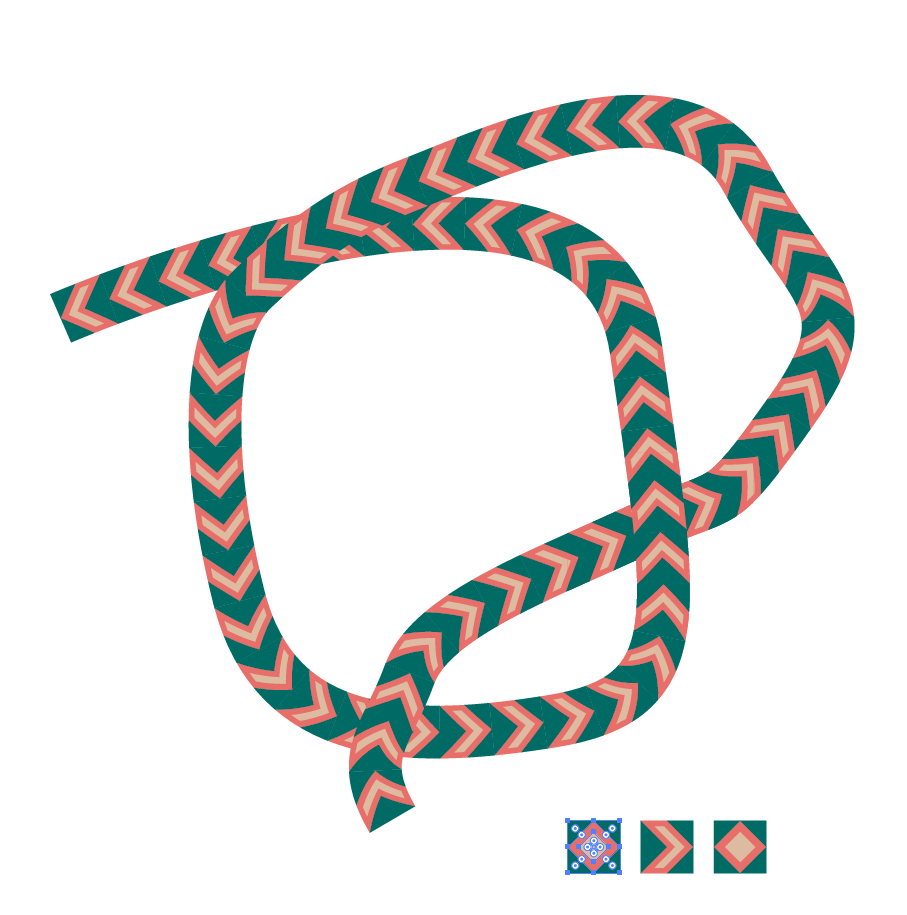
Here's the original, reversed and new flipped rope brush.
Copy link to clipboard
Copied
I did it finally, so I made a copy, used the new flipped brush and then under the brushes panel I went to options of selected object and checked Flip Along instead of reversing the path.
Copy link to clipboard
Copied
Cool! There's always something new to learn.

Find more inspiration, events, and resources on the new Adobe Community
Explore Now
 AdChoices