Answered
Paint & colour a hand drawn sketch
Hello SuperPeople,
I am just starting out with Adobe and really want to paint & colour my own hand drawn sketch. How do i go about it? Illustrator or ???? Layman terms will really help.
Thanks a doz.

Hello SuperPeople,
I am just starting out with Adobe and really want to paint & colour my own hand drawn sketch. How do i go about it? Illustrator or ???? Layman terms will really help.
Thanks a doz.
There are different ways to do this.
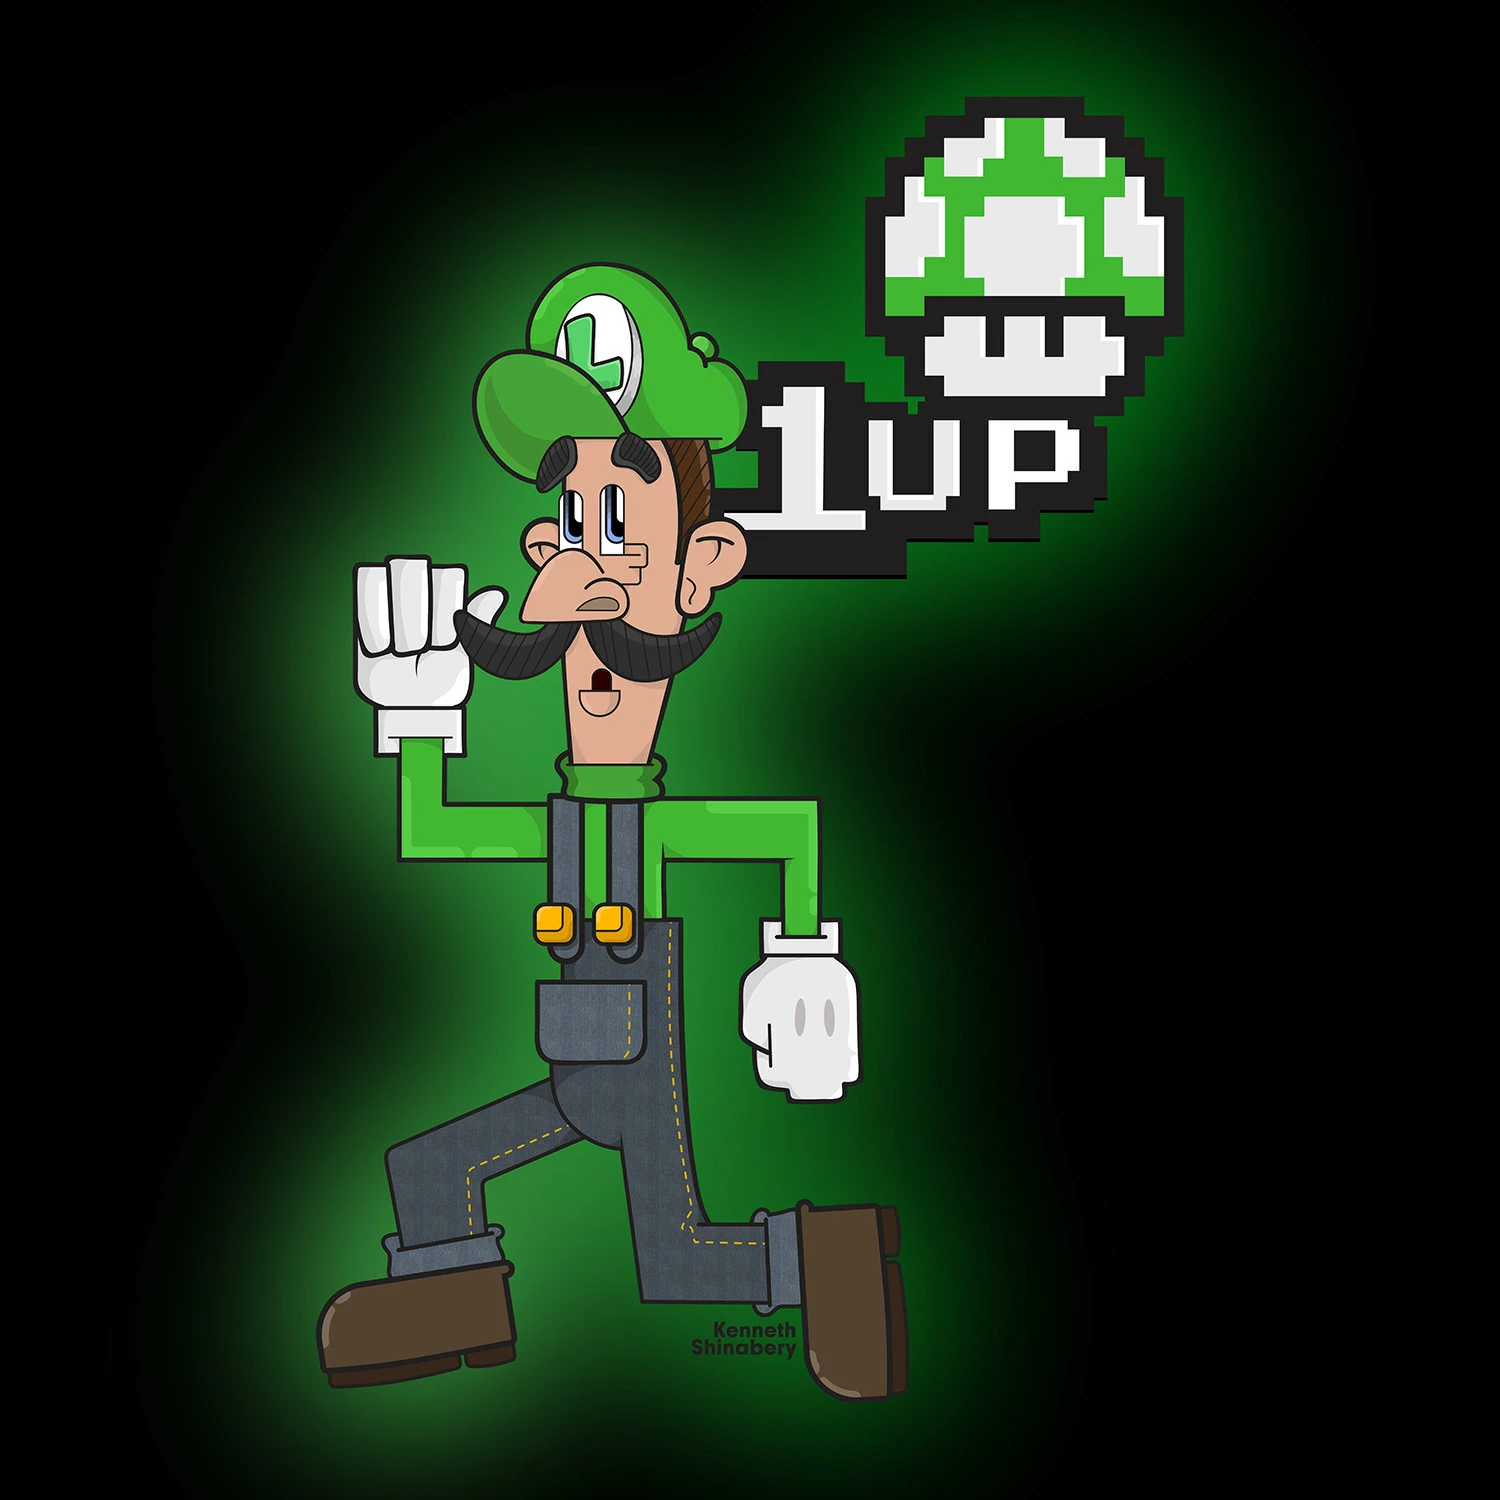
As you master Illustrator you can really give things more depth with shading and highlights. Example: I went from 2d flat characters in Illustrator to ones that have more natural shading. See the following two images.
Luigi is pretty flat. I the shadows and highlights are hard.
Snow White has more shading. Granted now I can even do better shading and highlights... but it is a process to learn how to do it.
Now if you look at artist Orlando Arocena's work on Behance you can see how he really mastered Illustrator.
https://www.behance.net/orlandoarocena
In fact, Orlando was commissioned by Adobe to create artwork for Illustrator 2014 CC.
https://www.behance.net/gallery/20179137/Adobe-Illustrator-CC2014-VENUS-REVISITED
The way I create is more like that of a graffiti artist. I think in layers.
First I create the line art. Then I expand every line. I make a copy of that group. The original stays the top layer. Then the copy becomes the bottom layer. The copy/bottom layer is turned into Live Paint and becomes my solid fill layer.
Now once the bottom layer is colored with flat colors.... between that bottom layer (the base colored layer) and the top layer (only line art) I start creating layers for shading and highlights. So the top layer and bottom layer remain my main layers.
Eventually you will want to learn how to use the Clipping Mask as that really helps out when using gradients and blurs.
The cool thing is that since you are working in Illustrator... the image can be blown up big big big and there is no distortion! I started using Illustrator simply because some people were asking to showcase my artwork in large printed format. Well... my old designs in Photoshop obviously were not intended for that and would become pixelated. But vectors in Illustrator do not.... so I began to master Illustrator so that I could print big images. Not to say Illustratori is the perfect place to create characters or color sketches/doodles..... Photoshop is still a good place as well. It just depends what you want to do with the image after. Now I know there is a possibility that my art might be shown in large format Illustrator is better for me. If that makes sense.
Already have an account? Login
Enter your E-mail address. We'll send you an e-mail with instructions to reset your password.