 Adobe Community
- Home
- Illustrator
- Discussions
- Re: Perspective Distort of Hash/Tick Marks
- Re: Perspective Distort of Hash/Tick Marks

Copy link to clipboard
Copied
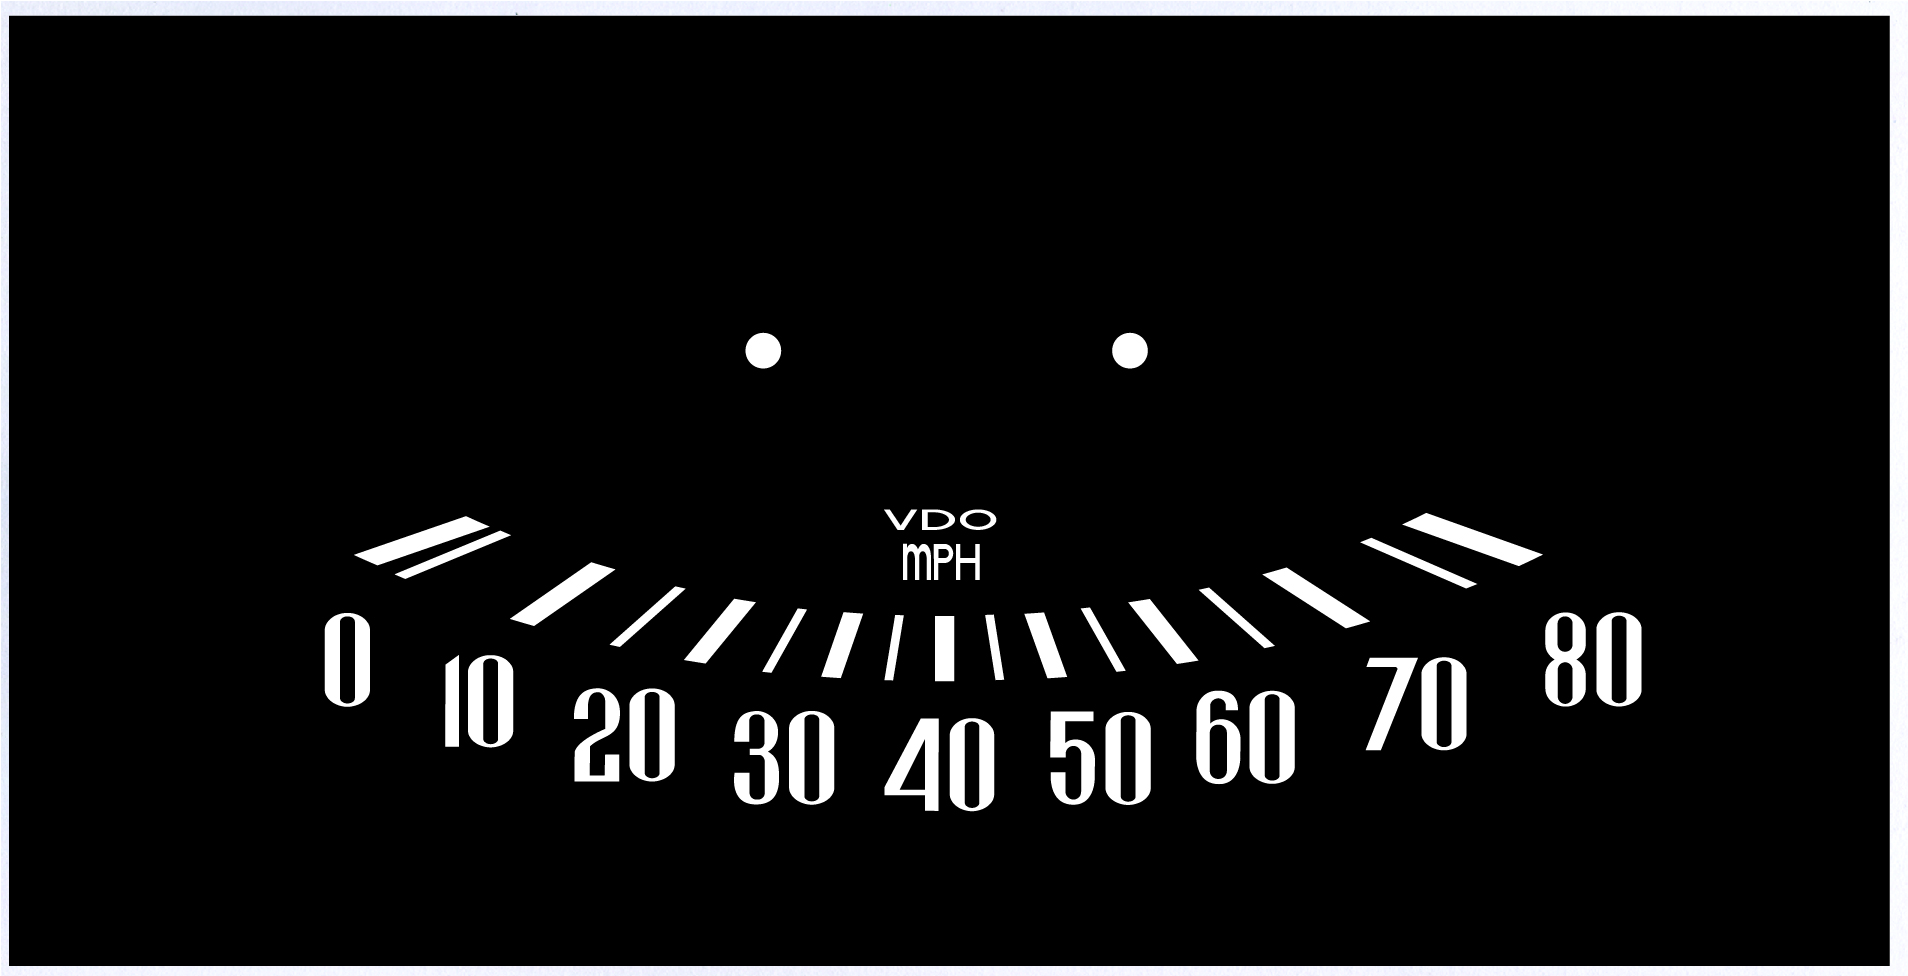
Prior to the CC 2018 version of Illustrator, I was using the Perspective Distort Tool to recreate the hash marks for Speedometers (and other dials) that I need to re-create artwork for. Now, the Perspective Distort tool seems to be just one tool which is the transform tool. I am unable to figure out how to distort of group of hash marks. The video's and articles that I've read all seem to deal with using perspective distortion on a single piece of artwork. When I use the free transform tool to pull the corners, they all move in one direction. I need to move them in both directions as a group WITHOUT changing the width or length of the marks. This is the original dial that I'm re-creating. Help in explaining the new way of doing things would be most appreciated.
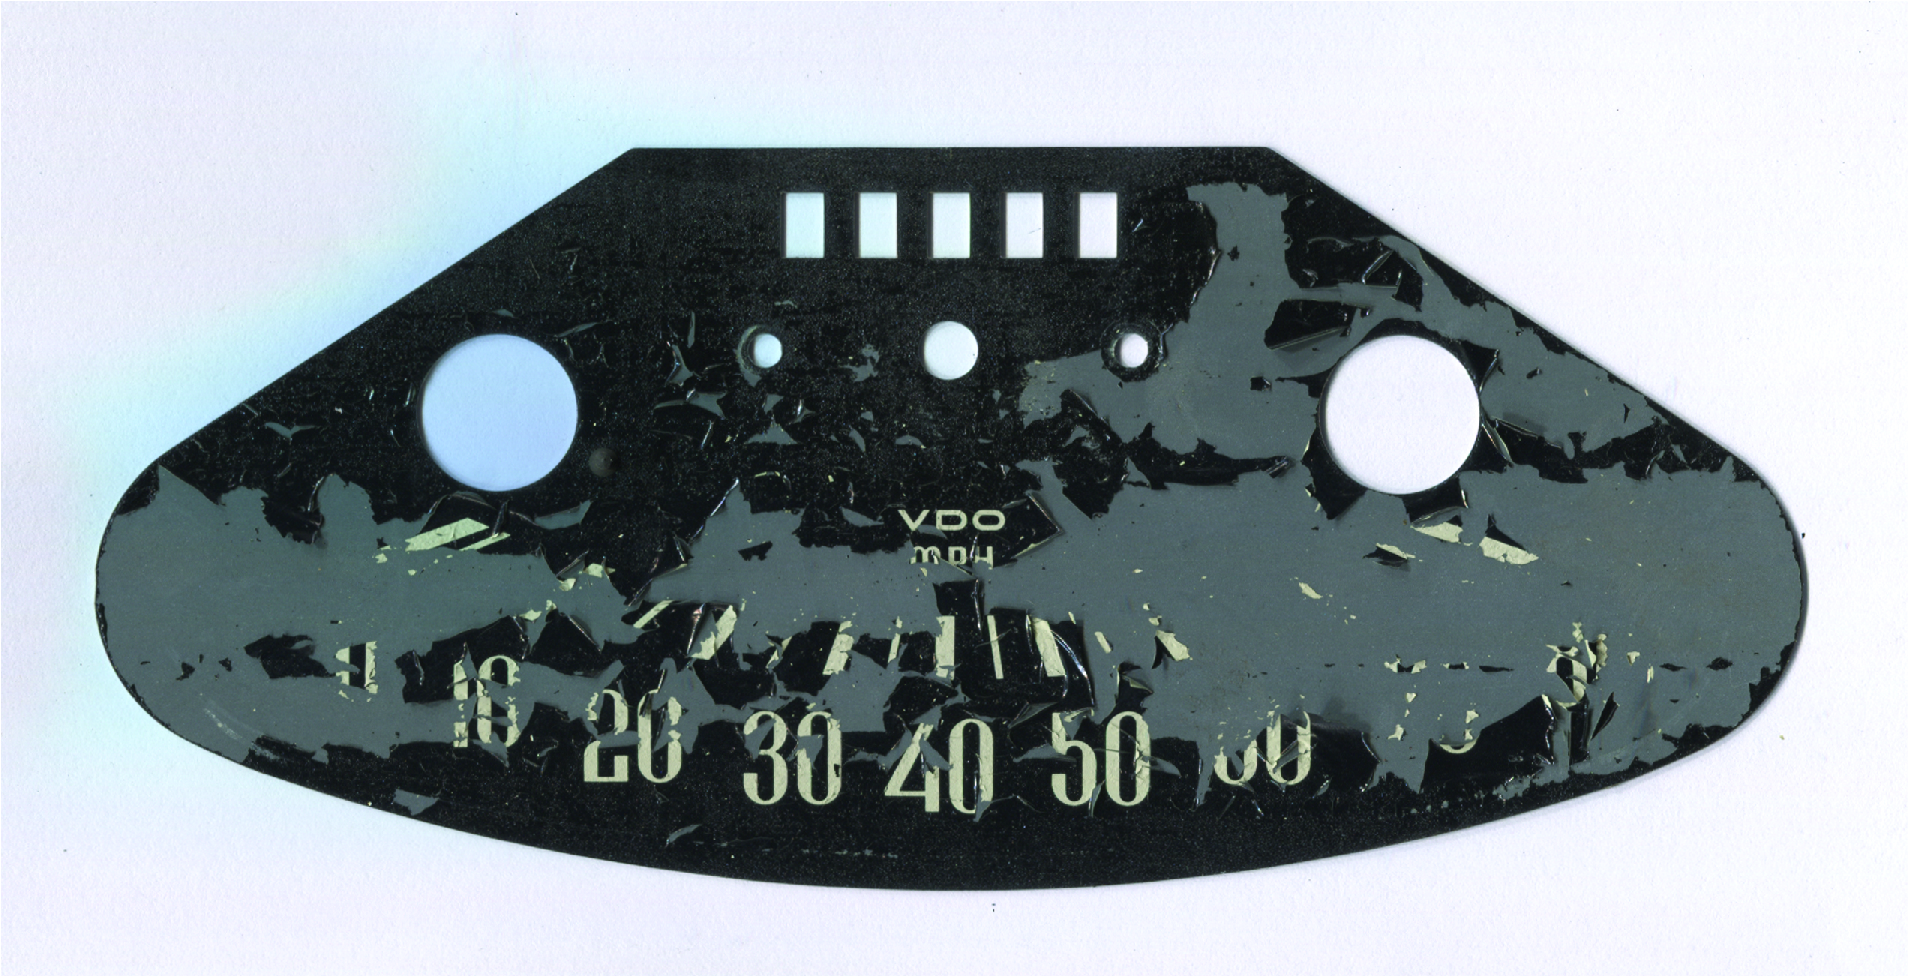
For those of you that are interested, this is for a 1960 Heinkel Speedo. I need the hash marks evenly spaced (although they are of two different widths to represent the major and minor hash marks) There are 15 hash marks in total.


 1 Correct answer

Jber,
I need the hash marks evenly spaced
As far as I can see they are quite unevenly spaced, more like even angles, but not quite at the ends.
I have the following somewhat simple and old fashioned suggestion (working on the locked image and keeping copies of the artwork at every step so you have something to fall back on):
1) Determine the centre where an extension of the hash marks would end (in the lower part of the central round hole), then simply draw the lines from there (you may use the Line
...Explore related tutorials & articles
 9
Replies
9
9
Replies
9

Copy link to clipboard
Copied
Jber505 wrote
When I use the free transform tool to pull the corners, they all move in one direction. I need to move them in both directions as a group . . .
Select all your hash marks, choose the Free Transform tool.
Click/hold on a bottom corner handle, THEN press Ctrl+Alt+Shift (Cmd+Opt+Shift), and drag horizontally. (The Alt/Opt modifier applies the transformation from the center-out.)
. . . WITHOUT changing the width or length of the marks.
That could be a tricky aspect. If your hash marks are filled shapes, their width/length will be distorted to some extent, depending on their original state, relative to the distance you drag. To avoid that, you'd have to operating on stroked paths with Scale Strokes and Effects disabled.
Copy link to clipboard
Copied
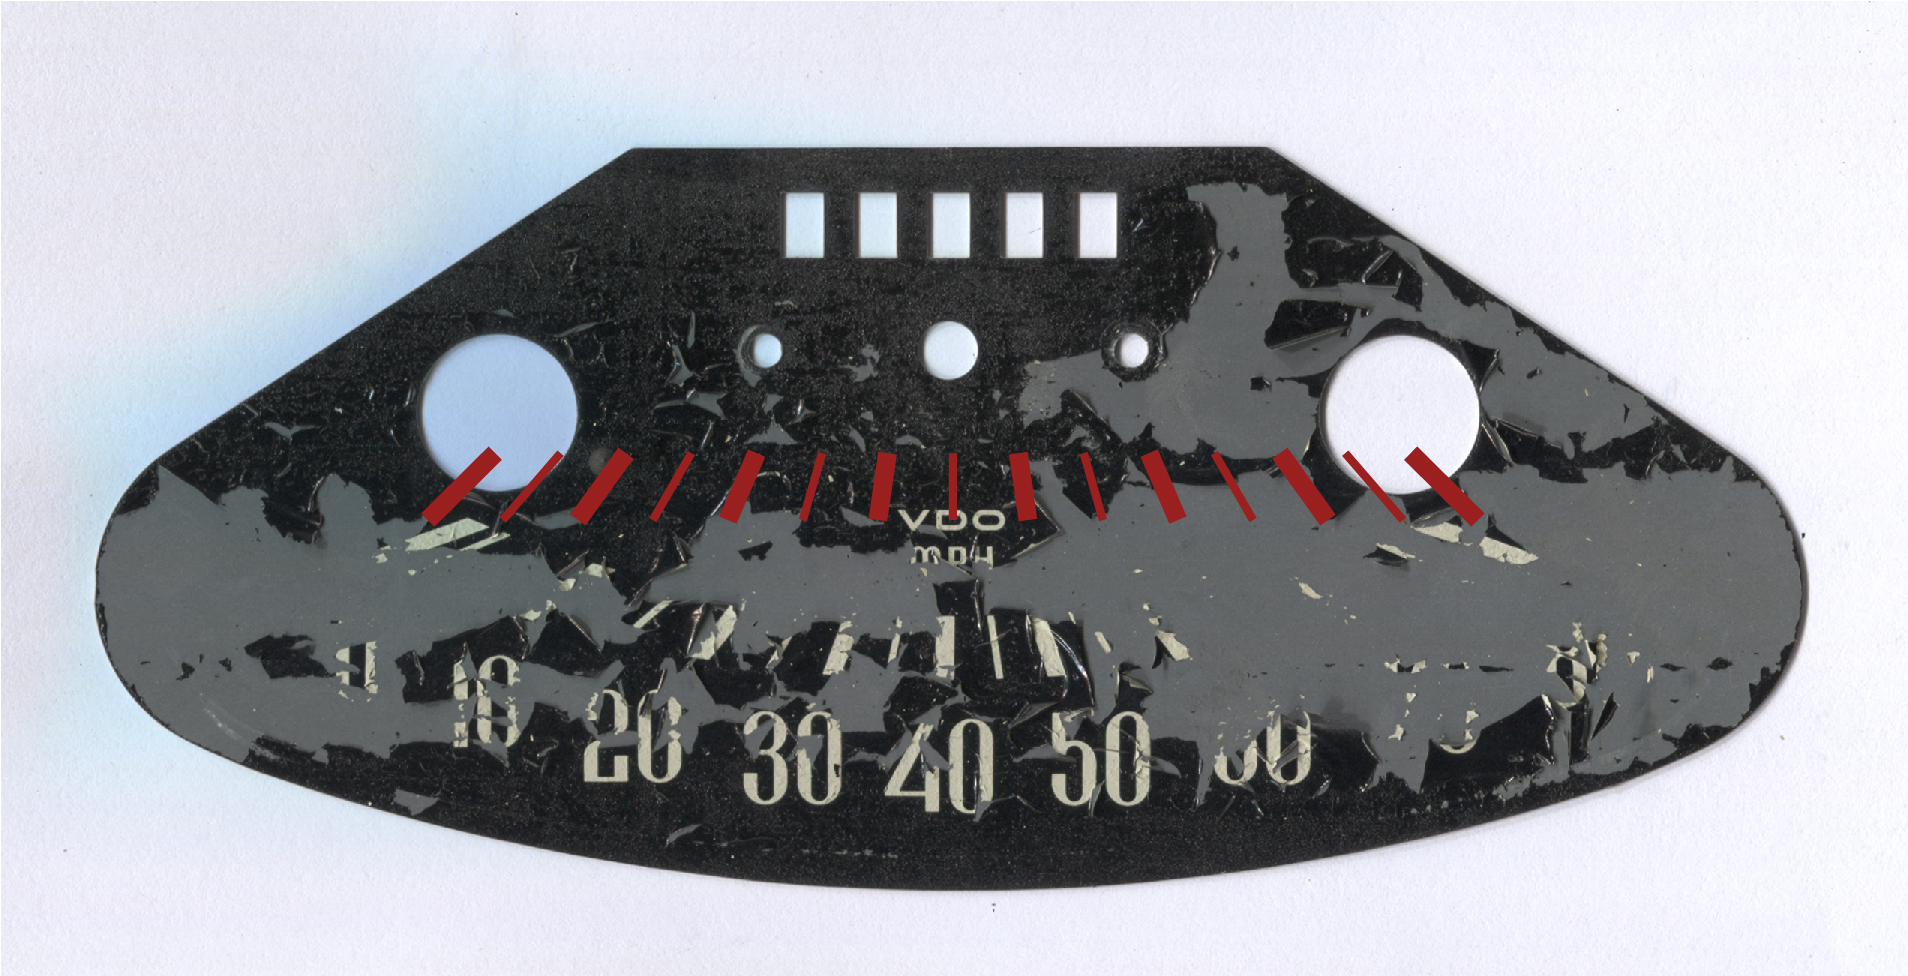
Thanks! I was able to figure out what I was doing wrong with the Free Distort (why it wasn't working for me). Now, my problem is the hash/tick marks are not "laying" down properly. I need the stroke to look as though it's flat side to side, as shown in the .jpg AND I need to be able to Warp it to the Arc shape and I just can't seem to get it to work. Any Suggestions? or down right step by step instructions would be highly appreciated.
Thanks.
This is the dial I am trying to re-create and the red hash marks are what I managed to do so far. My strokes and effects are disabled in general pref.

Copy link to clipboard
Copied
I doubt that you will reach your goal with distortion.
You might need to do some real construction:
Copy link to clipboard
Copied
Jber,
I need the hash marks evenly spaced
As far as I can see they are quite unevenly spaced, more like even angles, but not quite at the ends.
I have the following somewhat simple and old fashioned suggestion (working on the locked image and keeping copies of the artwork at every step so you have something to fall back on):
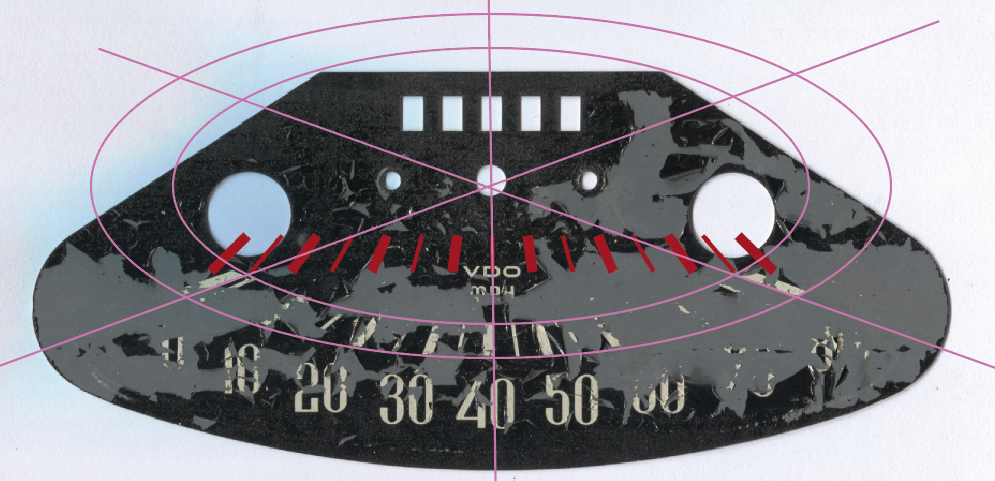
1) Determine the centre where an extension of the hash marks would end (in the lower part of the central round hole), then simply draw the lines from there (you may use the Line (Segment) Tool), you may start with the central 40 MPH one straight down and rotate round the top to fit (some 5 degrees between neighbouring lines at least to start with), for both the thick and the thin ones, and make all of them very thin in a bright colour and too long;
2) Create two ellipses with the same centre (taking the time to make them right), maybe you can create the bottom one then scale down for the top one, so that the two ellipses cross the lines where the top and the bottom of the hash marks are (to be);
3) Increase the widths of the lines to match the two hash mark widths, then turn them white (if not already), then select all the lines and Object>Path>Outline Stroke, then select each of the two ellipses and Object>Path>Divide Objects Below, then Ctrl/Cmd+Shift+G to Ungroup and delete the unwanted bits.
That should give you all the hash marks as filled paths of the right shapes
Copy link to clipboard
Copied
Thanks Jacob! I will give it a whirl.
Thank you Monika but I really have no idea what your trying to tell me.
Copy link to clipboard
Copied
You are welcome, Jber, and welcome back with another intriguing case.
What you see in post #4 by Monika are basically a few of the lines from the centre in the lower part of the central hole as in 1) and then the two ellipses one scaled from the other as in 2); it was posted 3 minutes after my (first version of the) 1) - 3) suggestion in post #3, so we were thinking alike and posting in random order.
I came back maybe half an hour later to make a few corrections and additions I came to think of (and saw that there was a post #4), and then once (or twice) more even later, hence the apparent disorder in the time space continuum.
Copy link to clipboard
Copied
Thanks Jacob;
Yes, after I posted my reply I realized that what she was showing me is what you were telling me lol - thanks to both of you. I'm sure to be back!

Copy link to clipboard
Copied
Jber, Hi.
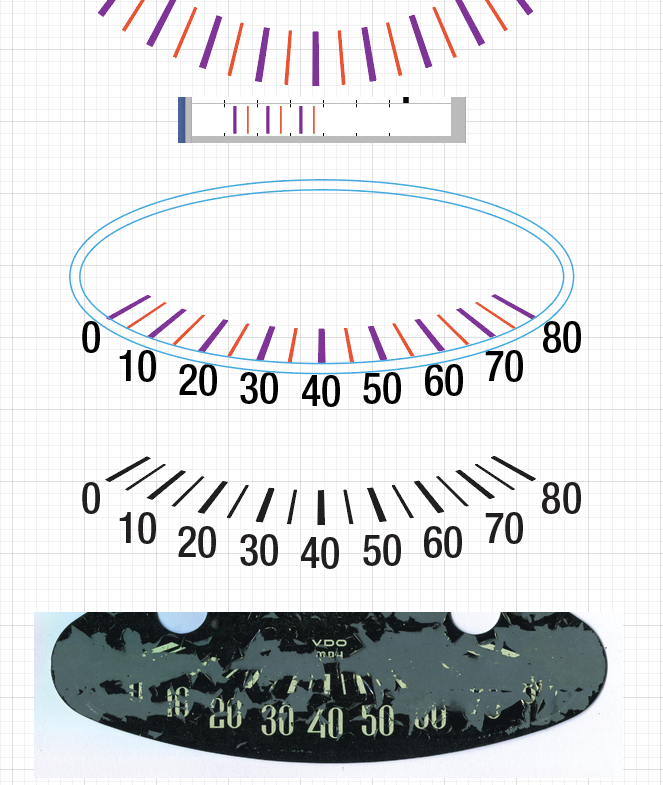
Here I first created a Pattern Brush and stroked a circle.
Then expanded the stroked brush and deleted all the extraneous ticks
Next I created 2 ellipses to be use as guides.
Group your tick marks and with the Free Transform tool, adjust to fit your guide ellipse.
Create your digital text frames and place.
Hope that helps.
K
Copy link to clipboard
Copied
Thanks for all your effort kphotopage, I very much appreciate the help and the illustration 
It makes perfect sense now that I've read all the replies. The customer did make one change and I noticed that Jacob caught the difference between my description and the .jpg I put up. The change went from "evenly spaced hash marks" to "as originally placed on the dial". In that respect, I think the brush would not have worked. I'm not sure how to mark all 3 of these replies as "correct", but I'm going to try because they actually all are correct. Here is my final work. I ended up having to create the font for the numbers which was a pain and is the story of my life lol. You don't see the large circular cut outs or the rectangle cut outs across the top as that part isn't required. A film will be created from this artwork and placed on the physical dial, although it's not would you would think of as a "sticker" as there is nothing to peel off.

 AdChoices