Copy link to clipboard
Copied
Hello.
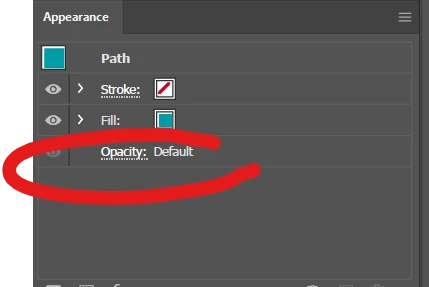
I'm brand new to Adobe Illustrator and I'm working on an image (personally taken - jpg) in which i'm trying to erase the portions of the photo in the attached areas which I've highlighted in Red. I'm working on a windows 11 pc.
Ulitmately my goal is to have the photo somewhat faded over the blue background and erase the portion of the image that shows up over the white section in the middle and the orange triangle on the top.
I've done quite a bit of searching on YouTube but can't seem to find the right video that shows this capability and when I spoke to Adobe Tech Support they recommended I try it in PhotoShop (which i've also never used before).
I would be extremely greatful for any help, tips or links - thank you!
Well if you want that same overlay opacity as the original image, id say without the original design file its upmost impossible. You could overlay it with a full opaque path and then add the new text as you want.
Wondering where this shot is from, it seems to be either photoshop or Illustrator. I see its being sliced up, that kinda oldskool for outputting HTML ready version of the design.
EDIT
looking at the image with the red outline. I believe you want those parts not transparent but rather op
...Copy link to clipboard
Copied
So you want to do that in the JPEG or in the orginal the JPEG has been created from?
In Illustrator you cannot do image editing. You could mask it with an opacity mask, but that might not be what you want. I'm also not quite sure of the desired result. Those marked areas are a different color and you want to have the blue background image continued there? So this are has to be re-created?
Copy link to clipboard
Copied
Hi, thank you for your response. I think what I'm looking for is to custom crop the underlaid image so it's only visible under the blue color and is not visible on the white below or the orange triangle in the top right hand corner. How would I accomplish this? I've played with the opacity mask which is how I've gotten to this point so far.
Copy link to clipboard
Copied
Cropping in Illustrator is available when you select the image. And thenlook in the Properties panel or the Control panel.
Copy link to clipboard
Copied
Well if you want that same overlay opacity as the original image, id say without the original design file its upmost impossible. You could overlay it with a full opaque path and then add the new text as you want.
Wondering where this shot is from, it seems to be either photoshop or Illustrator. I see its being sliced up, that kinda oldskool for outputting HTML ready version of the design.
EDIT
looking at the image with the red outline. I believe you want those parts not transparent but rather opaque. Simply change the transparency of the path, aka the opacity. Set it higher or to 100%. You can view this in the appliance panel. See top menu > Window > Appearance
See red outline to change opacity
If you want the photo in the backdrop to fade to white. Id suggest to add a path on top of it. Than add a gradient fill. In the gradient, select the gradient tool and click drag top to bottom. Then in the gradient panel, select the fill and on of the color stops. Those are those small markers below the gradient. Once on is selected, you can set the opacity and you can control the amount. By dragging the stops, you control at what point it fades from white to transparent
Control opacity of a color stop in a gradient
PS
I dont want to blunt in anyway. You do know you still have Lorum Ipsum in the design. AKA fake place hodler text. Please dont use this design as a final in this state. Ive seen hilarious outcomes where stuff was printed which still had lorum ipsum
Copy link to clipboard
Copied
Well spotted, schroef, I for one had completely overlooked it:
"You do know you still have Lorum Ipsum in the design."
So I believe there is no other way than starting over, from the original (vector) version where it can be changed; and then it will be a completely different task depending on what exactly forms the background (parts).
Copy link to clipboard
Copied
Mathew,
Based on these,
"Ulitmately my goal is to have the photo somewhat faded over the blue background"
"when I spoke to Adobe Tech Support they recommended I try it in PhotoShop (which i've also never used before)."
the simplest way to get rid of everything but the blue part of the image is probably in PS (Photoshop), the bright cyan rectangle probably causing most grief and best dealt with separately at the start by erasing the bits on the pale bands using one of the Marquee Tools, then using the Magic Wand for the pale stripes, and one or more of of the Marquee Tools to get rid of the rest, deleting everything but the blue area and saving as PNG with transparency; this requires a modest amount of instruction.
But since you are (asking) here, you can obtain the cleanest way by plunging into some of the unknown tools of AI, requiring some more serious instruction.
Find more inspiration, events, and resources on the new Adobe Community
Explore Now