Emily,
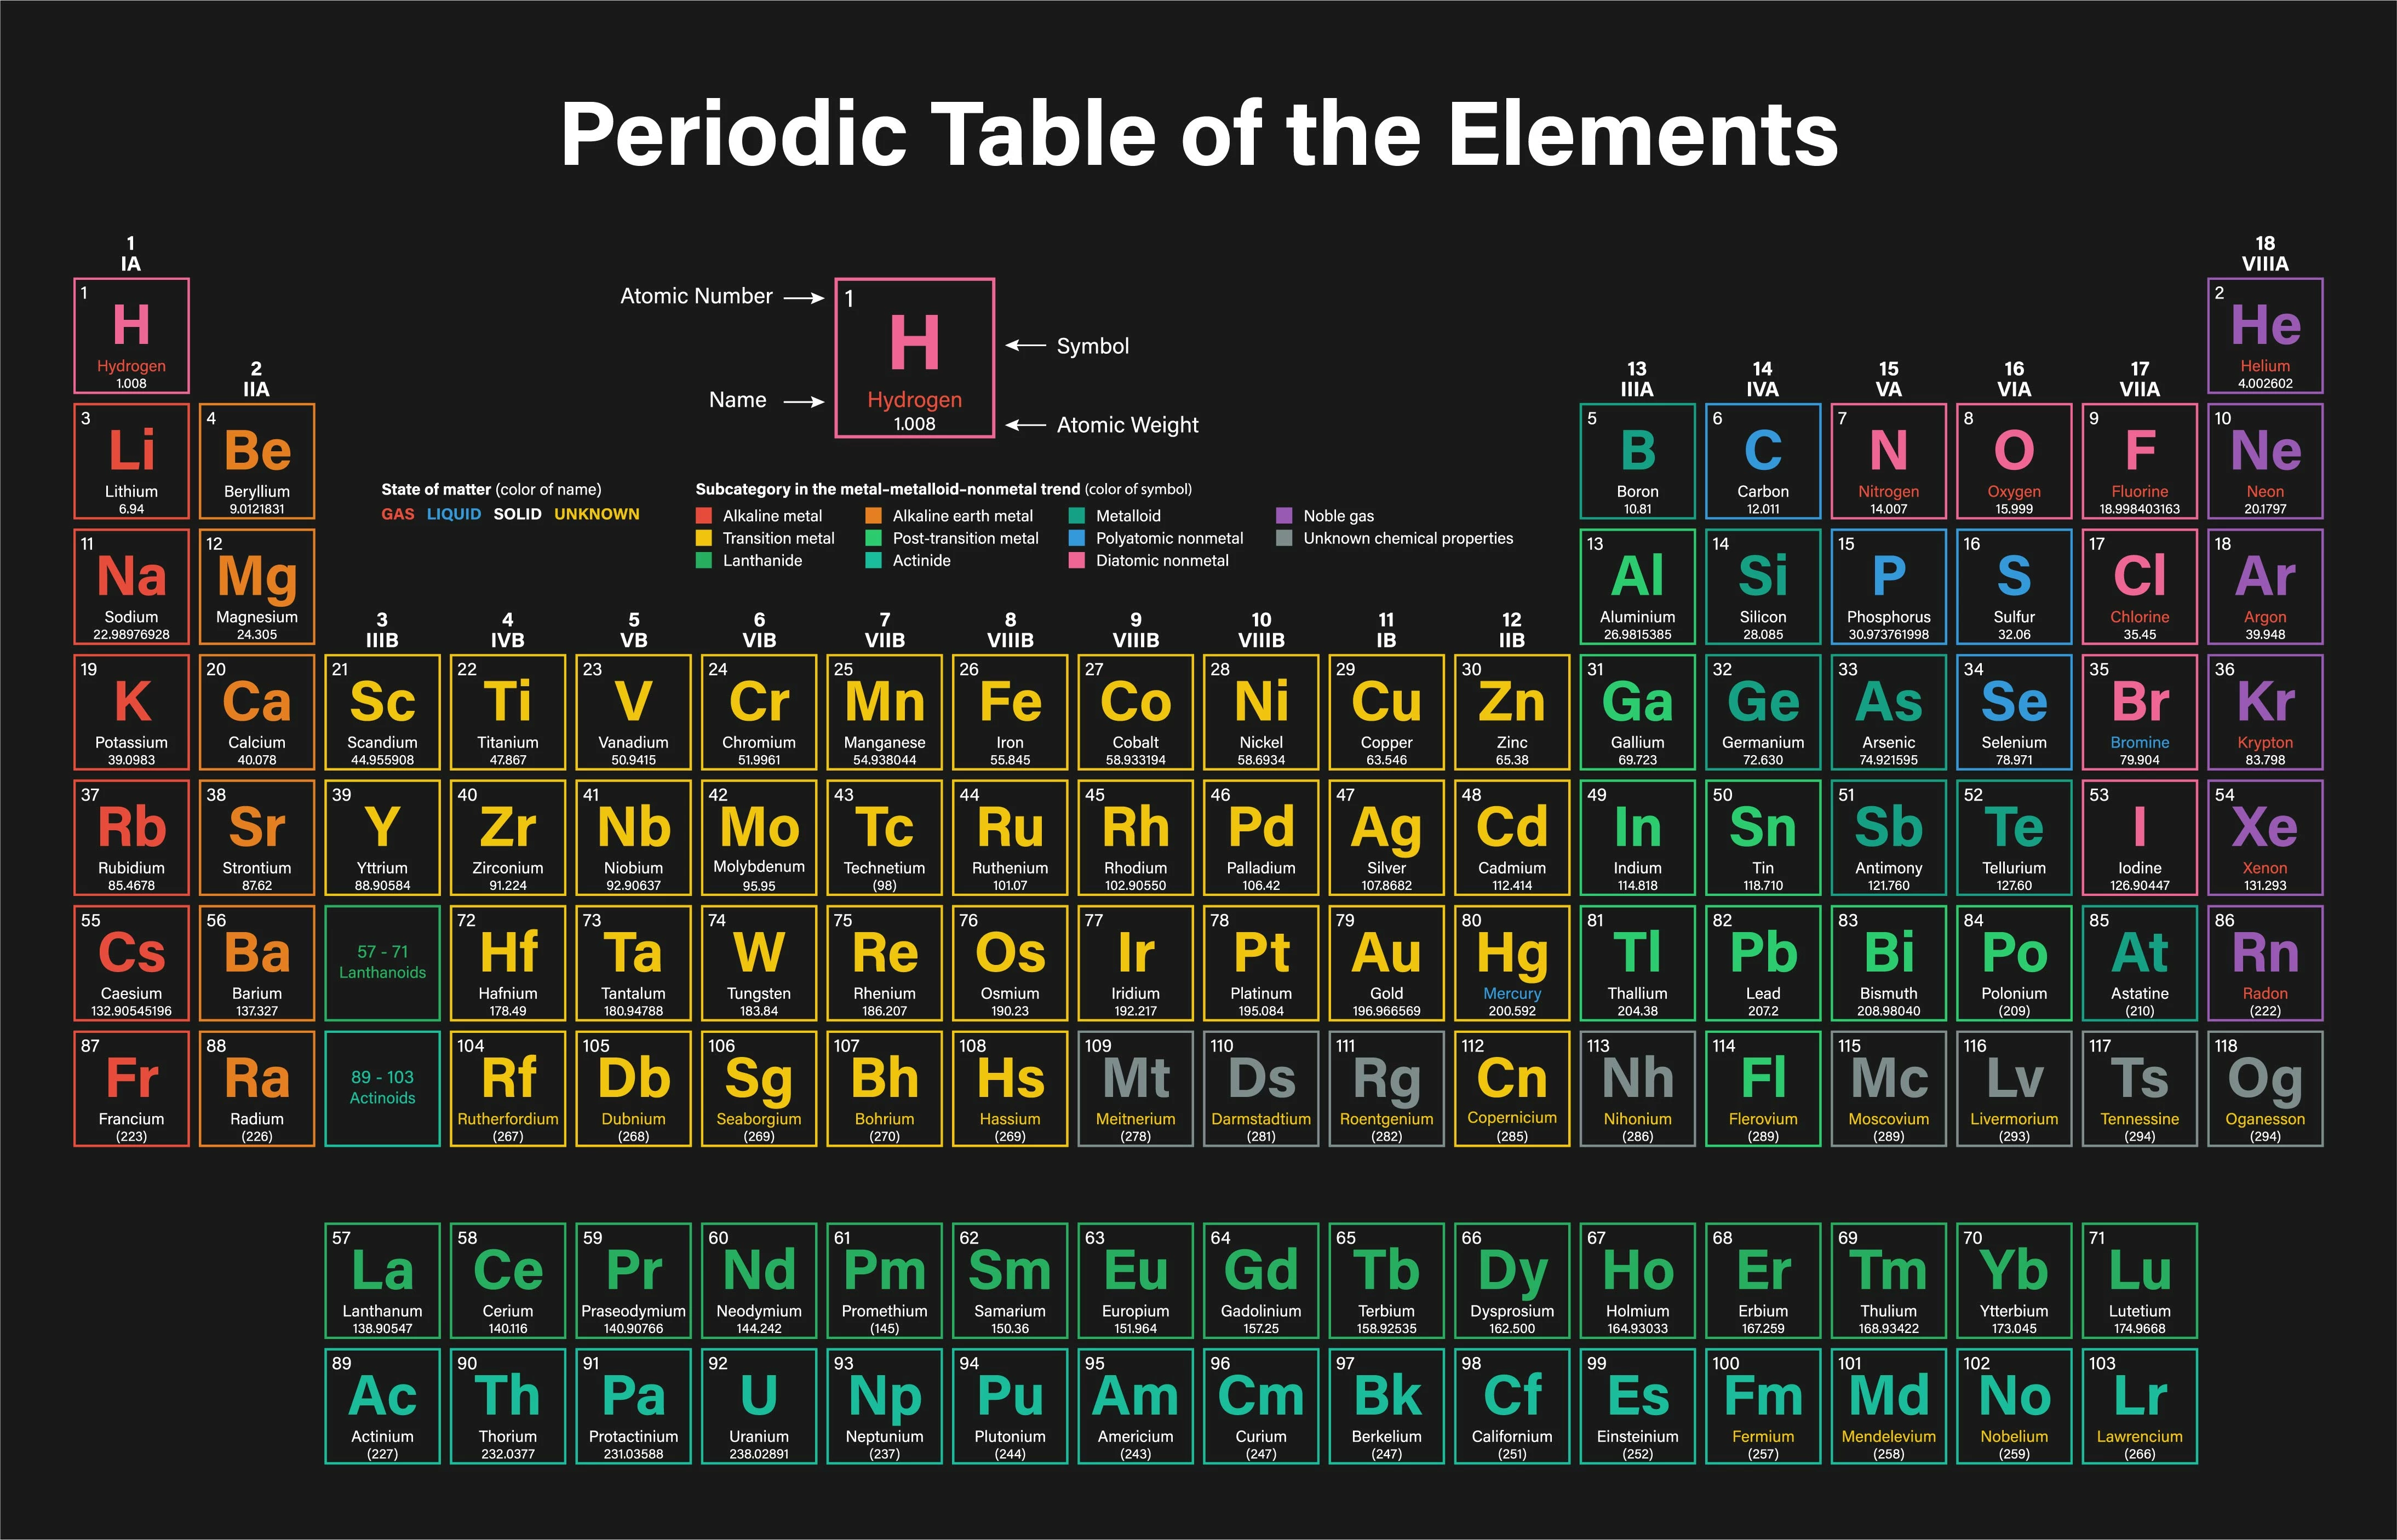
If the coloured boxes are made as stroked squares, adding the fill is the easy part, which can be done using the Appearance palette.
If the boxes are beneath the text/number parts in the stacking order, as seen in the expanded Layers palette (in one Layer or in different Layers), it is still easy.
If the boxes are above the text/number parts, they must be moved down beneath them.
Presuming stroked squares, for the colouring itself, you can, for each colour:
C1) With the Direct Selection Tool click one of the stroked squares, then in the Select dropdown choose Same>Stroke Color to select all the identical ones;
C2) In the Appearance palette choose Add New Fill and drag it down beneath the Stroke, then with only the Fill selected give it the desired fill colour.
I believe it is crucial to choose a suitable fill colour with sufficient contrast to the text/number parts, both the white ones and the elements colour (which is identical to the stroke colour).
If the boxes are in a separate Layer or in different separate Layers, you can move the Layer(s) down beneath the Layer(s) with the text/number parts.
If everything is on one layer, you can add a step C3) for each colour with all the identical boxes still selected:
C3) Ctrl/Cmd+X+B (hold Ctrl/Cmd and press X then B) to move the set of boxes to the bottom of the Layer; it is convenient to Group them if not already.
If the objects are placed on Layers in a different way, some more adaptations may be needed.