- Home
- Illustrator
- Discussions
- Re: Speedometer recreation of the dashed lines
- Re: Speedometer recreation of the dashed lines
Copy link to clipboard
Copied
Hello; I'm fairly new to Illustrator and I'm trying to fiure out the best (balance of accuracy and time) method of recreating a vintage speedometer. This is the dial that I need to recreate and I need this to be in vector form which is why I've chosen Illustrator for the project. Is there anyone that could give me some pointers on how to best go about doing this. I did play around with the dashes/width point vs gap and that seem to work okay, but there must be a better more accurate way of accomplishing this. Here is the vintage dial that I'm trying to recreate. Also, the 3 semi-circles are not really the problem, it's the hash marks that I'm needing help with.
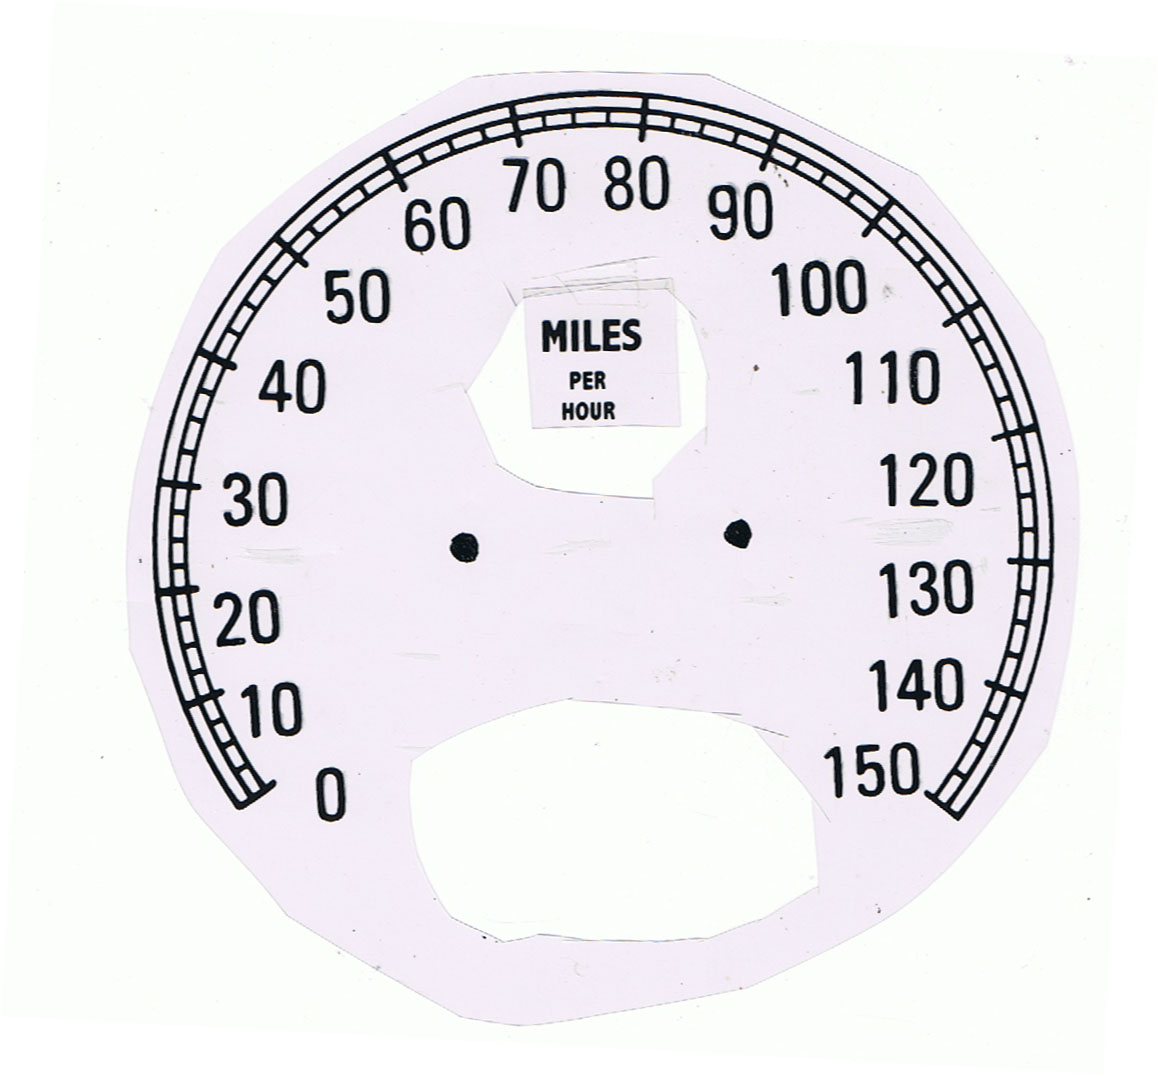
Thanks for any help that can be given, it is very much appreciated.
 1 Correct answer
Congratulations, Jber, and good luck with the font.
You may have a look at the following sites for (something like) it, or create the lettershapes.
Explore related tutorials & articles
Copy link to clipboard
Copied
Thank you!!!! got the brushes and yes, that's exactly what I need. SWEET!
Copy link to clipboard
Copied
ok, I'm stumped. I made the brush, made the circle, rotated and deleted unneeded segments. I apply the brush and this is what happens. I've check settings and tried several things, but I can't seem to figure out why I have this....
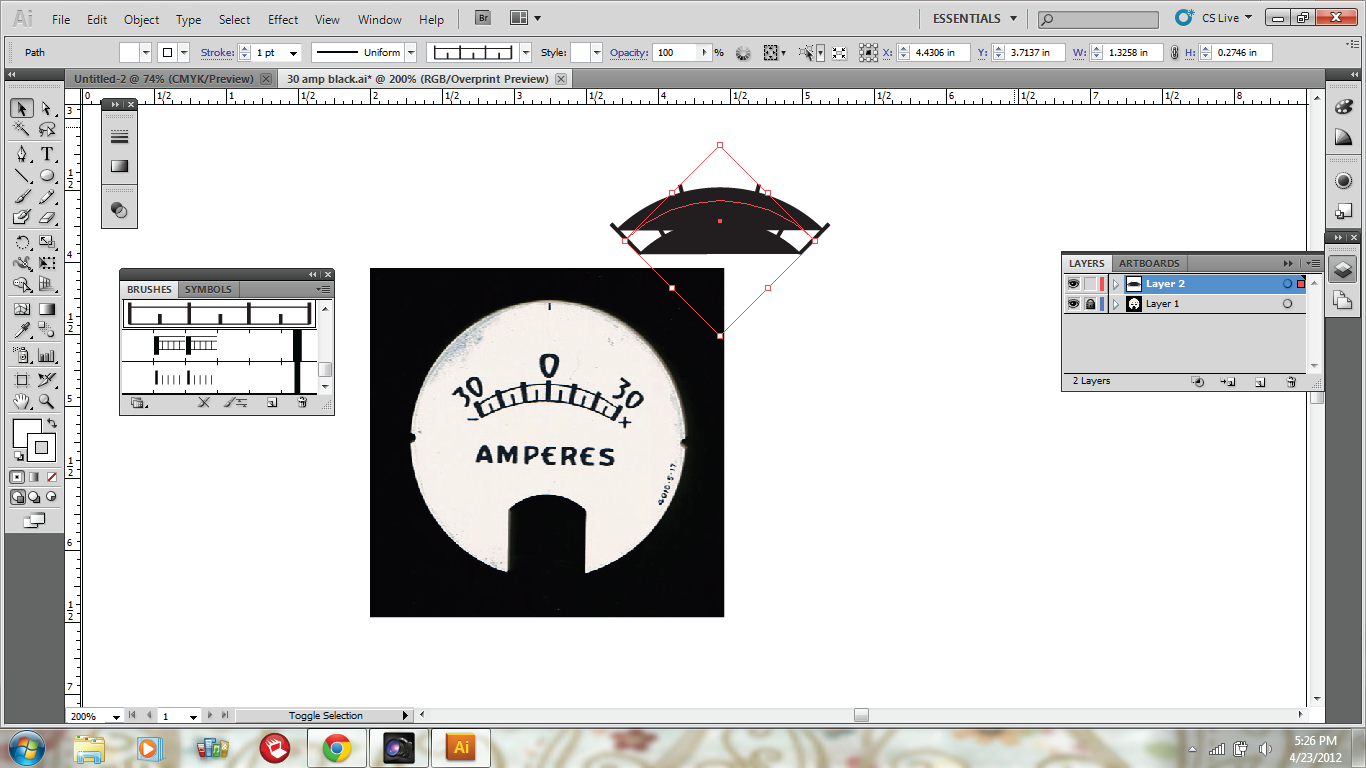
I get those filled in half circles, one on top the other. I'm sure that I'm doing something stupidly simple but I sure can't figure out what.
Copy link to clipboard
Copied
Looks like you may have some unwanted fills on the path before applyign the brush. Just try removing any fill color.
Copy link to clipboard
Copied
ok. I think I tried that and didn't get anywhere. I'm done for the night, my eyes are blurry lol. Thanks for the help!
Copy link to clipboard
Copied
Expand layerr two in the Layers Panel and also bring the Appearance panel into view.
Copy link to clipboard
Copied
ok Wade, thank you very much I'll give this a try tomorrow - it's been a loooong day lol
Copy link to clipboard
Copied
Thanks for clarifying the matter i was going buggy for a while.
Copy link to clipboard
Copied
Wade,
i was going buggy for a while
Then imagine being it all the time.
Copy link to clipboard
Copied
Jacob Bugge wrote:
Wade,
i was going buggy for a while
Then imagine being it all the time.
Defies my imagination, Jacob.
Copy link to clipboard
Copied
Hello Jacob;
I went back to Grant's post where he talked about how to get the angle of rotation equation, but that didn't this time. (original post at http://forums.adobe.com/message/4428776#4428776 So looking at this post and not the original post, If I needed the same type of dial but with different number of ticks what would the rotation be? Going by Grant's formula it should be this:
for large ticks 360-gap of 90=270/9(9 large ticks needed) with 8 copies
then, using the same formula for the small ticks:
360-90=270/33(total of 33 ticks are needed) with 32 copies
but apparently I don't know the formula after all because I got this after spending hours trying to figure out the angle of rotation.
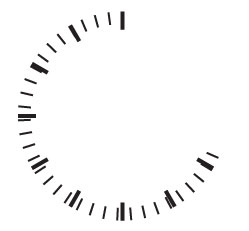
as you can see the small ticks are not lining up with the large ticks. Can you please tell me what the angle of rotation formula is? I am presuming it would be the same for both large ticks and small ticks, but I don't know, perhaps not?
Thanks again.
Copy link to clipboard
Copied
Jber,
You should divide by the numbers of copies = intervals, not the total numbers of tick marks (the first one being where you start so the rotation only starts with the second one (was that intelligible or unintelligible?)), so it should be 270/8 and 270/32.
Apart from getting the different tick marks aligned, that should also bring you the full 3/4 of the way round (270/360).
Copy link to clipboard
Copied
Perfect! that's the equation alright.
Copy link to clipboard
Copied
Jber,
It is important to get the number right. With blends it is even worse, because you have to remember to subtract 2 from the total number to get the number of steps.
For the coloured partial circle, also see the shaded arch thread.
Copy link to clipboard
Copied
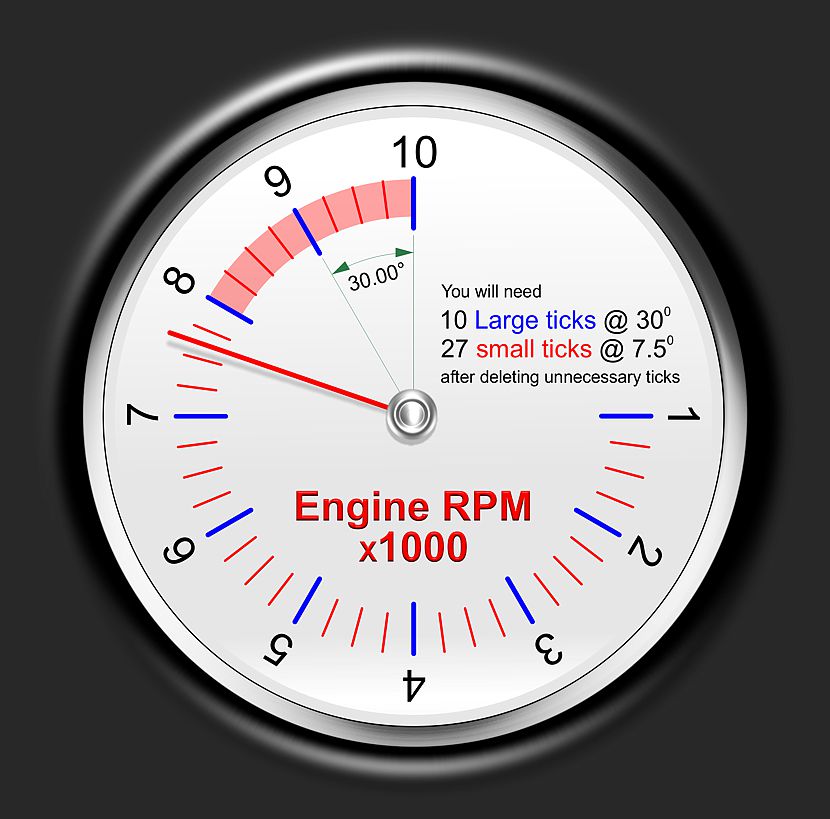
Or another way of looking at it....
Copy link to clipboard
Copied
Mike;
lol showoff! hahaha and yes, that's pretty much what I need except I needed 9 large ticks and how on earth did you manage to color only a section of this? Thanks much for the illustration, if only I could do that so quickly.
Copy link to clipboard
Copied
And doubtlessly, after a few more pints, conclude that the new nonsense is bloody cheating. Rightly so, of course.
Copy link to clipboard
Copied
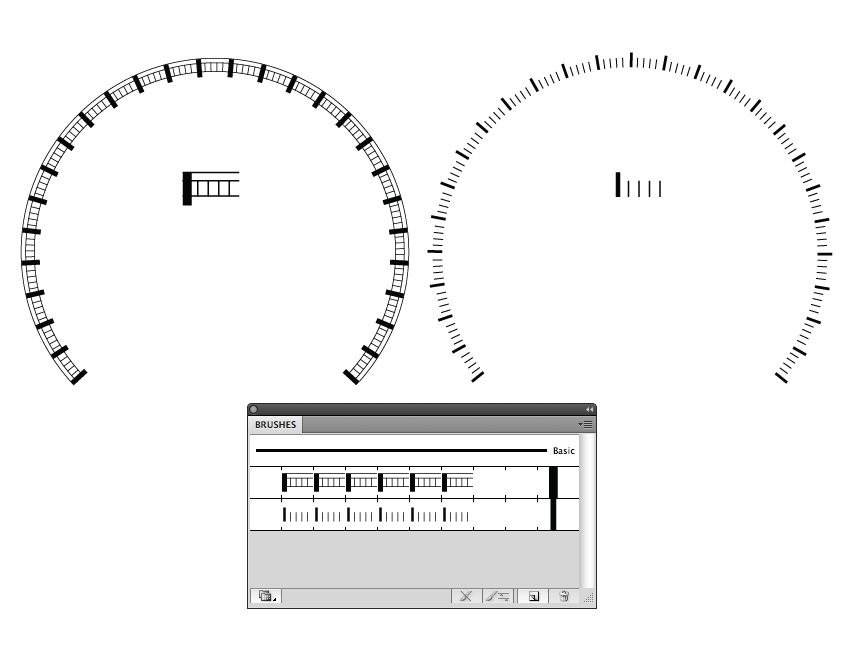
A couple basic pattern brushes seem to fit the bill here.
Copy link to clipboard
Copied
yes, those brushes would work wonderfully. I was able to follow the tut along very nicely (once I grouped them lol), but I'm not able to delete the outter circles and with no stroke/no fill I wasn't able to see the circles in order to create the hash/tick mark. Now, when I try to delete the circles everything gets cleared, same thing happens when I attempt to ungroup the hash marks from the circles. Can you tell me where I went wrong? I'm soooo close now - I'm loving this, the "old" way was horrible compared to this, it took hours to do. It's so nice to be forced out of 1962 lol
Copy link to clipboard
Copied
Jber,
As I said, I apologize for sloppy posting.
The missing step (or link):
8) Select all, Object>Expand Appearance, Direct Select the circles by dragging over them at the bottom, then delete them (press delete twice).
But Smart Guides may guide you to place the first tick mark even with strokeless circles, and/or you may place both using the X and Y in the Transform palette/panel. I only stroked them to make them visible in the image.
Copy link to clipboard
Copied
I was able to delete the inner circle using the Step 8 above, but I don't seem to be able to delete the outter circle. Is this due to being numerous outter circles? I keep selecting and deleting, but the outter circle still remains. Thanks.
Copy link to clipboard
Copied
Agree with Scott that is very covenient way to do it but once you get the transform set up and get it wworking then all you have to is copy the object and then change the settings and there you are it would be greaat if a transformation could be a brush.
Perhaps it can be done?
Copy link to clipboard
Copied
I apologize for sloppy posting, Jber.
Copy link to clipboard
Copied
No apology necessary, you've been wonderful!!!!
Copy link to clipboard
Copied
Thank you for the kind words, Jber.
It is three quarters after midnight here, high time to attend to other duties, before the sun rises.
-
- 1
- 2

