Copy link to clipboard
Copied
Hi all
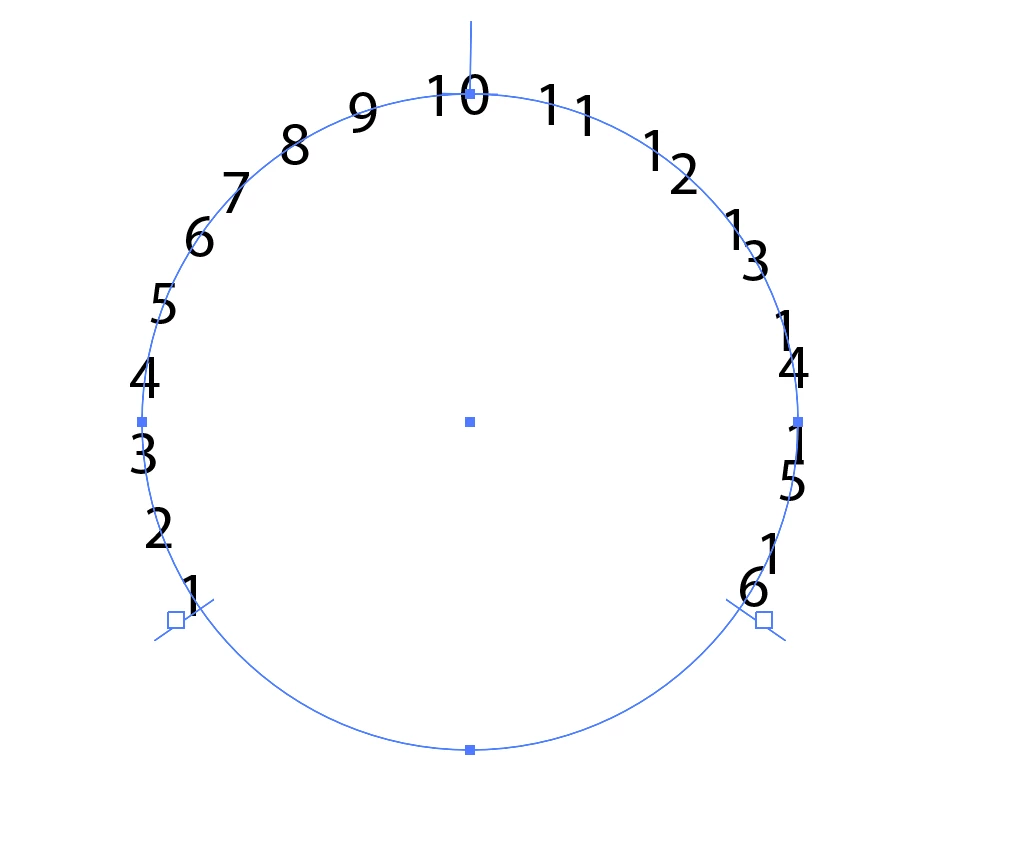
I'm trying to put text in a circle for some artwork to go on a control panel for a volume control.
All is ok until I get to double digit numbers (10,11,12 etc...) where it doesn't recognise them as a pair of digits. Apart from doing the double digit numbers as a '1' and then adding a second digit manually, is there any workaround anyone knows of?
Hopefully I'm making sense......
thanks
G
Copy link to clipboard
Copied
I would just split the circle itself and insert more anchor points, then use conventional snapping to those points with separate text objects. I'm sure there's soem super fancy way of doing it with pattern brushes or symbols, but sometimes the dumb quick & dirty way is more efficient.
Mylenium
Copy link to clipboard
Copied
Do you want to create this once or do you need it as a template with variable circle diameters, distances and number of text fields?
Copy link to clipboard
Copied
Hi, sorry for the late reply, my stuff is not behaving....
I guess a template that I can edit?
Copy link to clipboard
Copied
Granger,
To create it once, you can use a 1 step fake Blend, as shown below; and you can also apply tick marks, all similar to this,
Click/RightClick to get closer, and Click again to get closer still
Copy link to clipboard
Copied
This looks exactly how I want it but I don't understand a "fake blend" or how to make one?
Copy link to clipboard
Copied
Granger,
In this case,
1) Create a set of single live Type numbers along a horizontal path, then Outline them and Ungroup to form individual Compound Paths, then select each pair of Compound Paths forming two digit letters and Ctrl/Cmd+8 turn turn them into one Compound Path;
2) Align>Distribute Objects to get the same centre to centre distance throughout the set, this is the first part of the image;
3) Object>Blend>Blend Options>Set the number of steps to 1, then Object>Blend>Make, this is the second part of the image, the steps looking funny (both funny peculiar and funny haha):
4) Create/Select the circle part, then Object>Path>Add Anchor Points a sufficient number of times (at least thrice in this case), this is to shorten the segments and ensure an even Blend, you can see it in 5) if you have too few, this is the third part of the image;
5) Select both Blend from 3) and the circle part from 4) and Object>Blend>Replace Spine, this is the fourth part of the image, still looking funny;
6) Object>Blend>Release to get rid of the funny steps, this is the fifth part of the image.